
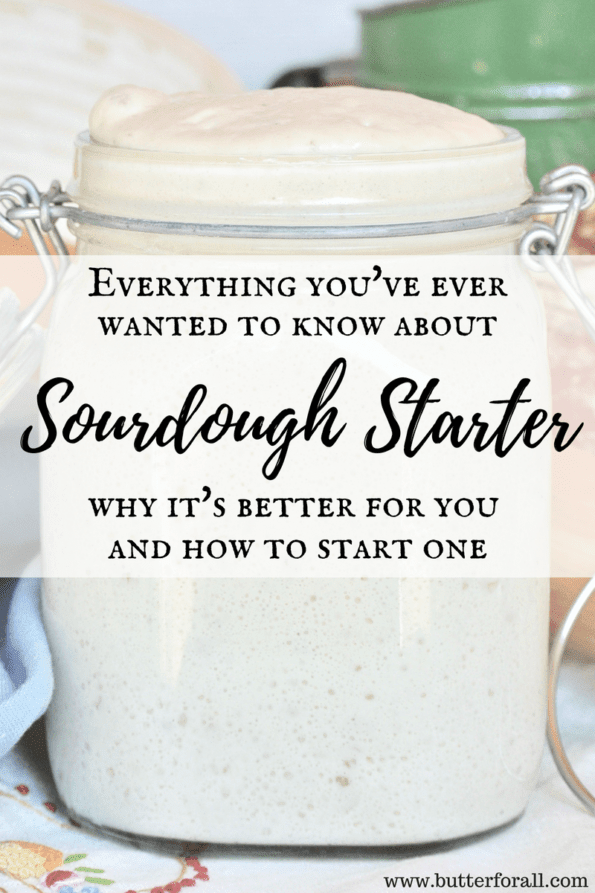
Don’t Fear the Sourdough Starter
Sourdough can feel like a daunting challenge, but I’m here to show you how simple and rewarding it is to create your own sourdough starter. Up until a couple hundred years ago, nearly all leavened bread was made with wild yeast and bacteria—the heart of sourdough. I bake with my starter at least weekly, and it’s become a cherished part of my family and my journey as a chef. My mission? To transform every leavened wheat recipe into a sourdough masterpiece. With over 70 sourdough recipes on Butter For All, from crusty boules to tender pancakes, this guide will help you become a confident, healthy sourdough baker.

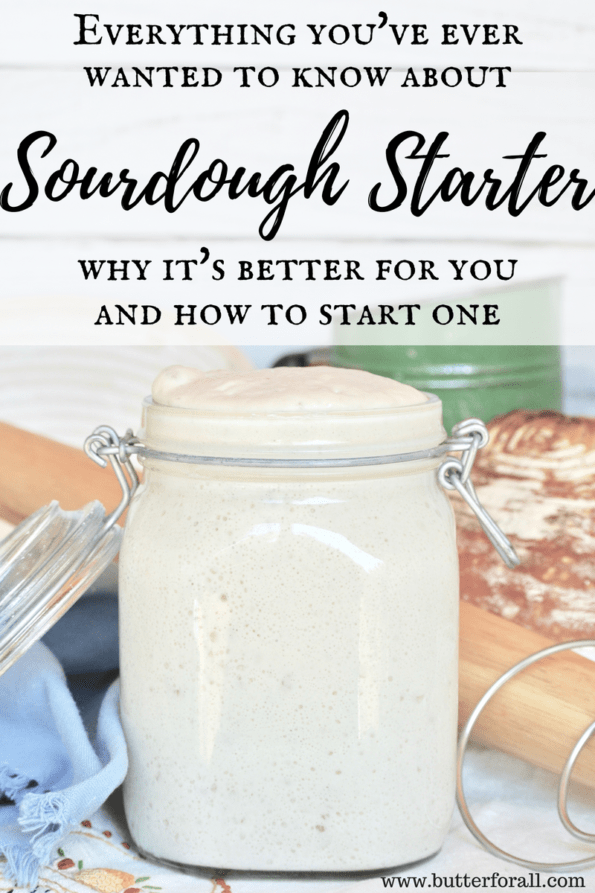
What Exactly Is a Sourdough Starter?
Let’s Start at the Beginning
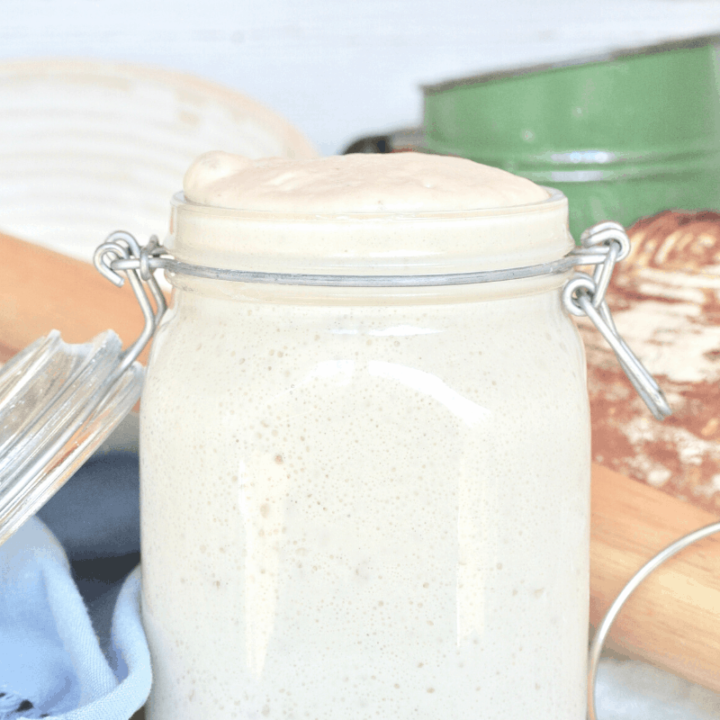
A sourdough starter is a vibrant mix of flour, water, wild yeast, and beneficial bacteria living in symbiotic harmony. The wild yeast acts as a natural leavening agent, producing carbon dioxide gas to make dough rise. It feeds on the sugars in flour, predigesting them for energy and multiplying in the process. This gas gets trapped in the gluten network formed when flour meets water, creating those airy pockets in your bread.
The bacteria, meanwhile, produce lactic acid (and sometimes acetic acid), giving sourdough its classic tangy flavor. These acids also neutralize phytic acid, a compound in grains that can block nutrient absorption. The result is bread that’s easier to digest and packed with more accessible nutrients.
How Lactic Acid Breaks Down Gluten
Gluten, the protein in wheat, forms elastic strands when mixed with water, giving bread its structure to trap fermentation gases. During the long sourdough fermentation, lactic acid predigests this gluten, breaking it into simpler proteins and enzymes that are gentler on your digestive system while still supporting the bread’s shape.
For the best results when starting a starter, use organic whole grain flours like whole wheat or rye. These contain more bran and husk, where wild yeasts and bacteria naturally thrive, along with minerals that fuel yeast growth.
Wild yeast is everywhere—on grains, fruits, vegetables, and even in the air—making it the cornerstone of traditional fermentation for bread and beverages like wine, beer, and mead for centuries.

Why Sourdough Is Better for You
Sourdough isn’t just delicious—it’s a nutritional game-changer compared to commercial bread made with rapid-rise yeast. The extended fermentation process reduces phytic acid, unlocking minerals like iron, zinc, and magnesium for better absorption. It also predigests gluten, making it easier for many with sensitivities to enjoy (though not safe for celiacs). The lactic acid bacteria act as probiotics, supporting gut health, and the fermentation reduces simple sugars, potentially lowering the glycemic index—ideal for blood sugar management. Longer ferments (12-72 hours) further reduce carbs as yeasts and bacteria consume them, and the absence of additives means pure, natural flavor. Traditional peoples knew this, fermenting grains for millennia, a practice largely abandoned since rapid-rise yeast emerged in the 1860s. To dive deeper into traditional diets, check out Nourishing Diets by Sally Fallon Morell.
Important Sourdough Starter Terminology
Master these terms to navigate your sourdough journey with ease:
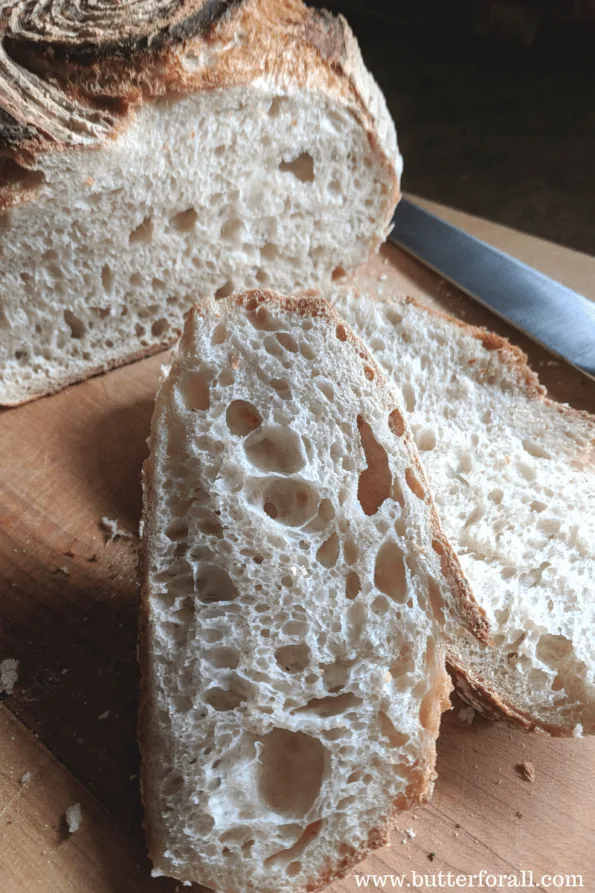
- Crumb: The interior texture—open for airy holes, tight for denser bread. Essential for assessing the quality and structure of baked goods.
- Discard: The portion removed before feeding to maintain balance. Crucial for managing starter health and using in recipes to minimize waste.
- Feeding: Adding equal weights of flour and water to refresh the starter, boosting yeast activity. Vital for maintaining an active, healthy starter.
- Fermentation: The action of yeast and bacteria, creating an acidic environment that preserves food and enhances digestibility. The core process of sourdough baking.
- Hydration: The water-to-flour ratio by weight. A 100% hydration starter uses equal weights, ideal for beginners. Key for recipe consistency and dough handling.
- Kneading: Developing gluten by folding and pressing dough until smooth. Critical for building dough structure to trap gases.
- Leavening: The rising process driven by fermentation and trapped gases. Fundamental to achieving risen bread.
- Proofing: The rising process, typically twice: after mixing (bulk fermentation) and after shaping. Essential for dough development and timing.
- Starter: A continuous mix of flour, water, wild yeast, and bacteria, fermented and used to leaven dough. The heart of all sourdough baking.
- Windowpane Test: Stretch a small dough piece thin—if it forms a translucent layer without tearing, gluten is developed. A key indicator of proper gluten development.
For a full list see The Baker’s Glossary of Sourdough Terminology and Traditional Breads
Tools for Your Sourdough Journey
Before diving in, gather these essentials for success:
- Organic Flour: Freshly milled is ideal. Favorites include:
- Organic All-Purpose: Great for feeding starters and baking pies, cakes, or tortillas.
- Organic Bread Flour: Higher protein for more gluten and loftier loaves.
- Organic Whole Wheat: Adds flavor and nutrition but denser crumb due to bran.
- Triple 200 Wheat Flours: Sifted whole wheat for a lighter texture in cakes and breads.
- Heirloom/Ancient Grains: Einkorn, spelt, or Kamut for unique flavors and lower gluten.
- Unchlorinated Water: Chlorine harms yeast. Use filtered water or let tap water sit 24-48 hours to off-gas chlorine.
- Baking Scale: Essential for precise 100% hydration measurements.
- Glass Storage Jar: Use a locking lid jar with the seal removed to allow breathing while preventing drying or contamination.
- Ceramic/Glass Mixing Bowls: Avoid metal, which can affect fermentation.
- Banneton (Proofing Basket): Supports high-hydration doughs for artisan shapes.
- Dutch Oven: Traps steam for better rise and a soft, stretchy crust.
- Dough Whisk: Perfect for mixing and stretch-and-fold techniques.
- Parchment Paper: Eco-friendly options for easy dough handling.
- Bread Lame: For precise scoring with a razor blade.
Optional tools: Grain mill, cast iron loaf pans, baking stone, stand mixer, baguette forms, measuring cups, scoops, and wooden spoons.

Copyright Butter For All
How to Start a Sourdough Starter
You can start a sourdough starter by borrowing, buying, or trapping wild yeast:
- Borrow: Get a scoop from a friend’s active starter for instant baking.
- Buy: Purchase a dried starter from trusted sources like Jovial or King Arthur.
- Trap: Capture wild yeast from organic flour, fruits, or herbs. Organic whole wheat or rye flour works best due to higher yeast content on the hull.

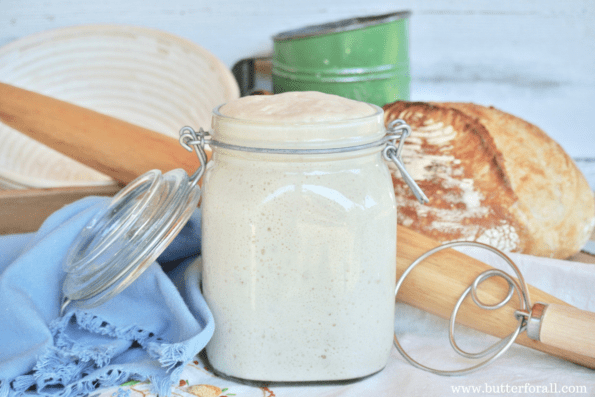
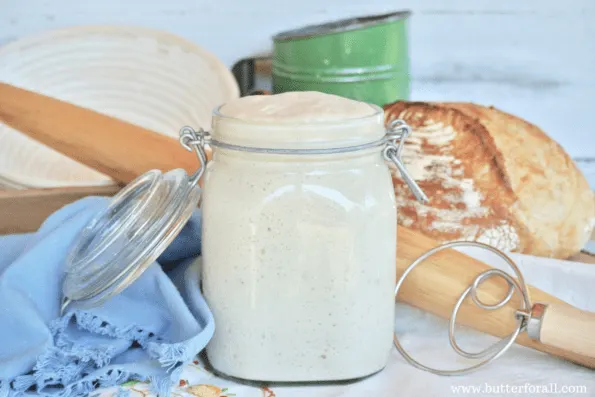
From-Scratch Sourdough Starter
This recipe creates a 100% hydration sourdough starter using organic flour and filtered water, ready for baking breads, cakes, and more.
Ingredients
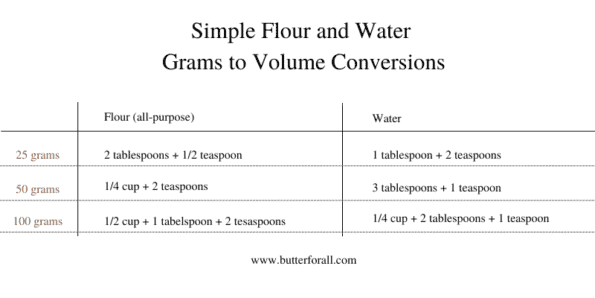
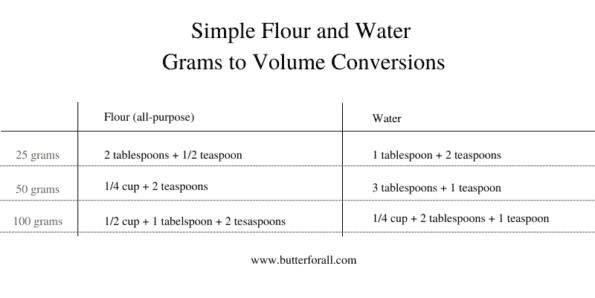
- 575 g organic flour, divided over 14 days
- 575 ml water, divided over 14 days
Instructions
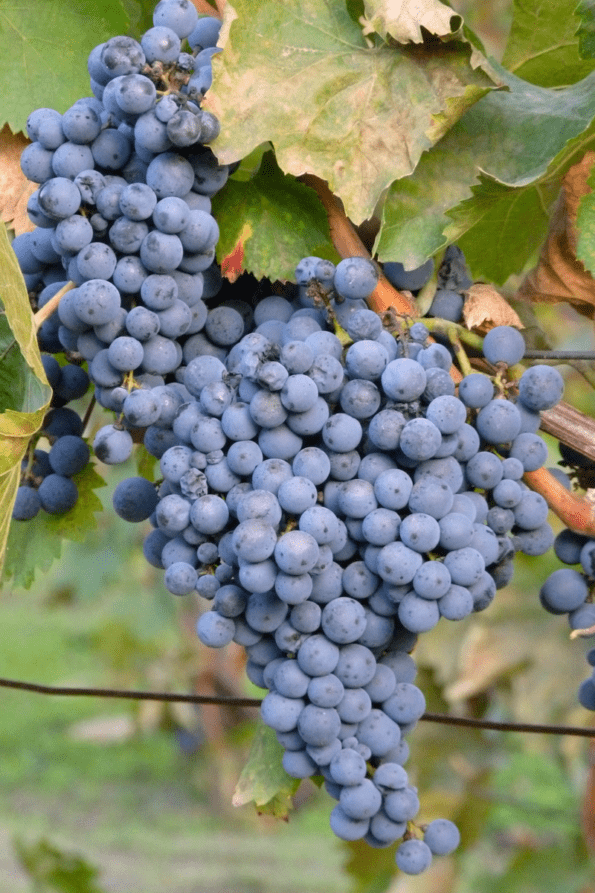
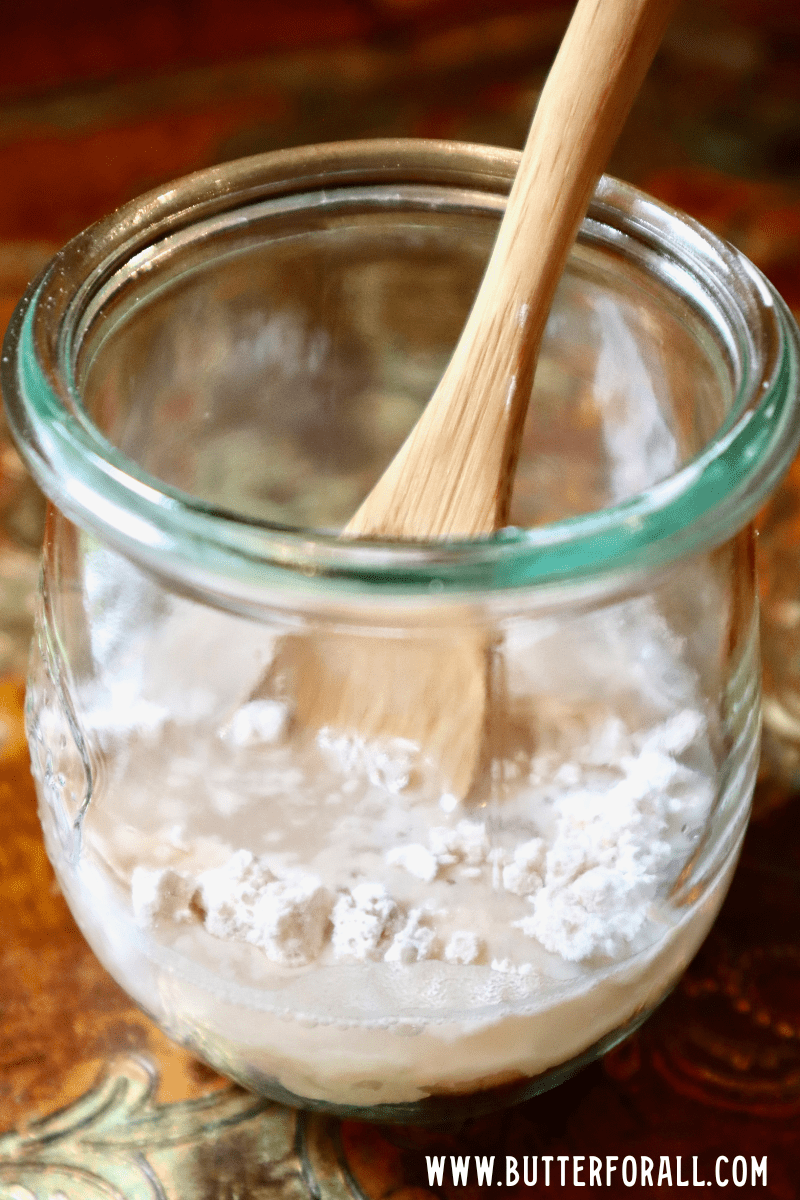
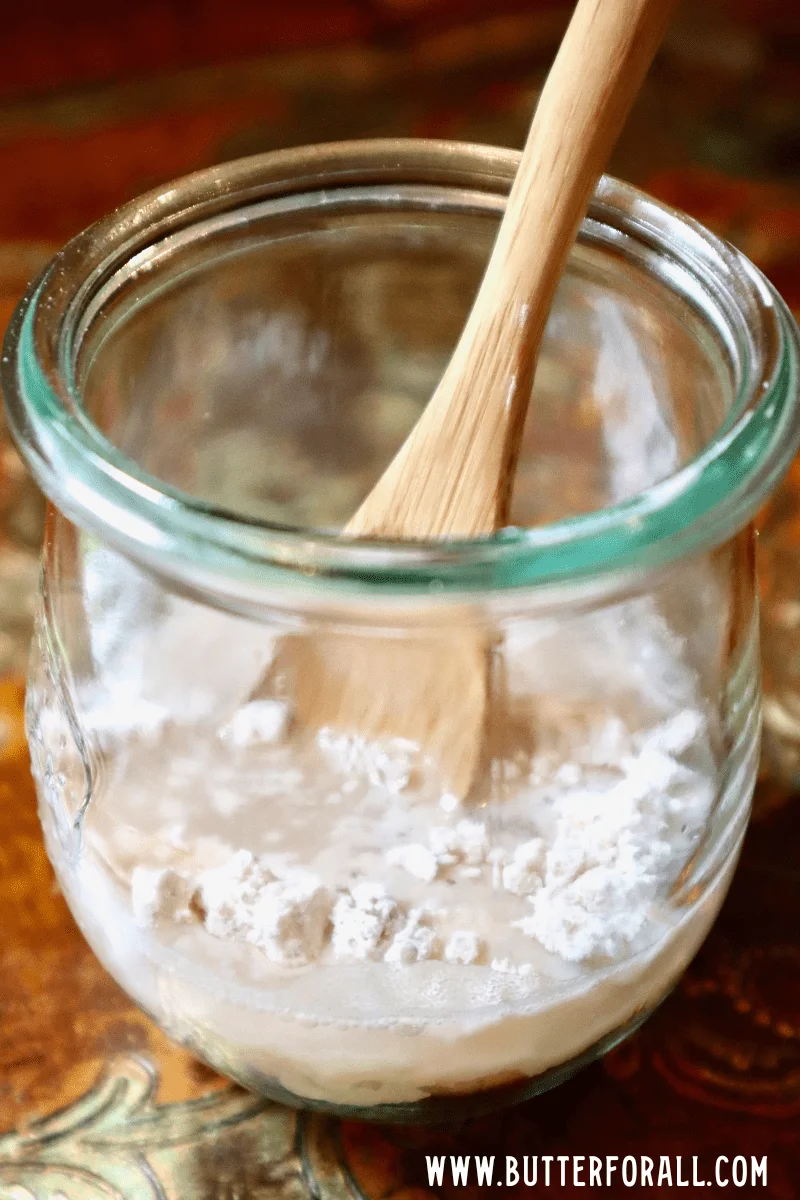
Day 1: In a clean glass jar, mix 50 grams organic flour (1/4 cup + 2 tsp) and 50 ml filtered water (3 tbsp + 1 tsp) into a paste. Cover loosely with a lid (slightly ajar, not airtight) or a coffee filter. Store in a warm, draft-free spot (70-80°F). Optionally, add a piece of organic fruit (like a grape) to boost yeast, removing it before Day 2.
Days 2-7: Once daily, discard 50 grams of starter (half). Add 25 grams flour (2 tbsp + 1/2 tsp) and 25 ml water (1 tbsp + 2 tsp). Stir well, cover loosely, and store in a warm place. By Day 7, expect bubbles, a fermented smell (sweet, sour, or alcoholic), or slight rising.
Days 8-14: Feed twice daily (morning and evening). Discard 50 grams each time, add 25 grams flour and 25 ml water. Stir and store warmly. The starter should double in volume within 4-8 hours and pass the float test (a spoonful floats in water).
Day 15 and Beyond: Once consistently doubling, the starter is ready. Store in the fridge between uses, feeding weekly with equal flour and water. Build volume as needed (e.g., 150g each for 300g total).
See How To Feed, Care for, and Maintain Your Sourdough Starter for maintenance tips.
Notes
A Note on Choosing Flour.
Using an organic flour is always recommended.
All-purpose flour can work for sourdough starter, but to ensure you get a little boost of wild yeast, include a small portion of organic whole grain flour of your choosing to your first few feedings. You could use a typical whole wheat, rye, spelt, emmer, or other ground whole grain.
The amount of whole grain flour you use is not critical. You could successfully use only whole grain flour in this recipe, or a proportion of whole grain flour to all-purpose flour.
Different flours will have different flavor profiles, fermenting characteristics, and final outcomes. Once your starter is established I recommend keeping it fed with organic all-purpose flour, and saving your more expensive whole grains for building a sourdough levain (an off-shoot starter with unique characteristics) or baked goods.
Tips:
- Use organic flour to avoid chemicals that inhibit yeast. Whole grain boosts yeast; mix with all-purpose for cost savings after establishment.
- Freshly ground farro works, but avoid buckwheat—it lacks gluten and ferments overly sour.
- For cold climates (e.g., Switzerland), use local organic flour for adapted yeasts; keep in a warm spot like an oven with the light on (80-95°F).
- Normal for early rises to slow as bacteria and yeast balance; keep feeding consistently.
- For low-gluten needs, try Kamut or einkorn flour.
- Diabetics: Longer ferments (24+ hours) reduce carbs—test blood sugar response.
- Sprouted wheat adds nutrition but may densify bread; blend with bread flour for lift.
- Save discard after Day 7 (when active) in the fridge for recipes like crackers or pancakes.
- Use a loosely covered jar (plastic screw lid or locking lid with seal removed) to prevent drying or fruit fly contamination.
Recommended Products
As an Amazon Associate and member of other affiliate programs, I earn from qualifying purchases.
-
 Jovial 100% Organic Einkorn All-Purpose Flour, 10 Pounds
 -
 King Arthur, 100% Organic Unbleached Bread Flour, Non-GMO Project Verified, No Preservatives, 2 Pounds (Pack of 12) -Packaging May Vary
 -
 King Arthur Flour, Organic All Purpose Flour, 32 oz
 -
 100% Organic All Purpose Unbleached White Baking Flour - 10 Pound
 -
 Mini Glass Jars for Dessert and Jelly - Weck Tulip Jars
 -
 Escali Primo P115C Precision Kitchen Food Scale for Baking and Cooking
 -
 Checkered Chef Stainless Steel Baking Sheet With Rack - Heavy Duty Half Sheet Pan for Baking with Oven Safe Baking/Cooling Rack
 -
 Parchment Baking Paper
 -
 Stoneware Loaf Baking Dish
 -
 9 Inch Bread Banneton Proofing Basket - Baking Bowl
 -
 Oval (13,8 x 6,1 x 2.7 Inch) Bread Banneton Proofing Basket
 -
 Camp Chef Home Seasoned Cast Iron Bread Pan
 -
 Tovolo Stainless Steel Dough Whisk, 12 Inch
 -
 Danish Dough Whisk and Bread Lame Set Double Eye
 -
 Pyrex 8-piece 100 Years Glass Mixing Bowl Set (Limited Edition)
Nutrition Information:
Serving Size: 1 gramsAmount Per Serving: Unsaturated Fat: 0g
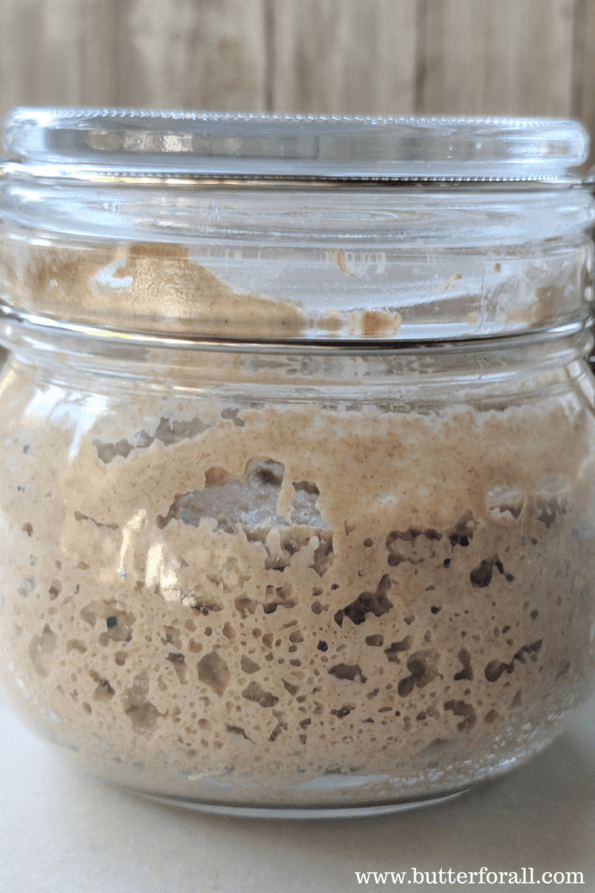
The Difference Between Active Starter and Discard
- Active Starter: At peak fermentation, doubled in volume, ideal for bread or recipes needing further fermentation. One cup (100% hydration) weighs ~165 grams.
- Discard: Fully fermented, often refrigerated, thicker, and more sour. Perfect for quick recipes like pancakes or crackers. One cup weighs ~250 grams. Use discard to avoid waste, as it’s highly digestible.


Sourdough Hydration Explained
Hydration is the water-to-flour ratio by weight. A 100% hydration starter uses equal weights (e.g., 100g flour, 100g water). Bread doughs are typically 65-85% hydration for easier handling and open crumb. To convert a starter to 100% hydration, mix 100g flour, 100g water, and 20g of your existing starter, then maintain with equal feedings.
Troubleshooting Your Sourdough Starter
Starters are forgiving, but issues happen. Here’s an expanded guide based on real experiences:
No Bubbles or Rise
- Cause: Inactive yeast, often due to flour quality or chlorine in water.
- Fix: Use organic whole grain flour (rye or whole wheat) and filtered water. Inoculate with organic fruit/herbs for 24 hours, then remove and continue feeding. Try a warm spot (80-95°F, like an oven with the light on). Expect 7-14 days for activity.
Early Rise, Then Slows
- Cause: Normal as bacteria dominate initially, then yeast catches up.
- Fix: Continue daily feeds. If sluggish, feed every 12 hours for 3 days to boost yeast. Keep at 70-80°F.
Too Sour or Vinegary Smell
- Cause: Bacterial dominance from infrequent feeding.
- Fix: Feed every 12 hours for several days until doubling in 4-6 hours. Shorten recipe fermentation times for milder flavor.
Hooch (Gray/Brown Liquid)
- Cause: Underfed starter producing alcohol.
- Fix: Stir in or pour off if strong-smelling, then feed promptly with equal flour and water.
Mold or Off Odors
- Cause: Contamination from flour, water, or air.
- Fix: Discard if pink/orange mold appears; sanitize jar and start fresh. For cheesy/putrid smells, refresh with smaller feeds using organic flour.
Starter Won’t Raise Bread
- Cause: Immature or weak starter.
- Fix: Ensure it doubles in 4-8 hours. Feed every 12 hours for 3 days, discarding half each time. Use bread flour for better gluten; whole wheat densifies loaves. Store in a warm spot.
Sticky Dough
- Cause: Immature starter or high hydration.
- Fix: Confirm 100% hydration. Feed 4-8 hours before baking until doubling. For overworked dough, rest 1 hour, shape gently, and proof again. Try lower-hydration recipes like Sourdough Pizza Dough.
Switching Flours or Ratios
- Cause: Different flours affect fermentation and rise.
- Fix: Transition to all-purpose after establishment. Use 2:1:1 (starter:flour:water) for new starters, 1:2:2 for reviving dehydrated ones. Maintain 100% hydration by weight.
Storage and Revival
- Cause: Improper storage or forgotten starters.
- Fix: Use a loosely covered jar to avoid pressure buildup. Revive refrigerated or forgotten starters with daily feeds at room temp. Defrost frozen starters and feed to reactivate.
Other Tips
- Jar Size: Start with a pint jar, upgrade to quart for larger volumes (300-500g).
- Minimum Starter: Keep 50-500g based on baking frequency.
- Gluten Sensitivity: Long ferments help, but test personally. Kamut, einkorn or long proofs (24-72 hours) reduce gluten.
- Cold Climates: Local organic flours adapt better; use warm spots for consistent fermentation.
Watch my stretch-and-fold technique in this video for dough handling tips.
Adjusting Sourdough Recipes
Sourdough is versatile, but substitutions require care:
- Flour Variability: Heirloom grains (einkorn, spelt) may need adjusted hydration. Start with 75% of the recipe’s liquid and add as needed.
- Whole Grains: Expect denser loaves due to bran disrupting gluten. Use up to 50% whole wheat for balance.
- Texture and Hydration: Proper dough is tacky, not sticky. Adjust water for whole grains, which absorb more during fermentation.
- Use Intuition: Observe starter behavior, rise times, and baking results to adapt to your environment.
- Embrace Trial and Error: Not every loaf will be perfect—learn from each bake to refine your style.

Sourdough Insurance Policy
Protect your starter from accidents:
- Dehydrate: Spread 1 cup active starter thinly on parchment, dry in a warm oven (light on) or dehydrator until moisture-free. Store in an airtight container.
- Revive: Mix 20g flour, 25g water, and 5g dehydrated starter. Let rehydrate 8-12 hours, then feed daily until active.
Using Leftover Sourdough Bread
Save stale bread in the freezer for crumbs:
- Bread Crumbs: Defrost frozen bread, tear into chunks, and pulse in a food processor for uniform crumbs. Use for stuffing or as panko-style coating.
Final Thoughts
Sourdough baking is a journey back to traditional, nourishing food ways. With your starter, you’re part of a centuries-old craft that’s better for your body and soul. Explore my Sourdough Recipes Archives for inspiration, and don’t hesitate to email me at courtney@butterforall.com for personalized help via virtual consultations.
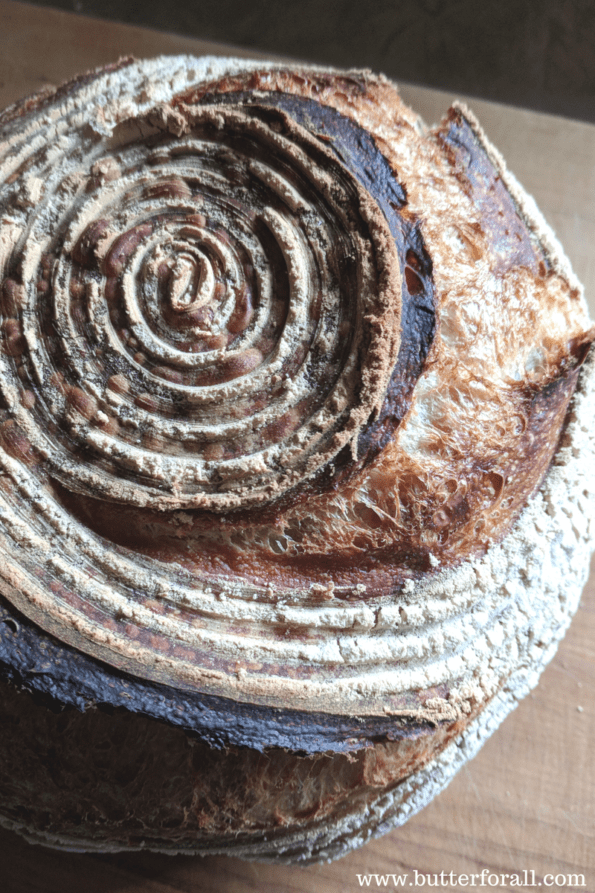
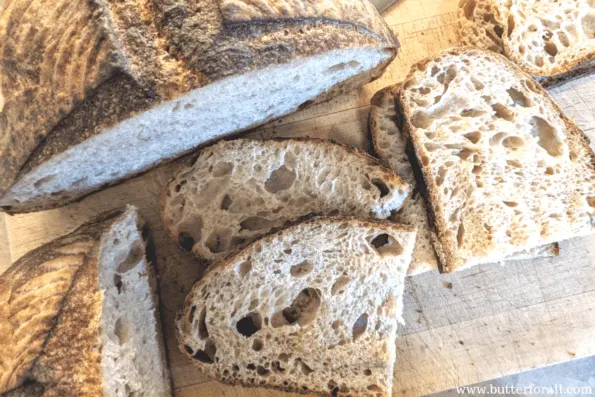
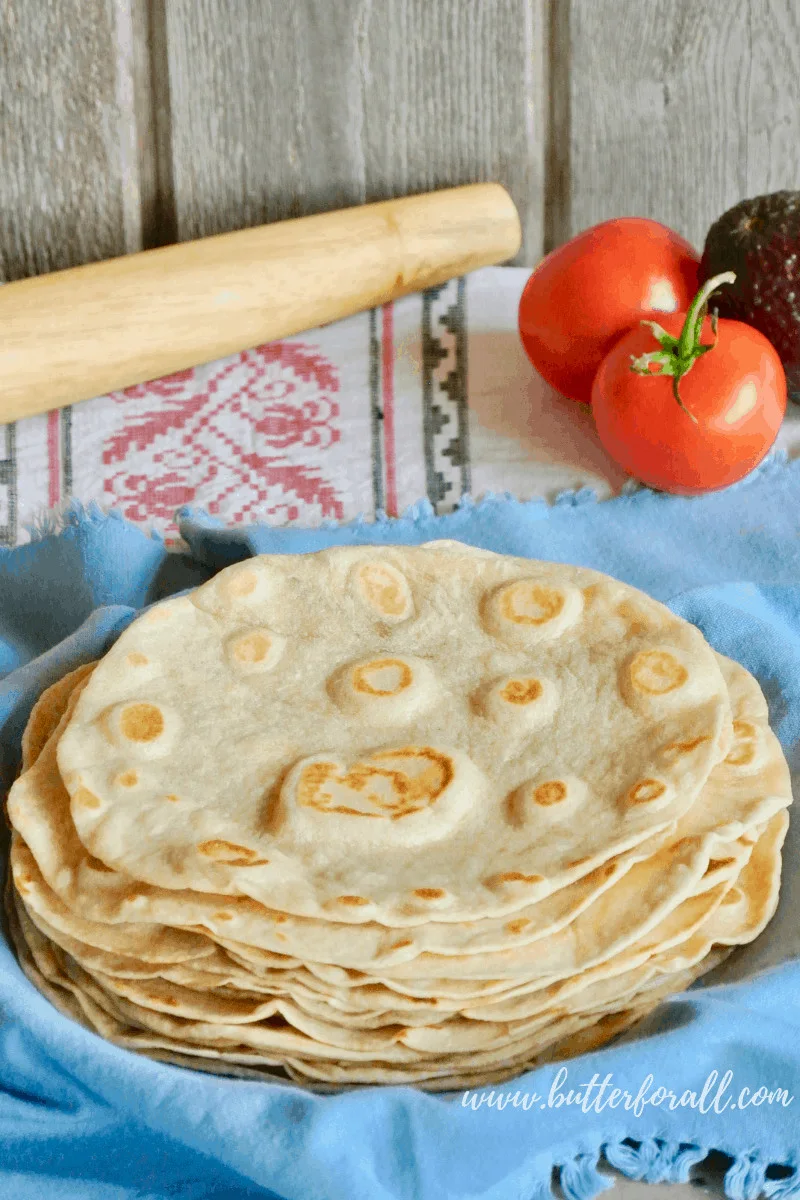
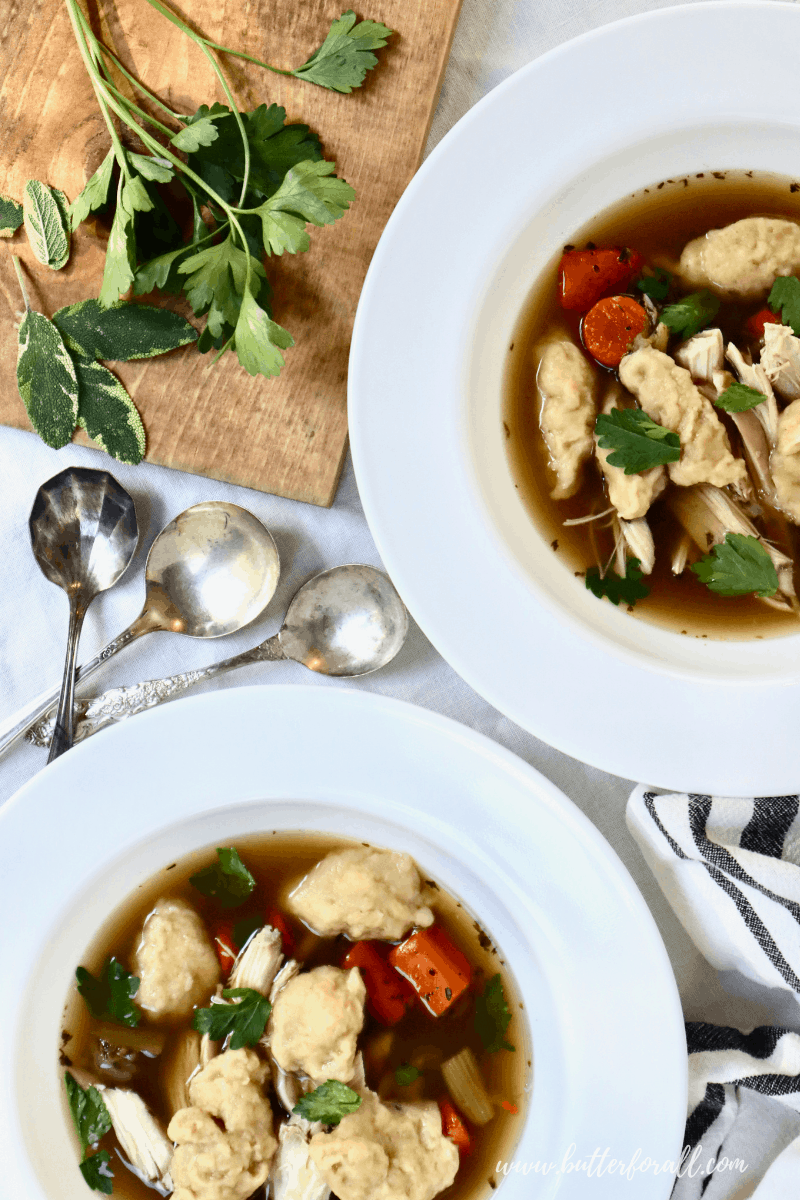
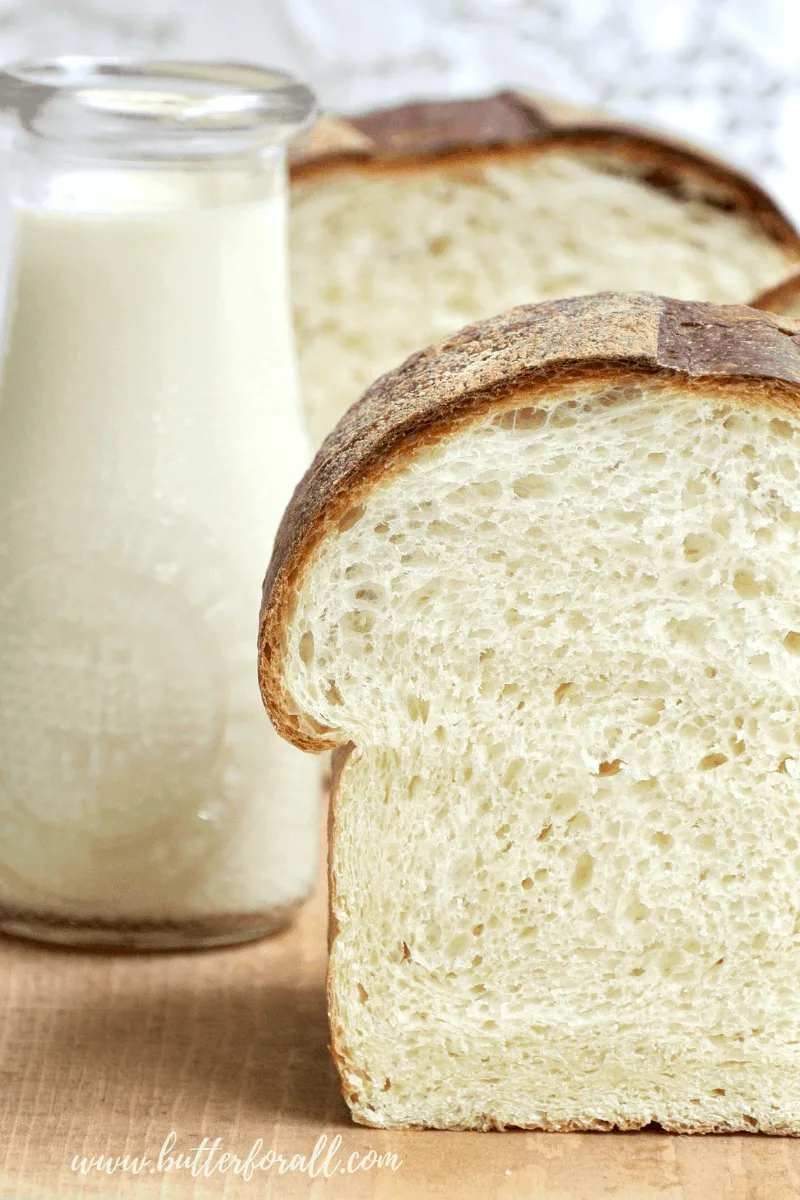
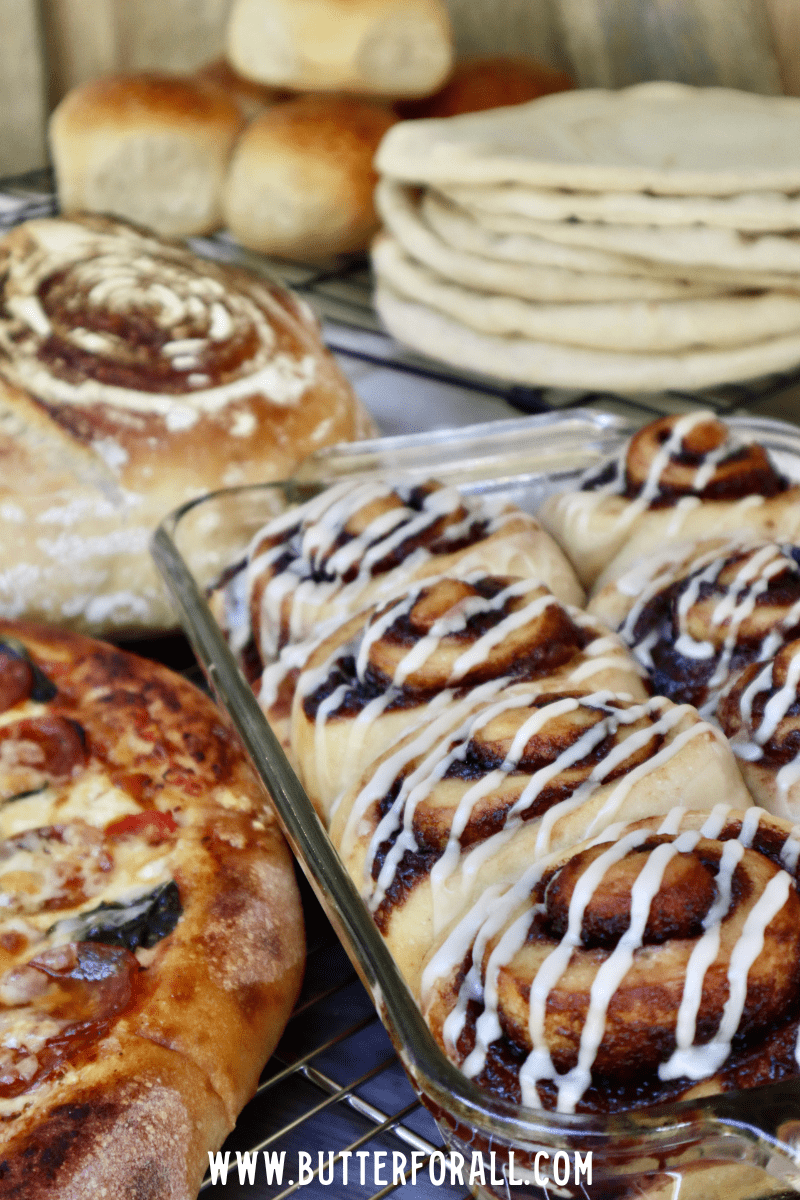
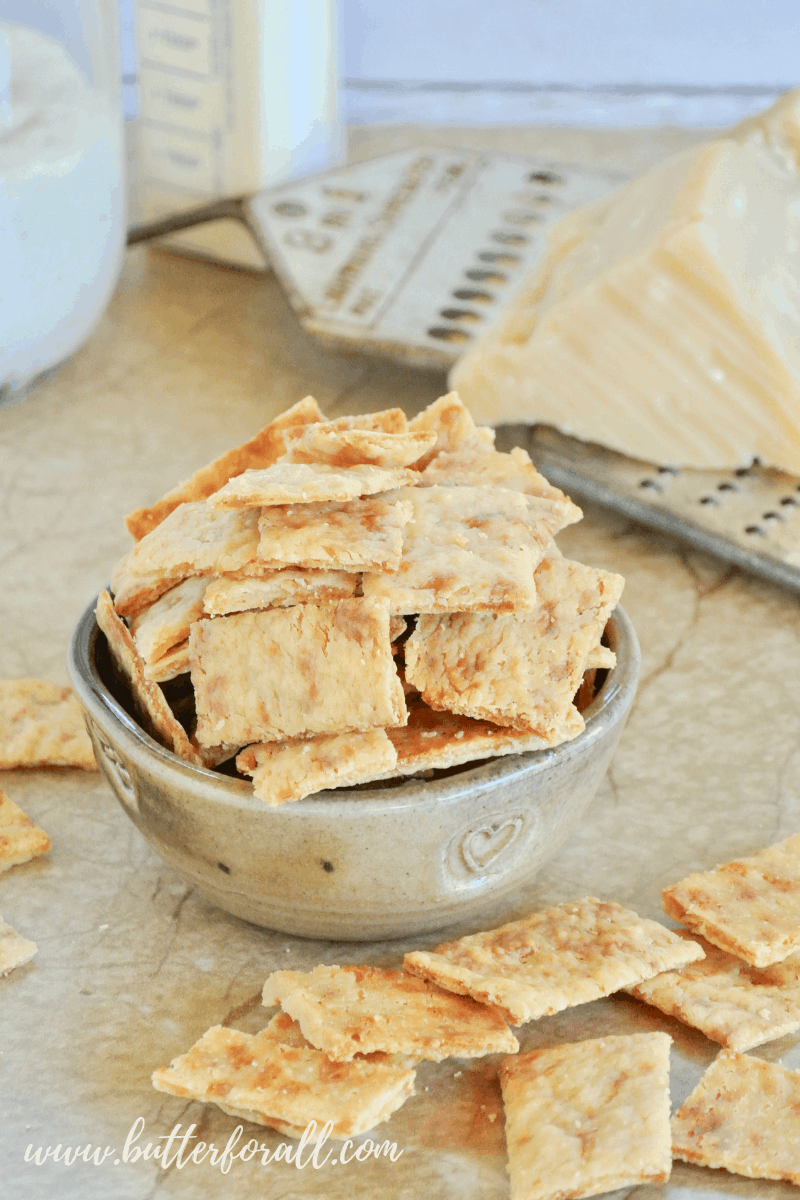
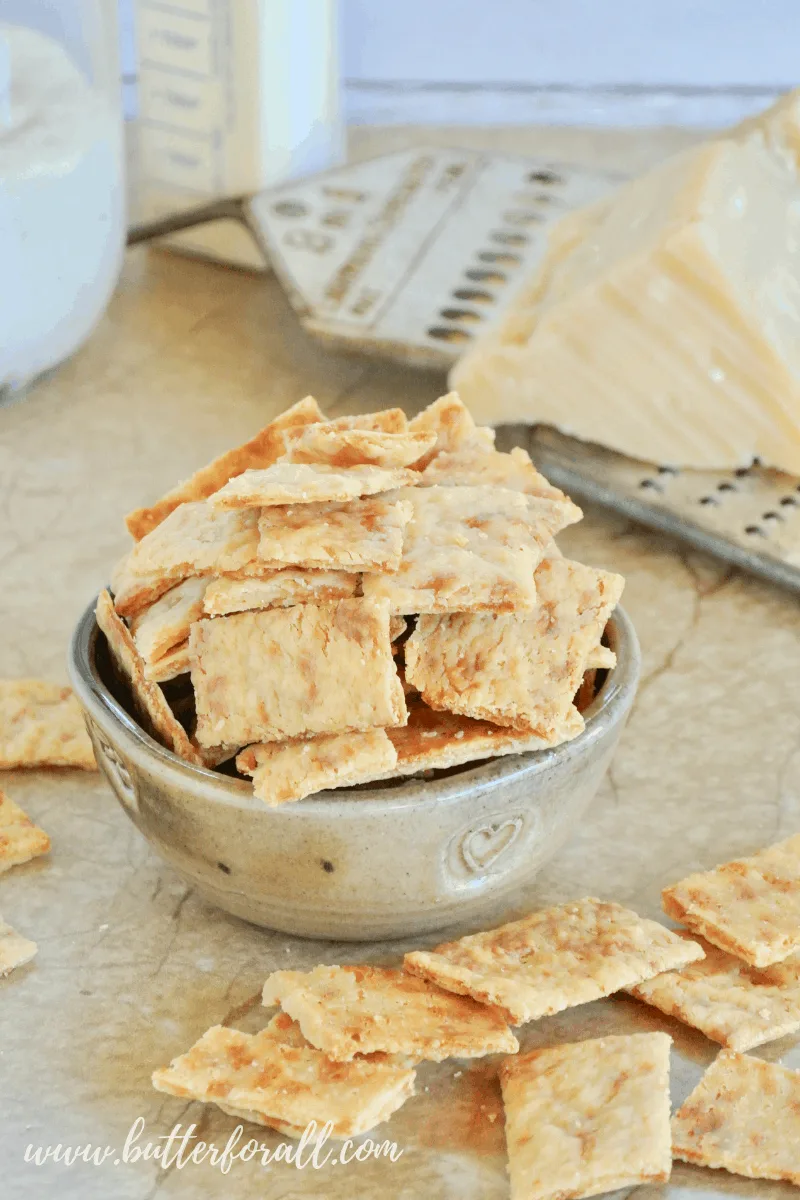
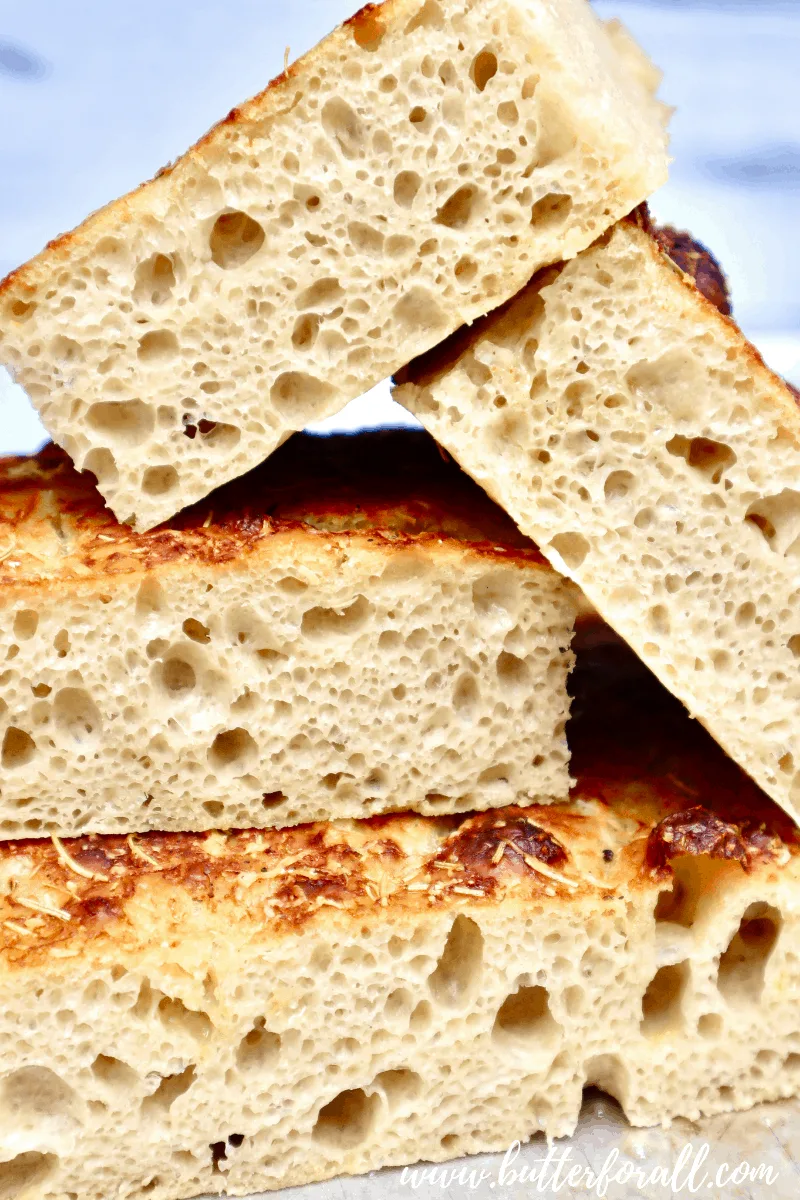
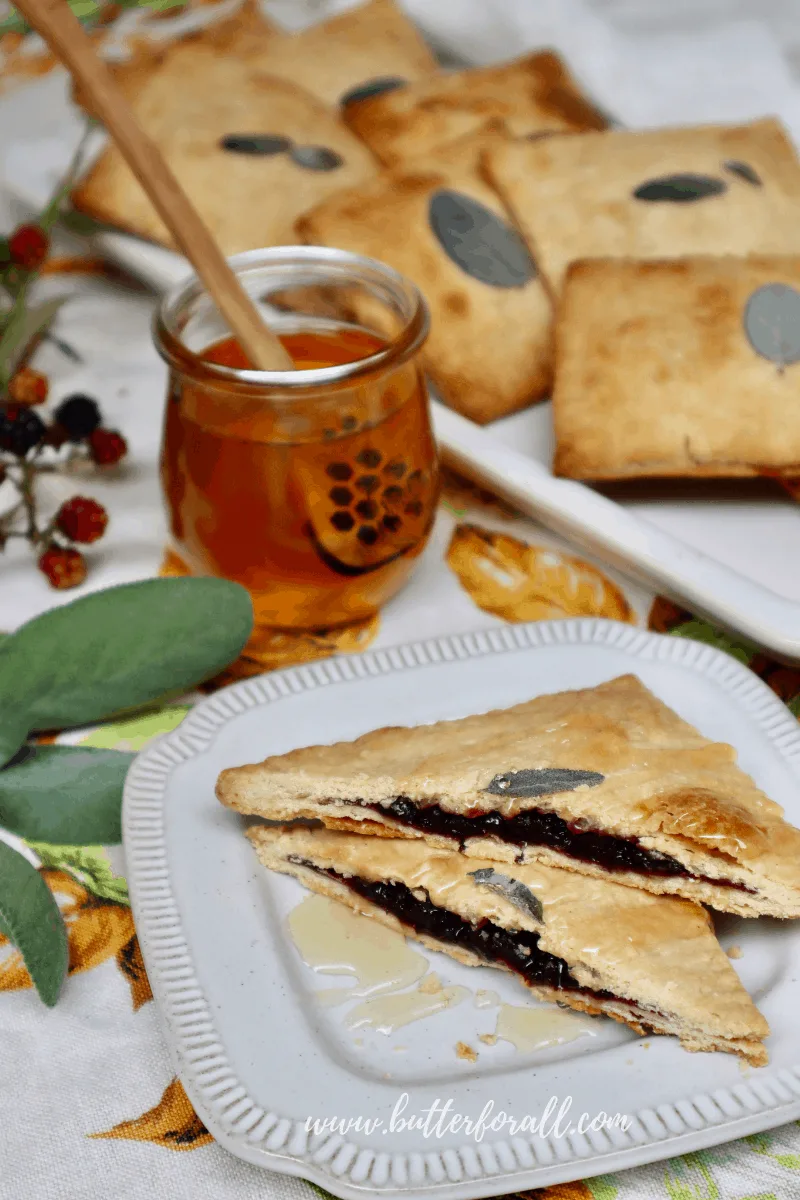
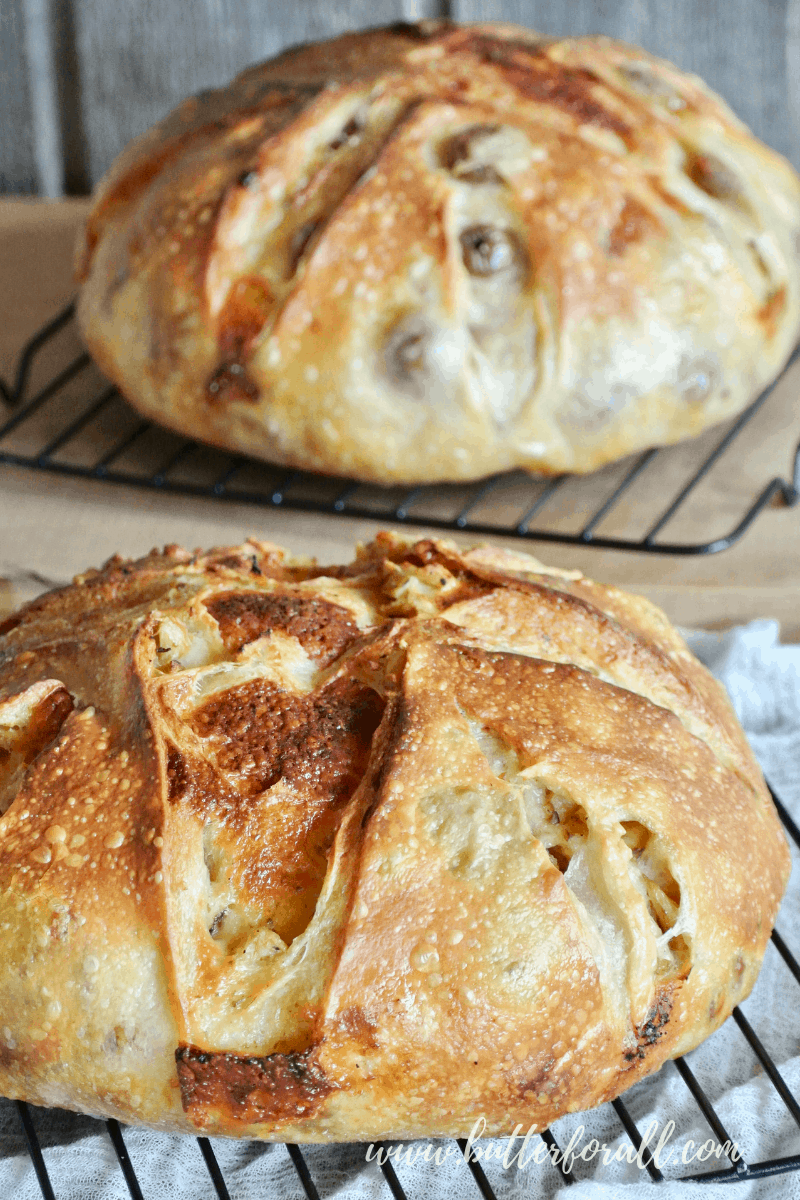
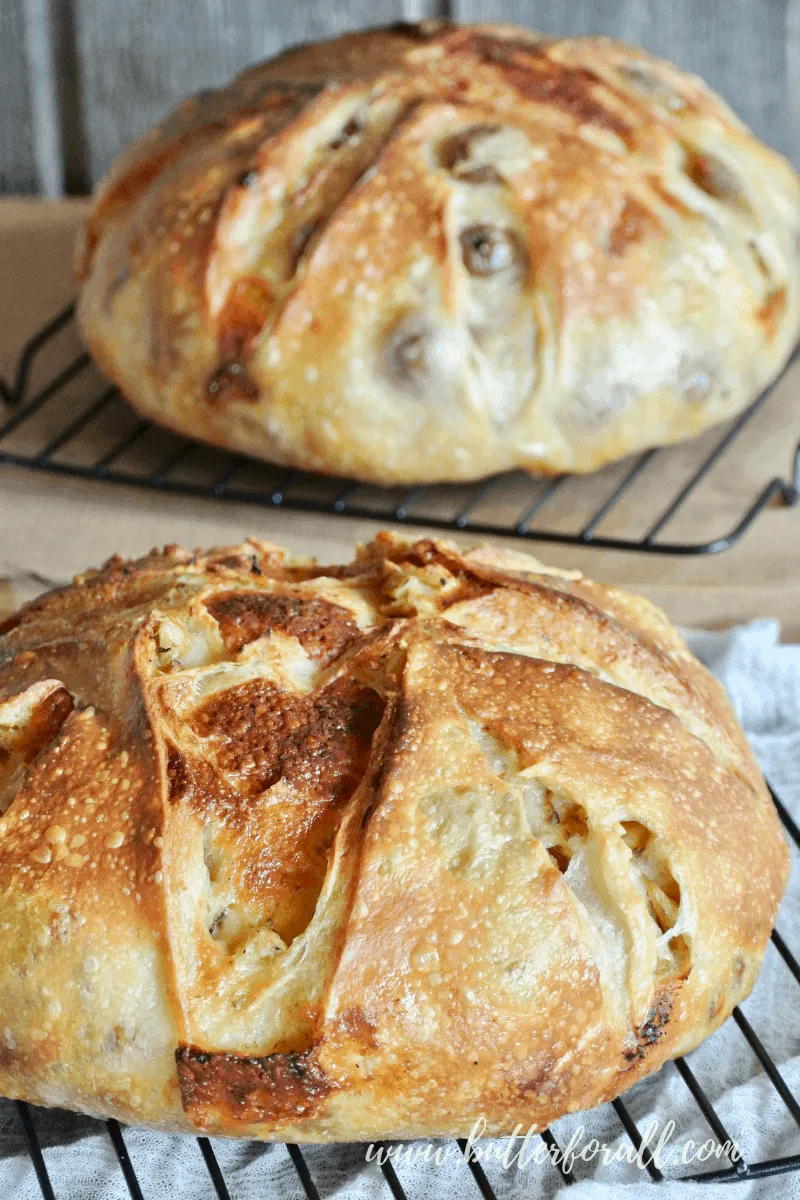
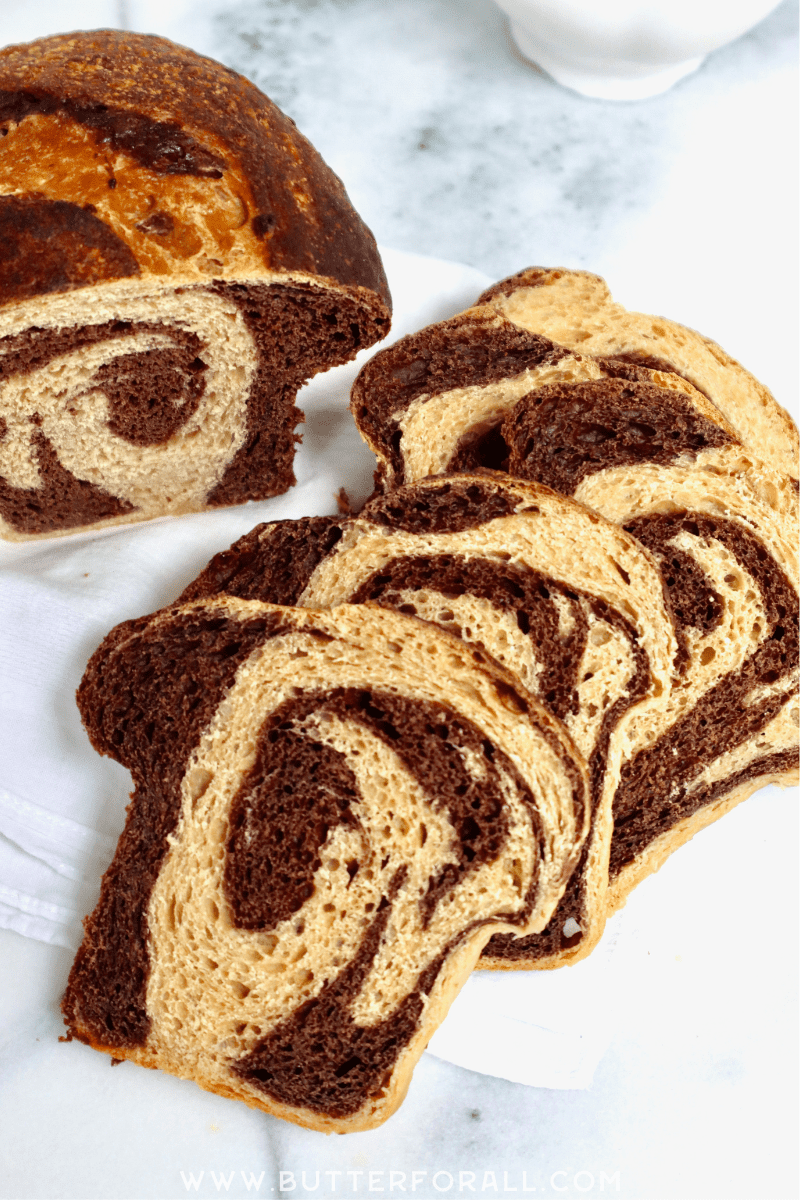
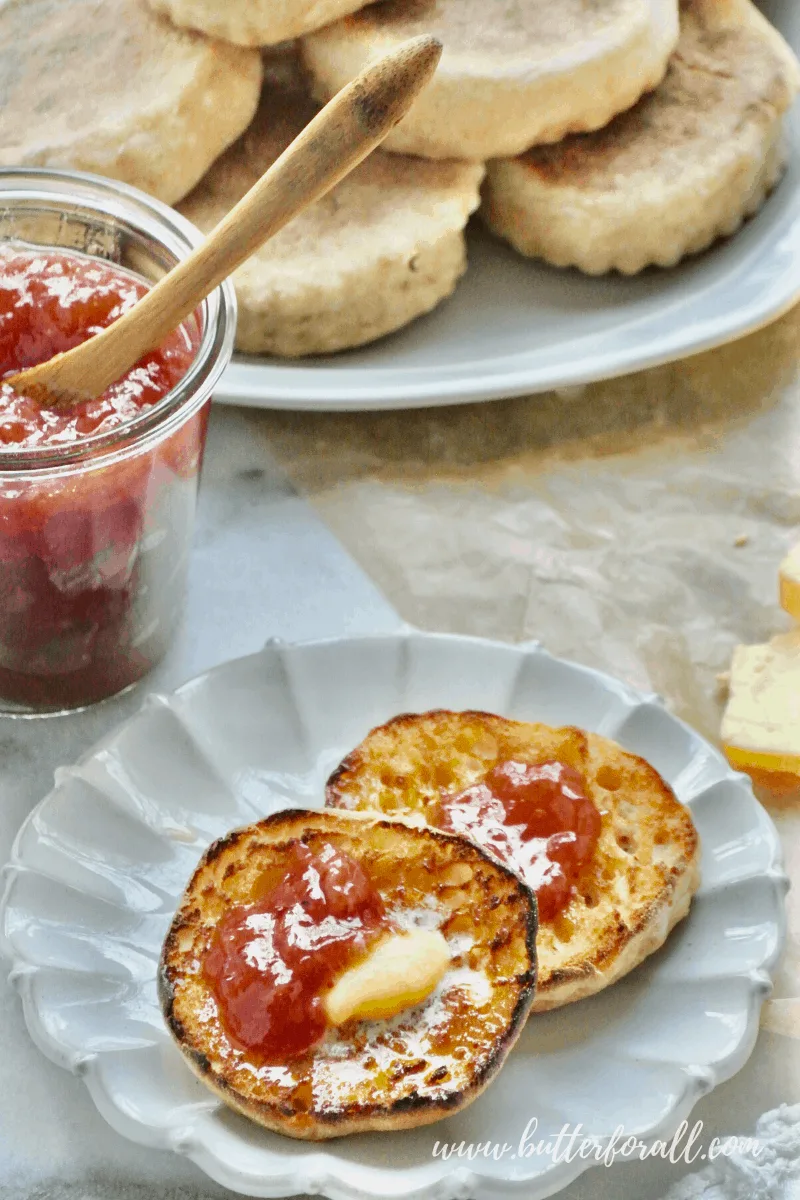
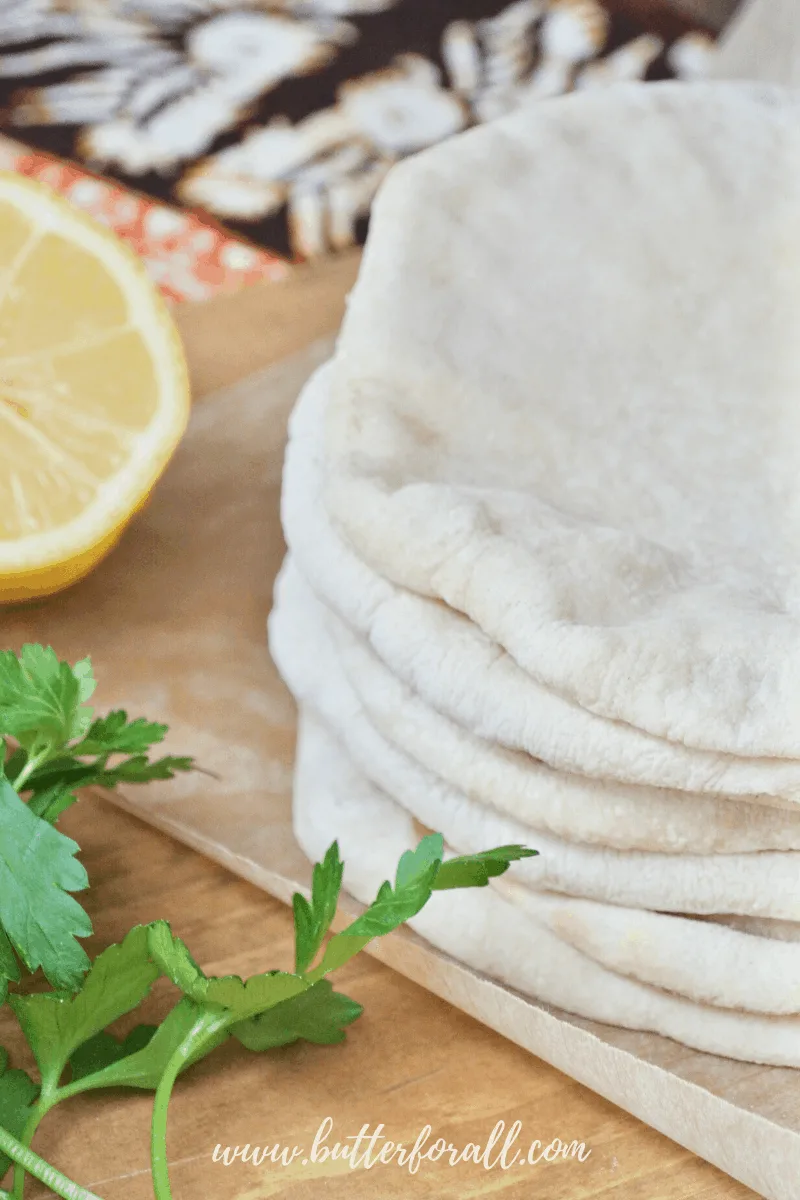
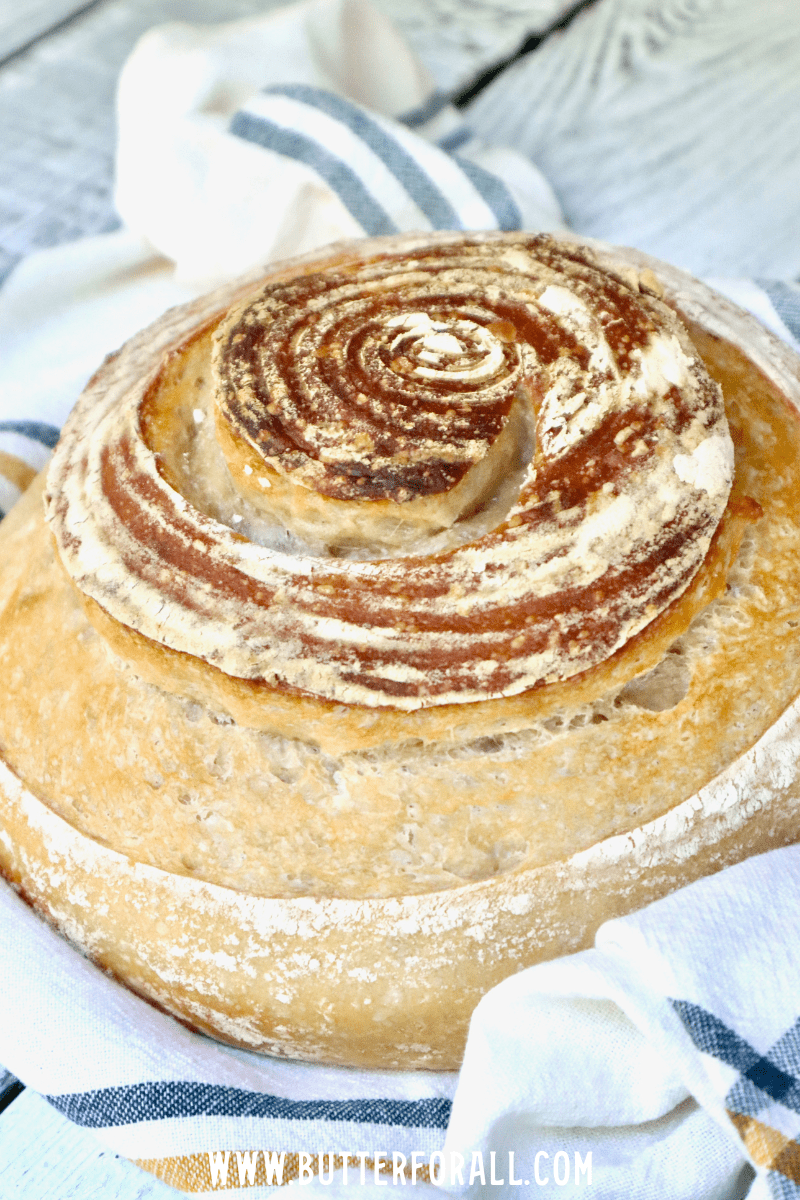
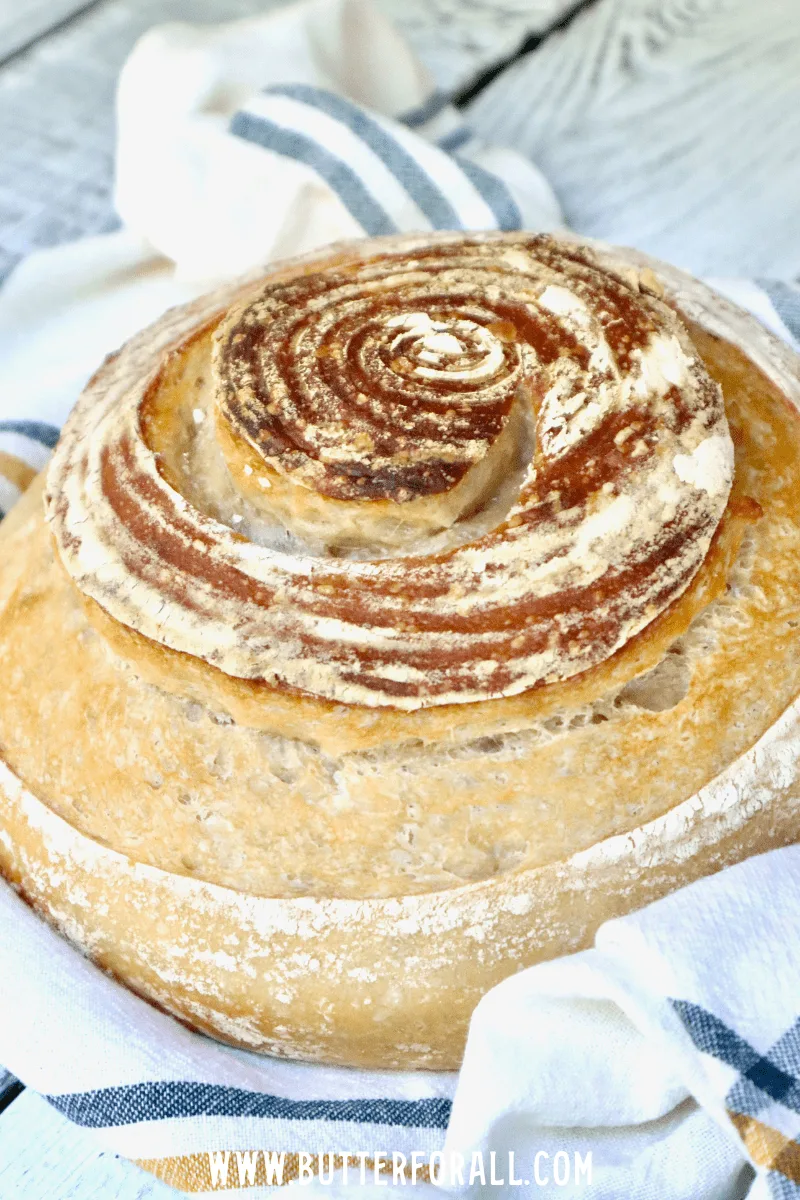
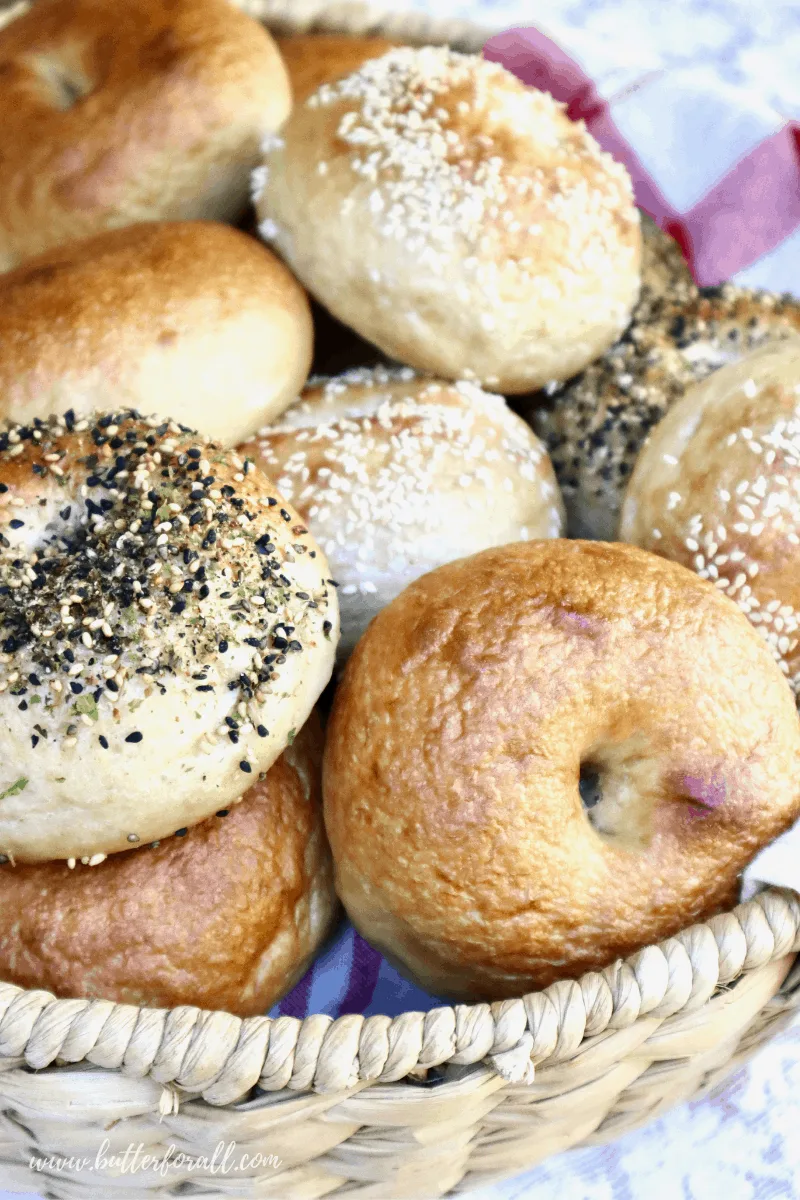
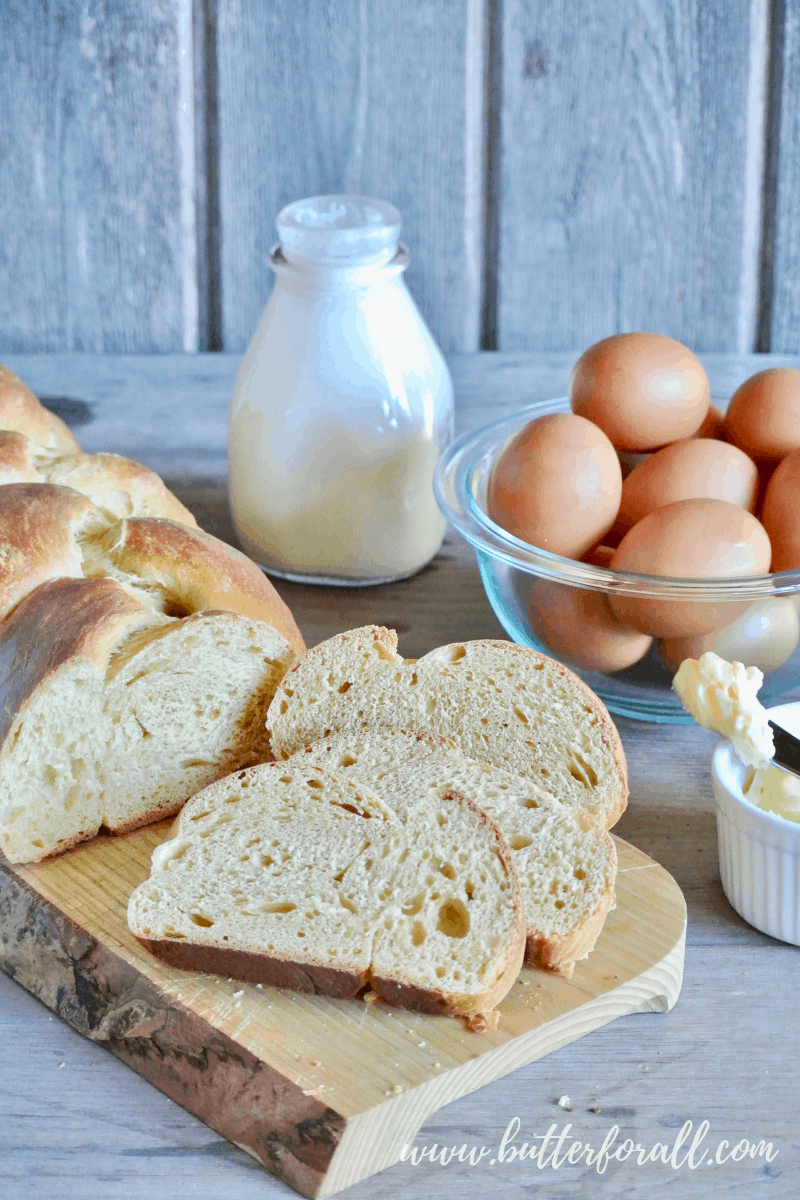
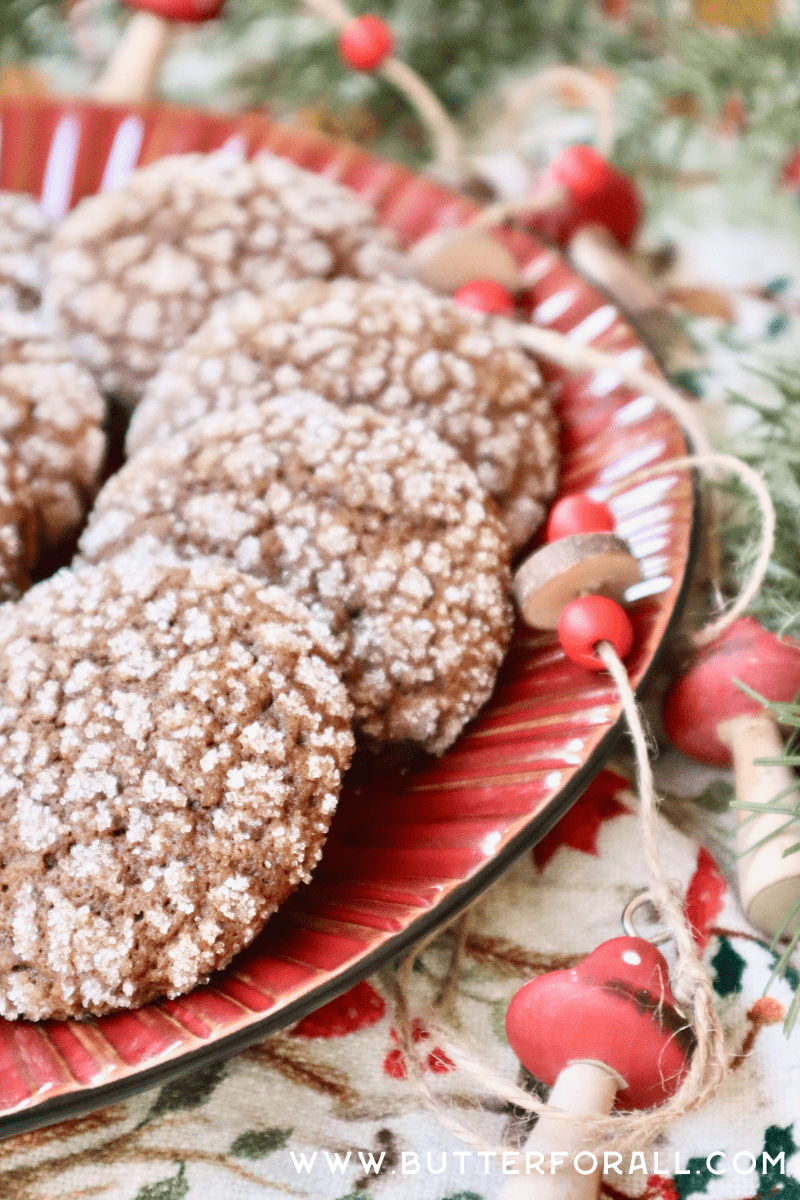
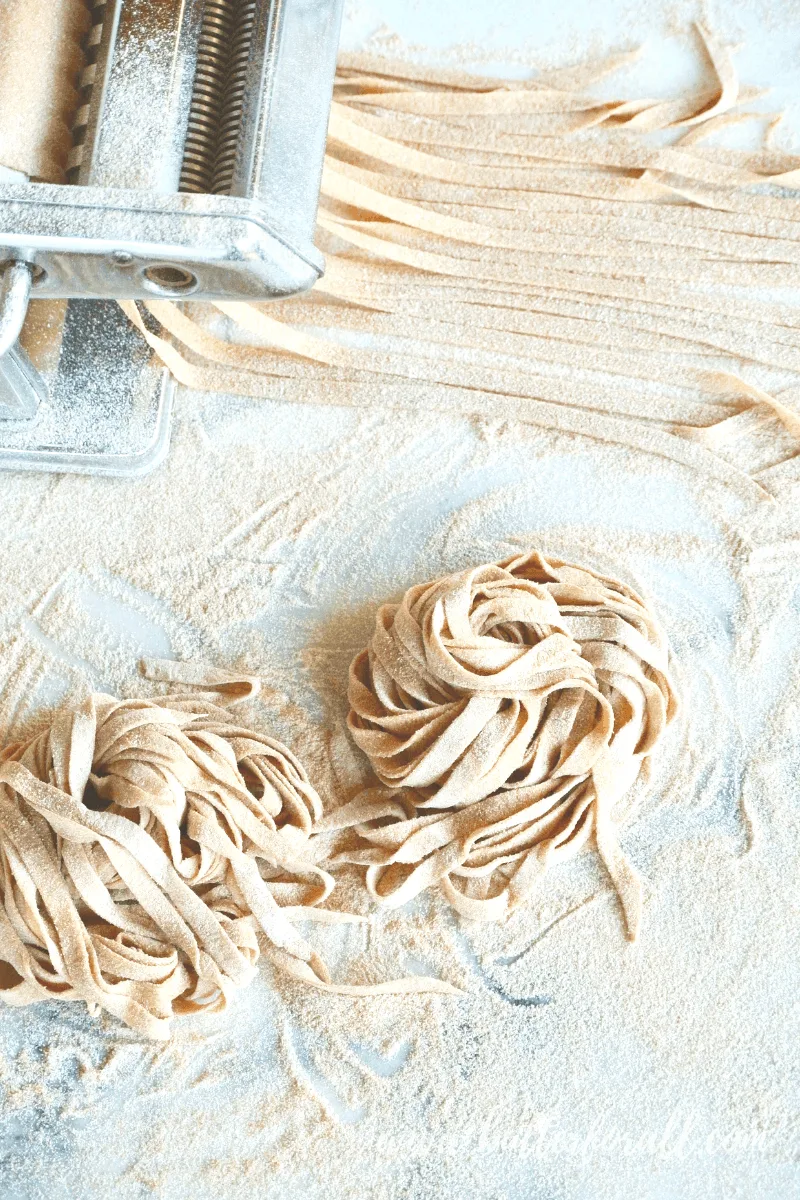
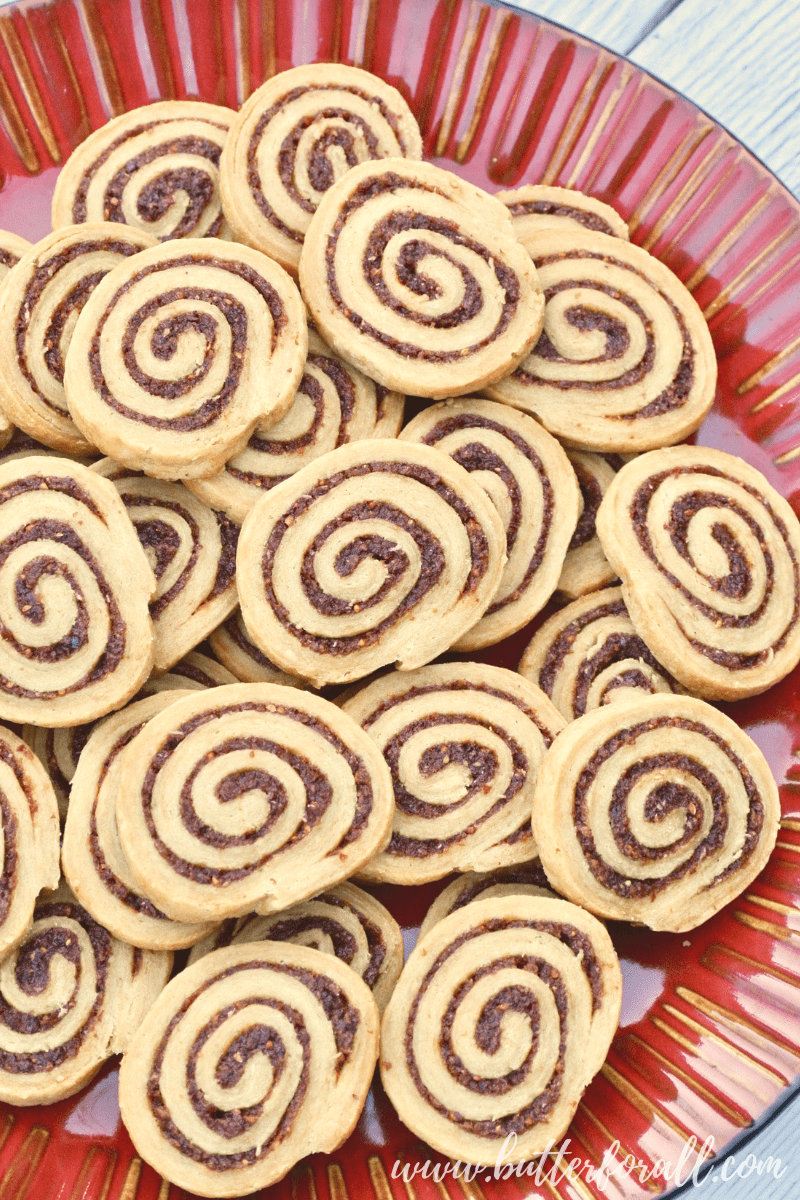
Here are examples of some of the beautiful baked goods you can make with a sourdough starter. You can find over 70 sourdough recipes on Butter For All!


Shannon
Saturday 11th of January 2025
Can I use fresh ground Farro, or Buckwheat for the starter? Suddenly I can't find wheat berries at store...
Butter For All
Tuesday 14th of January 2025
Hi Shannon, You can use freshly ground Farro. It is a variety of wheat, but buckwheat is not wheat and will not develop gluten. Buckwheat also tastes very different/very sour when fermented.
Amy
Saturday 16th of December 2023
Hi Courtney, I have seen others use one type of flour to initially start their starter & then feed it with another type. Why is that? I have a local grain mill near me and purchased their high-protien bread flour that they sell to bakeries. That should be okay to start and feed my started, right? Thanks!
Butter For All
Saturday 16th of December 2023
Hi Amy,
A whole grain flour is usually recommended for starting a starter because it has more bran and husk distribution throughout the flour. The bran and husk are where wild yeasts and bacteria can be found naturally. While the plant is growing they settle on the outside of the grain so when that is milled away a lot of the yeast is lost. Whole grain flour also has more minerals that the yeast like when they are getting established. It may take longer to start a stater with white flour, but you can also just by a small bag of local whole wheat and add a few small scoops every time you feed. The whole grain will help yeast take hold, while the white flour will supply the simple sugars the yeast love!
I wish you tons of success!
Courtney
Cathleen
Saturday 25th of February 2023
What is the difference between bread flour and home ground 100% wheat flour? Thank you for your help.
Butter For All
Monday 27th of February 2023
Hi Cathleen!
Bread flour is in most cases a hybridized wheat with a high protein content. Typically it is either sifted or hulled to remove the outer bran and keep the soft, white, inner starch. The high protein content translates to higher gluten development and a more open crumb structure.
Home ground wheat flour can be any wheat variety you choose, but it will have 100% of its hull ground into the flour. So it will have more vitamins and minerals, more flavor, translating to a higher chance of spoilage due to the increased oil content, and more anti-nutrients that will need to be taken care of with soaking, sprouting or souring. It's best to keep whole wheat kernels and fresh ground flour in the refrigerator or freezer. Or only grind as much as you can use in a few days. Whole wheat flour will create a bread that is much more dense with less gluten development, but a lot more flavor and nutrition.
I hope that helps!
Courtney
Ella
Wednesday 22nd of February 2023
Hello Courtney, I started my sourdough starter journey last week. I used day 1 50g of whole wheat flour and 50g water, day 2,3 and 4 i used ratio 1:2:2 (25g starter, 50g flour and 50g water). It was doing very well day 2 (almost rised twice by 24 hours), day 3 rised less but bubbles were there, day 4 the same. Am I feeding it too much? You have a different ratio in your recipe - 50g starter, 25g flour and 25g water. Temperature in my kitchen is between 70-72 degrees
Thank you for your advice! Ella
Butter For All
Monday 27th of February 2023
Hey again! I answered you in the previous question, but I will say that the temp could be increased to really favor the yeast. Check out the temperature inside your oven with the light on. If it's between 80-95℉ you could keep your starter in there while it becomes established. If it's too warm in the oven, try cracking the door to see what temp the oven stays at.
Ella
Wednesday 22nd of February 2023
Hello Courtney, I started my sourdough starter journey last week and I'm on day 4 now. It rises less then before and it troubles me. I used 50g whole wheat flour and 50g water 1st day. Next days I used ratio 1:2:2 (25g starter, 50g flour and 50g water). I noticed that you used a different ratio in your recipe - 50g starter, 25g flour and 25g water. Am I giving him too much in my feedings?
Thank you, Ella
Butter For All
Monday 27th of February 2023
Hi Ella!
Sorry for the slow reply I recommend a 1:2:2 ratio for reviving a dehydrated starter, but for starting a starter from scratch, I like a 2:1:1 ratio. This ensures the yeast (who may be struggling to reproduce quickly) aren't getting overly diminished with each feeding. It's really very normal for you to see a big rise in the first day or two when the bacteria isn't as established, followed by a slower period of yeast growth as things start to balance out and the lactic acid starts to build. The yeast have to adjust to this new acidic environment. Hopefully you kept going and are starting to see some consistency with rising. I think you could continue with a 1:2:2 ratio (there is no definitive ratio) or try reversing it to see what works best in your situation. I hope you'll follow up to let me know how it goes!
Best of luck,
Courtney