
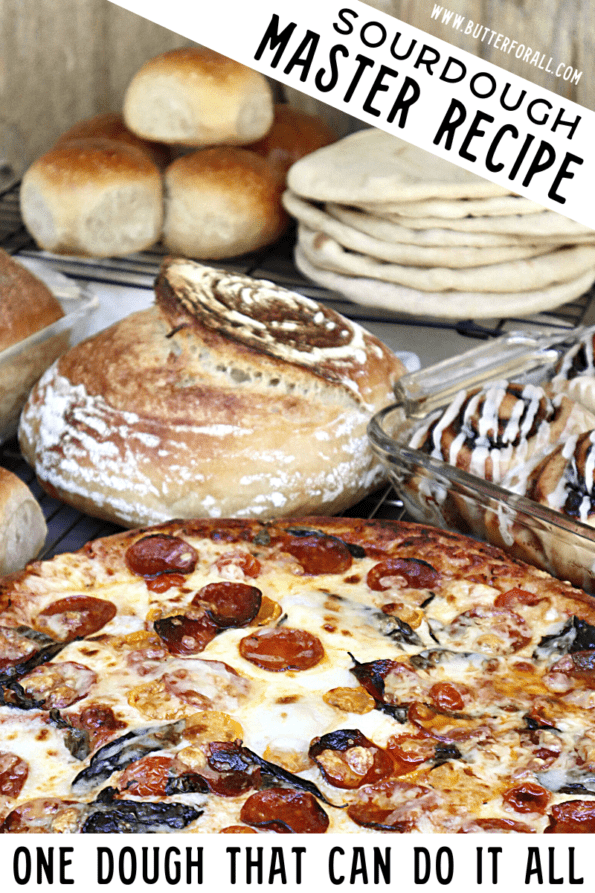
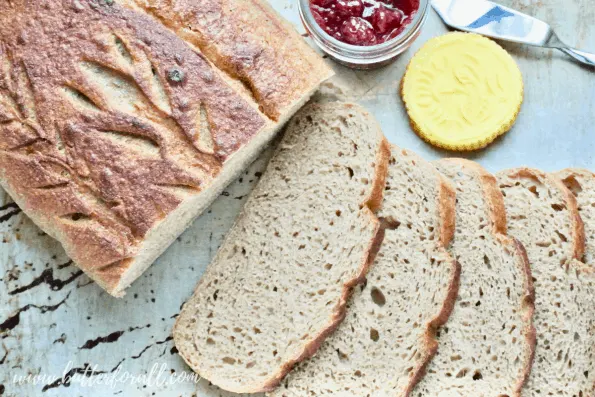
Now that you have your starter in tip-top shape it’s time to play with this one recipe that can do oh-so-many things! 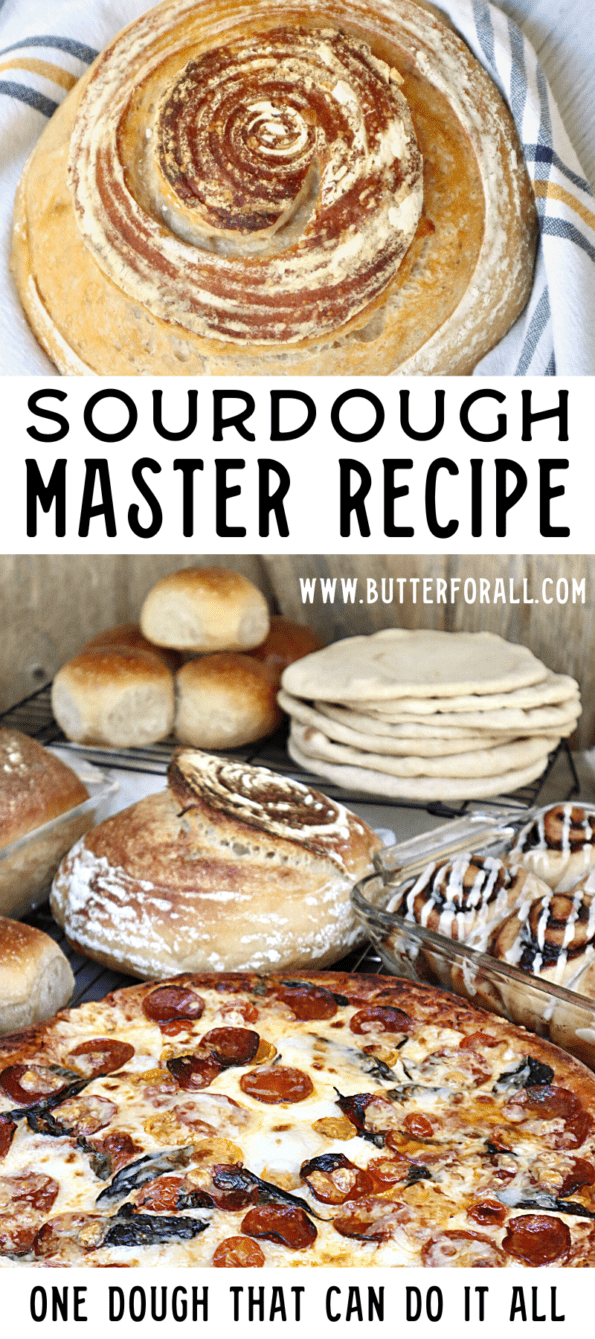

People make sourdough so much more complicated than it needs to be. Sure, you can expand into more detailed and dramatic recipes as your skills progress, but don’t ever forget the humble roots of good bread: flour, water, starter, salt, touch, and time!
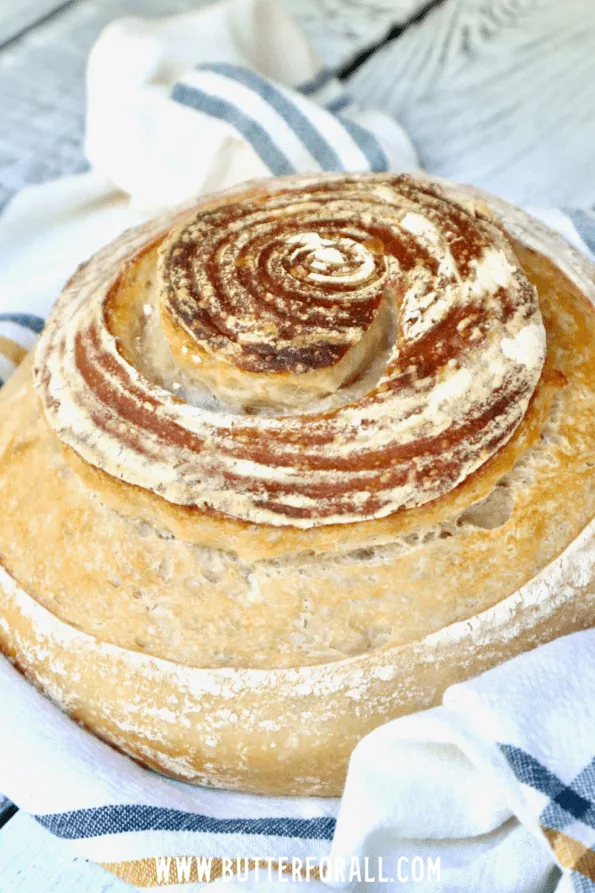
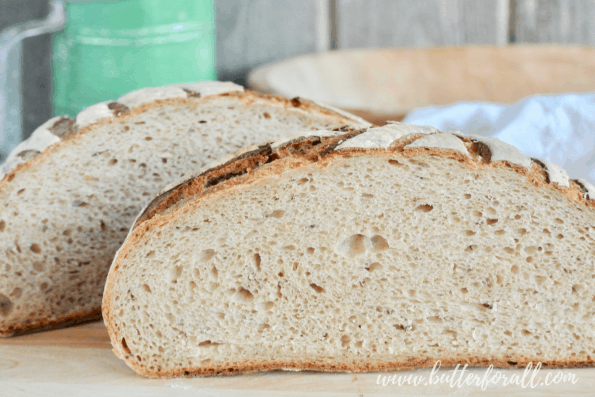
This simple recipe will change the way you make sourdough bread. Knowing this one formula will allow you to try different shapes, styles, and flavors with ease.
The Perfect Ratio
This formula is so easy to work with. The dough is the perfect hydration for beginners but more seasoned bakers will also appreciate the flexibility and easy handling. I typically don’t need any additional flour during shaping unless I’m rolling this dough out (like in these delectable market cinnamon rolls).


This recipe was developed for a strong bread flour (one that is high in protein). But if you read on you will see some examples of this formula with multiple whole grain flours.
Tried and Tested
I’ve scaled this formula from one loaf to 25. I get a consistent bake every time with great development and flavor.

Versatile Beyond Comparison
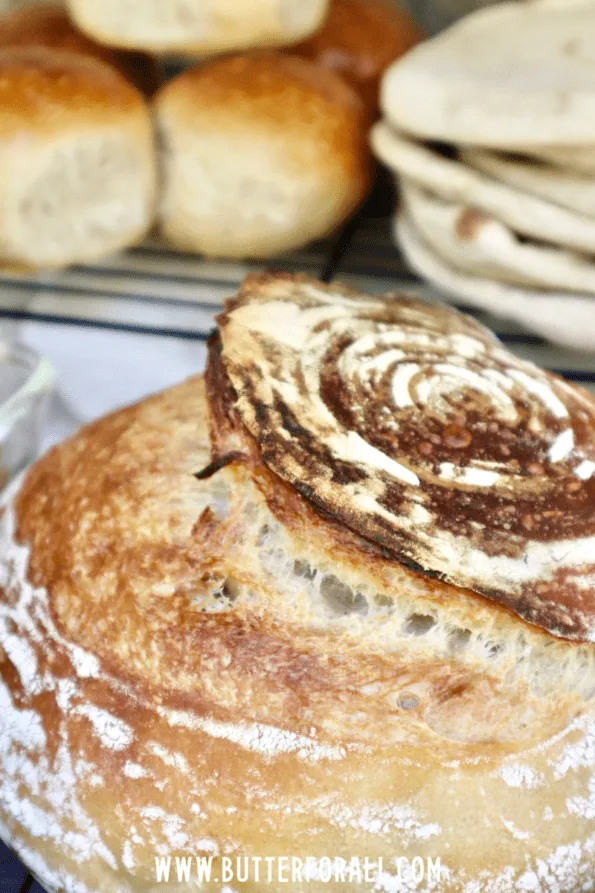
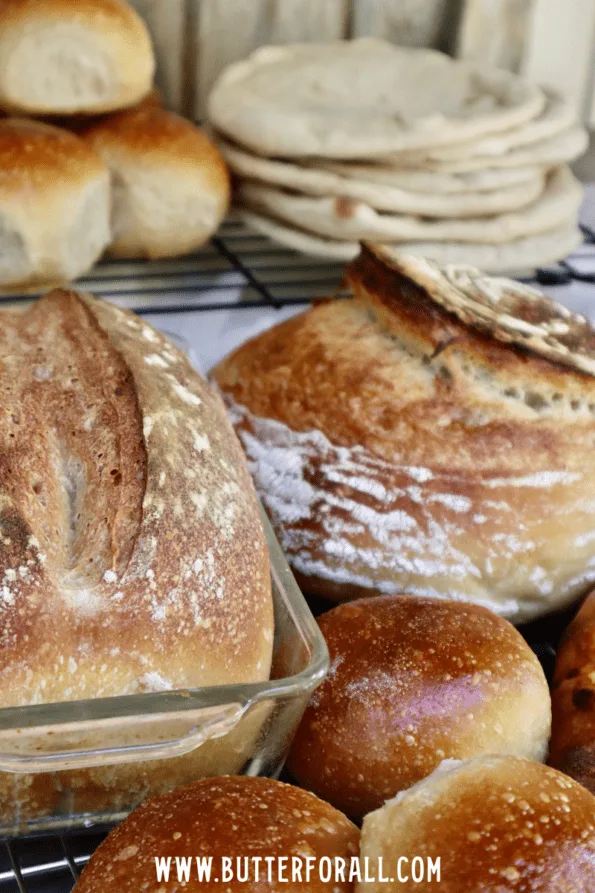
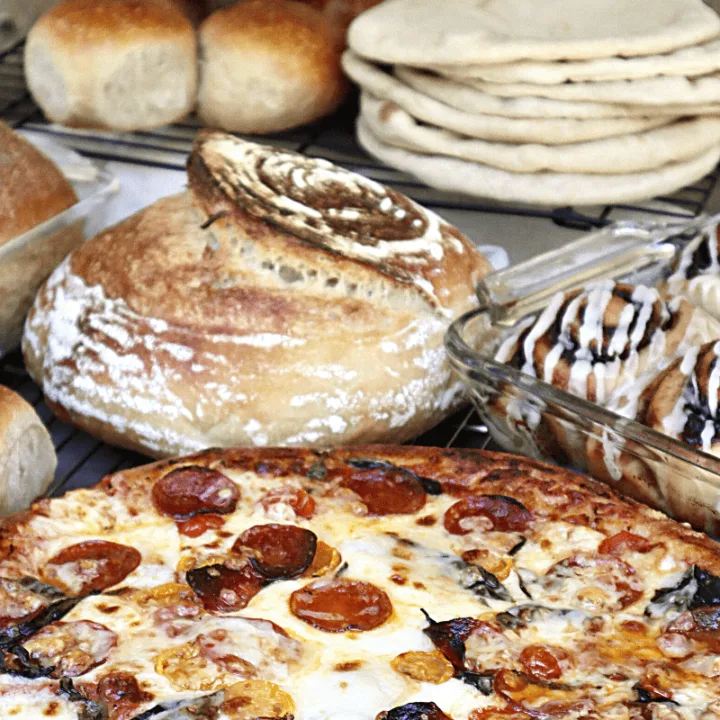
From pizza to pita, this one dough proves itself over and over again!
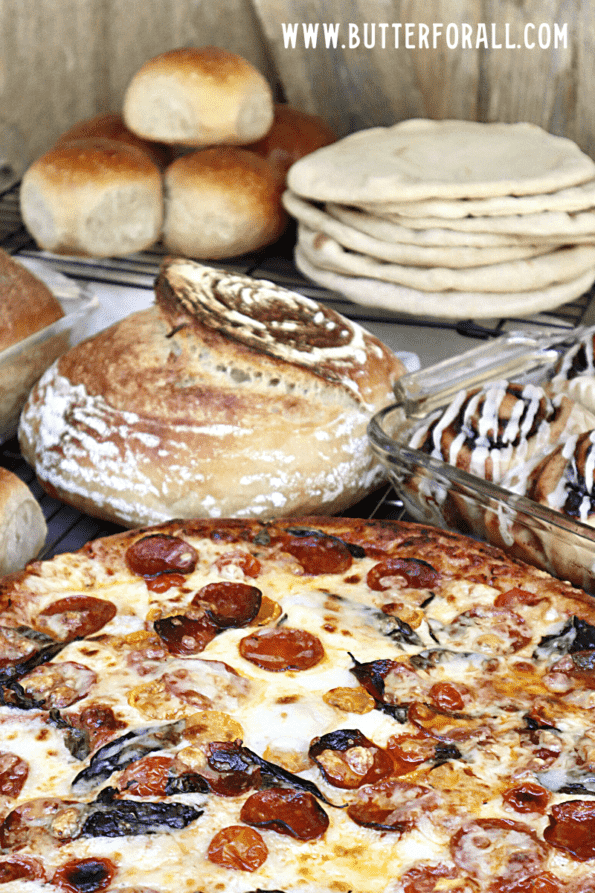

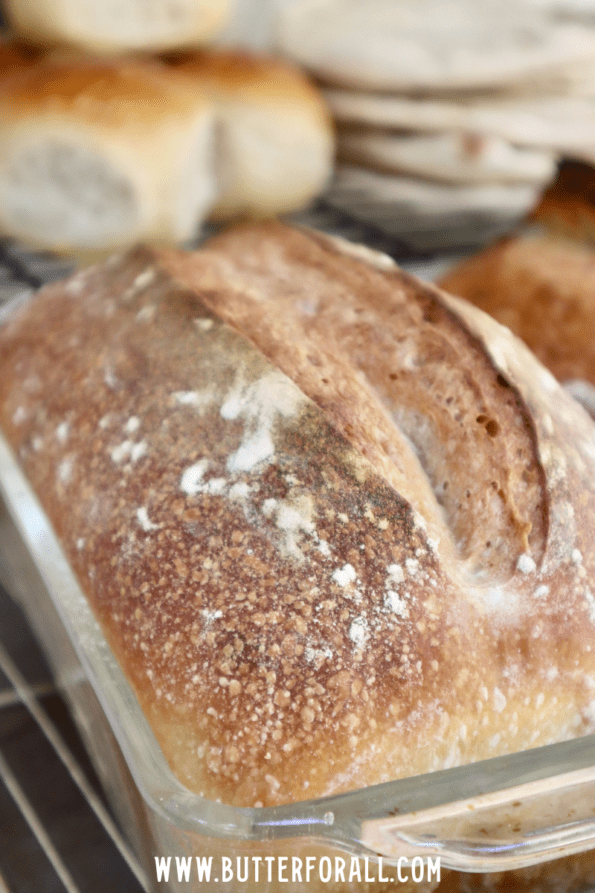
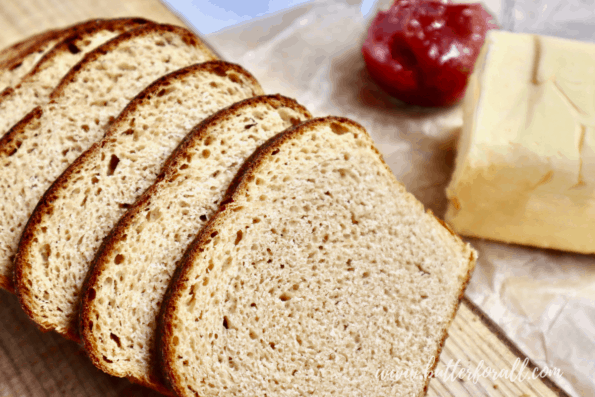
It even makes a perfect sandwich loaf.

And gorgeous hamburger buns or dinner rolls.
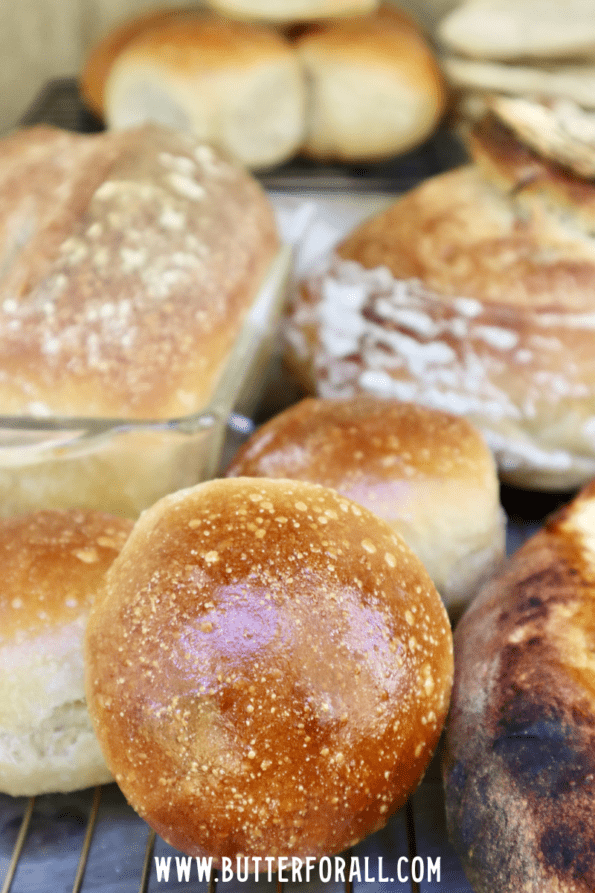

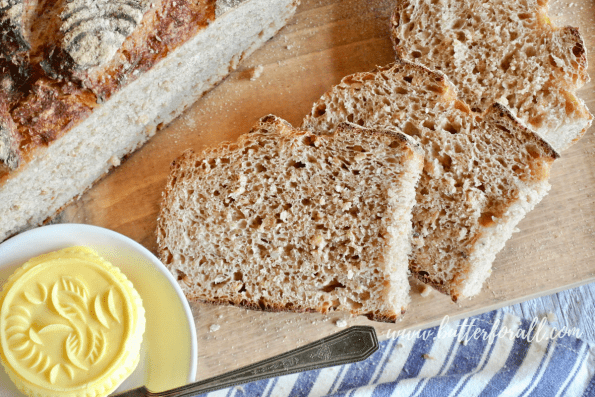
ALL these incredible baked goods were made with the same master recipe.
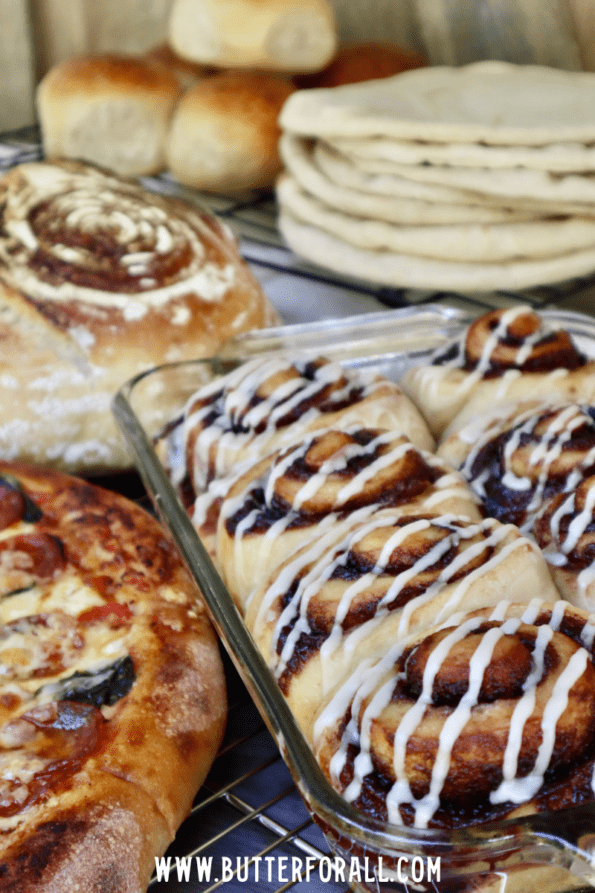

One recipe that can do it all! What will you try?

Shaping and Baking
The only thing that changes this recipe from one baked good to another is the shaping and baking technique. Mixing the dough, kneading, and the bulk fermentation is standard across the board.
The basic formula makes one 888-gram loaf, or eight 111-gram buns, rolls, or pitas.
Take a minute to watch me shape six totally different styles of baked goods with this one dough!
Watch these other videos for some shaping tips and techniques:

Great Bread No Matter the Flour
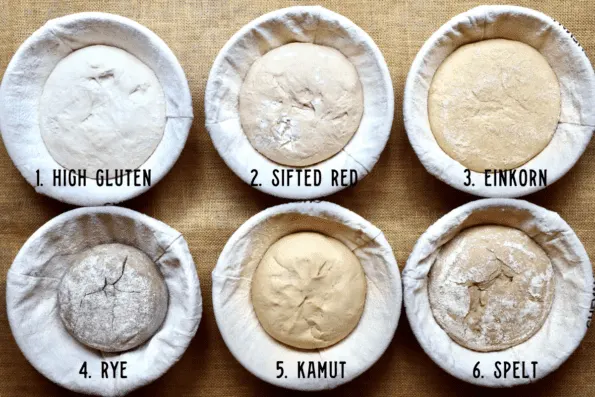
Not only did I test many different shaping styles with this master recipe, but I also took it one step further and documented the boule process with six flour varieties side by side.
- Organic High Mountain High Gluten Flour from Central Milling
- Organic Sifted Hard Red Spring Wheat Flour from Camas Country Mill
- Organic Whole Wheat Einkorn from Jovial
- Organic Dark Rye Flour from Great River Organic Milling
- Organic Kamut Flour from Camas Country Mill
- Organic Spelt Flour from Food To Live
Mixing Observations
The einkorn needed about 25 grams of additional water added at mixing. This gave a pliable dough.
Even though Kamut and rye were also very stiff doughs, I decided to see what would happen without extra water.
This is what the six different doughs looked like after an overnight bulk fermentation at room temperature (68℉) and shaping into boules.

After about 4 hours of proofing, all doughs were nearing double.
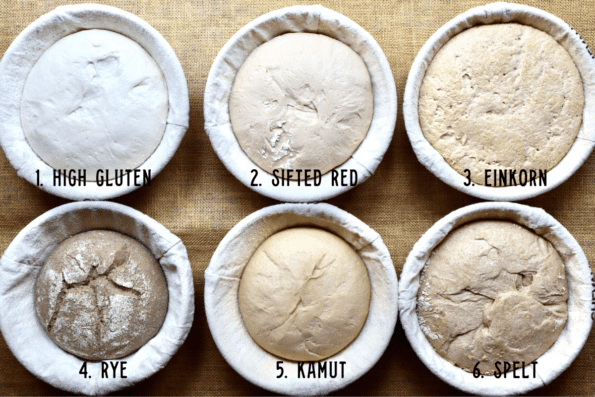

Proofing Observations
The einkorn had started to over-proof. It fermented so much faster than the other flours! Perhaps due to that added hydration and the bran to sugar ratio in the flour. It was the first to go in the oven, and while it wasn’t the most aesthetically pleasing loaf, it was delicious! I would bet it would perform better in a loaf pan.
The rye and Kamut dough needed a little more time, probably due to their density and resulting lower hydration. They were baked last.
Here is a side-by-side comparison of how the crumb looked on all six loaves.
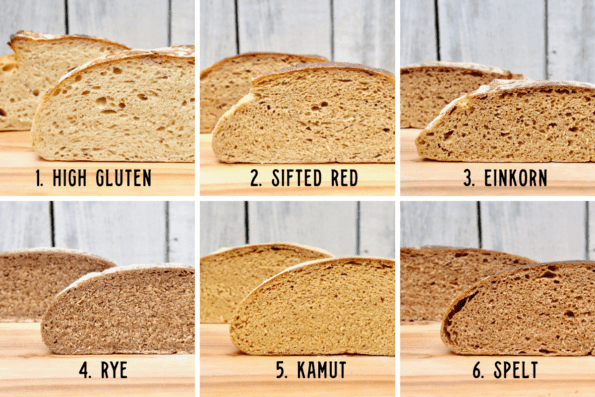

Baking and Crumb Observations
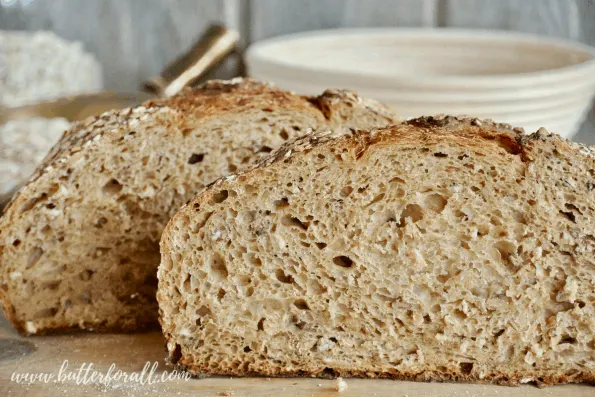
- The high-gluten flour gave a beautiful lofty loaf with perfect texture and a very mild flavor.
- The sifted hard red is my flour of choice — all the flavor of whole grain with a delicate chewy interior. This is the flour I used to develop this master recipe so it will always work out well!
- The einkorn had a nice open crumb and a very nice sour tang. You can see the effect of over-proofing in the long gap under the upper crust.
- The rye was dense and chewy, perfect for thin slices topped with butter.
- The Kamut was also fairly dense but nicely developed with a deep golden color and nutty, buttery flavor.
- The spelt had a decent open crumb with good flavor and beautiful color. I thought it baked a little on the dry side though, so it might be a good choice for an enriched whole grain dough or at the least it needs a little more hydration. It may have also over-proofed slightly as you can see a few bubbles right under the crust.
Takeaways
I normally wouldn’t bake boules with 100% whole grain. I often advise people to use 50% bread flour and 50% whole grain. This is especially important if you want to shape your dough into pitas, pizza, or rolls.
However, 100% whole grain loaves can be successful as boules and sandwich loaves.
This was a great test that proved this master recipe’s flexibility. All the bread was delicious and got devoured.
The Master Recipe
This recipe was developed for finely milled stone-ground hard wheat like the sifted hard red spring wheat from Camas Country Mill. But as I demonstrate above, it can work really well with a variety of white and whole grain flours!
This table provides you with not only the ingredient weight in grams but also in ounces, volume, and baker’s percentages.
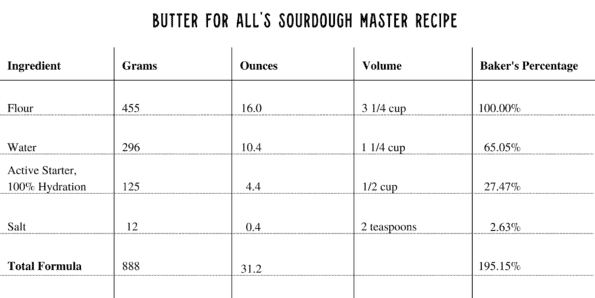

Baker’s Percentages
Baker’s percentages are useful for scaling recipes up and down with ease.
Note that the total flour weight is always 100% and every other ingredient is represented as a percentage of the total flour weight. No matter how much flour you use, it is 100% and all the other ingredients are scaled accordingly.
Using the table above, let’s scale a recipe together using baker’s percentages.
I need 30 hamburger buns for a dinner party. I know that the master recipe makes eight 111-gram buns. What do I do?
First, find the total formula weight, the number of buns I need times the weight of one bun: 30 x 111 = 3330
Once we know the total formula weight or the total flour weight it is easy to find the conversion factor that we will use to scale all the ingredients.
The conversion factor is 1% of your flour weight.
To find the conversion factor we take our total weight and divide it by the total formula percentage: 3330 ÷ 195.15 = 17.06 is our conversion factor.
Now multiply the conversion factor by the ingredient percentage to get your formula for 30 buns.
Flour — 17.06 x 100 = 1706 grams
Water — 17.06 x 65.05 = 1110 grams
Starter — 17.06 x 27.47 = 469 grams
Salt — 17.06 x 2.63 = 45 grams
Similarly, if you know the total flour you’d like to use you can divide that amount by 100 to get your conversion factor. This is helpful if you have a specific amount of flour to use up that is more or less than the specified amount.
I may write more about baker’s percentages in the future, but for now I hope this gives you an idea of how helpful they can be!
Measuring by Volume
I’ve gotten the volume measurements as close as possible, but please note that they are always approximate. You may need to adjust hydration by adding flour or water to your recipe.
Baker’s percentages also don’t work with volume measurements. So baking by weight has the benefit of being easily scaled in addition to greater accuracy.


Butter For All's Sourdough Master Recipe
Memorize this simple formula and you'll always have a sourdough recipe on hand that can make great bread, pizza, pitas, hamburger buns, cinnamon rolls, and more.
Ingredients
- 455 grams (3 1/4 cups) organic strong flour
- 296 grams (1 1/4 cups) water
- 125 grams (1/2 cup) active starter
- 12 grams (2 teaspoons) salt
Instructions
- In a large bowl or stand mixer, stir all ingredients together to form a shaggy dough.
- Alternate kneading and resting the dough in 1-minute intervals until it's smooth and elastic.
- Shape the dough into a ball. Place it in a covered bowl to ferment.
- Let the dough rise to double in volume, around 8 hours (overnight) in cool room temperature (68°F)
- Deflate, portion, and shape the dough as desired.
- Cover the dough and let it double again at room temperature.
- Bake loaves at 400℉ for 35 minutes or to an internal temperature of 200℉. Pizza and other styles and shapes will require specific baking times and temperatures.
- Cool loaves completely before slicing.
Notes
- This master recipe can be used with a variety of wheat flours for different styles and shapes of bread or rolls.
- Adjust hydration as needed.
- Adjust baking times and temperature as needed.
- Recipe yields one loaf or eight 111-gram servings.
Recommended Products
As an Amazon Associate and member of other affiliate programs, I earn from qualifying purchases.
-
 Fiddle and Fern Rectangle Collection Mini Loaf Pans, Set of 4, 6-inch Length
 -
 Le Creuset Stoneware Heritage Loaf Pan, 9" x 5" x 3"
 -
 Pyrex 8-piece 100 Years Glass Mixing Bowl Set (Limited Edition)
 -
 Victoria Cast Iron Pizza Crepe Pan, Dosa, Roti Tawa, Budare, 15 Inch, Black
 -
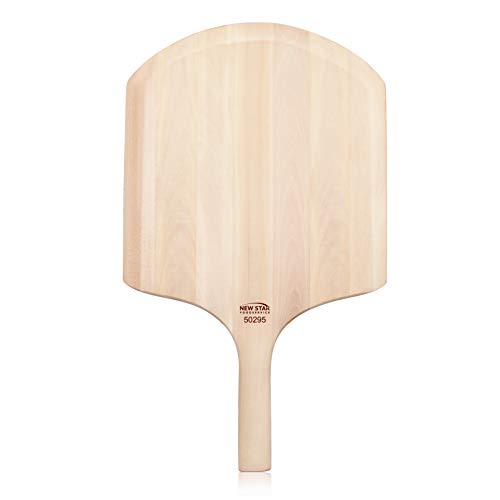 Wooden Pizza Peel, 16" L x 14"
 -
 Lodge 5 Quart Cast Iron Dutch Oven. Pre-Seasoned Pot with Lid and Dual Loop Handle
 -
 Danish Dough Whisk and Bread Lame Set Double Eye
 -
 Escali Primo P115C Precision Kitchen Food Scale for Baking and Cooking
 -
 9 Inch Bread Banneton Proofing Basket - Baking Bowl
Recipes You’ll Enjoy
Dark Rye Sourdough Bread With Molasses and Caraway

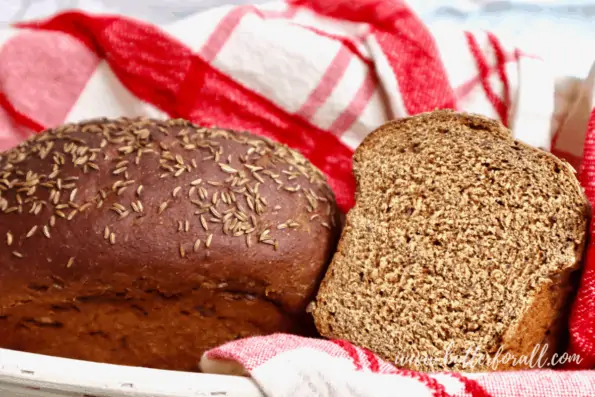
Light Rye Sourdough Boule With Caraway Seeds

Kamut Sourdough Sandwich Bread

Honey Whole Grain Sourdough Bread

Sweet and Soft Honey Oat Sourdough


Laurel
Friday 28th of November 2025
Hello and thank you for this recipe and your blog -- I love it and I love your approach.
I am a fairly experienced baker and I have made a lot of bread too. I have to admit, the directions for this load really baffled me. I used stone ground wheat (250grams) and einkorn (the rest). The dough seemed a bit dry so I just wet my hands when I worked the dough. I basically did stretches and folds every minute for about 7 - 8 times. Then I let it rest, etc.
The bread is absolutely delicious.
Thank you so much for this resource. YOU are a resource.
Warmly, Laurel
Butter For All
Thursday 4th of December 2025
Hi Laurel, Thank you so much for sharing your experience and leaving such positive feedback. I'm a mostly self-taught baker going on 25 years (I feel like I might be dating myself here). I would be the first to admit that some of my techniques and ideas are not standard or traditional. I definitely have my own style and I'm so pleased that you found it to be successful! It's great to know that you had such good luck with Stone ground wheat and einkorn. I'm going to be writing some fresh milled flour recipes soon! So watch out for those.
Hope to connect with you again soon,
Courtney
Jeff
Thursday 26th of September 2024
Courtney, If I'm not mistaken you had a recipe about using 250g of starter and putting in fridge overnight to proof. Can't find that recipe on your website. Thanks
Butter For All
Sunday 29th of September 2024
Hi Jeff!
I think you're talking about this one, How To Bake the Perfect Sourdough Boule in Your Dutch Oven – Recipe + Video Instructions
Sorry it was tricky to find, I did a little restructuring of my website, if you go to the category "Savory Sourdough", you should have a better idea of where to find it in the future. Or, just use the search function and type in the word "boule". I hope that helps :)
Shannon
Friday 29th of March 2024
Thank you so much! I finally have a sourdough starter! Your method is so foolproof . Enjoying our bread :-)
Butter For All
Tuesday 2nd of April 2024
Hi Shannon!
That's wonderful to hear! The master recipe is such a great place to start. I'm so happy that you're having such great success with it.
Happy Baking!
Diana
Sunday 15th of October 2023
do you have instructions on how to reduce a sourdough recipe. I tried using conversion factor in reverse, but does not seem right. I guess, perhaps, if I want to maintain 65% hydration,etc. I just scale it back. maybe I answered my own question.
question 2. have you converted recipes to sourdough? do you have a conversion tip? I am using 100% hydration sourdough starter.
thank you and I love your site!
Butter For All
Sunday 5th of November 2023
Hi Diana,
You certainly can scale down. I find it easiest and quickest to just halve recipes. But if you need to get a specific weight you would start with turning each ingredient into a percentage. Do this by taking the ingredient weight and dividing it by the flour weight, then multiply by 100. Once you have the percentages for any recipe you can scale it using the conversion factor.
Converting recipes is pretty straightforward. Replace yeast with starter in a percentage based on the total flour weight. I'd aim for 20%. Then reduce flour by 10% and liquid by 10% to make up for the addition of the starter. Use your intuition to adjust hydration a little if necessary.
Hope this is helpful! Sound like you are a competent baker and I'm excited to hear what you come up with!!
Best,
Courtney
Mary Wright
Tuesday 14th of March 2023
I see you specify Hard Red Wheat. I have SO much White Wheat that I grind myself. Will this work as well as the Red? Thank you.
Butter For All
Tuesday 14th of March 2023
Hi Mary!
White wheat will work fine. You might need to adjust the hydration slightly by adding a bit more water. In my experience whole white wheat requires a little wetter dough. It will also ferment faster if it's whole grain and not sifted so watch out for that too.
Best of luck,
Courtney