
If you love soft chewy pizza crust then you will go gaga for my super chewy, cheesy, sourdough pizza bread.
In the words of my husband (who has eaten a lot of pizza over the years) “Pizza Bread Is Life!” If that’s not a good endorsement then I don’t know what is.
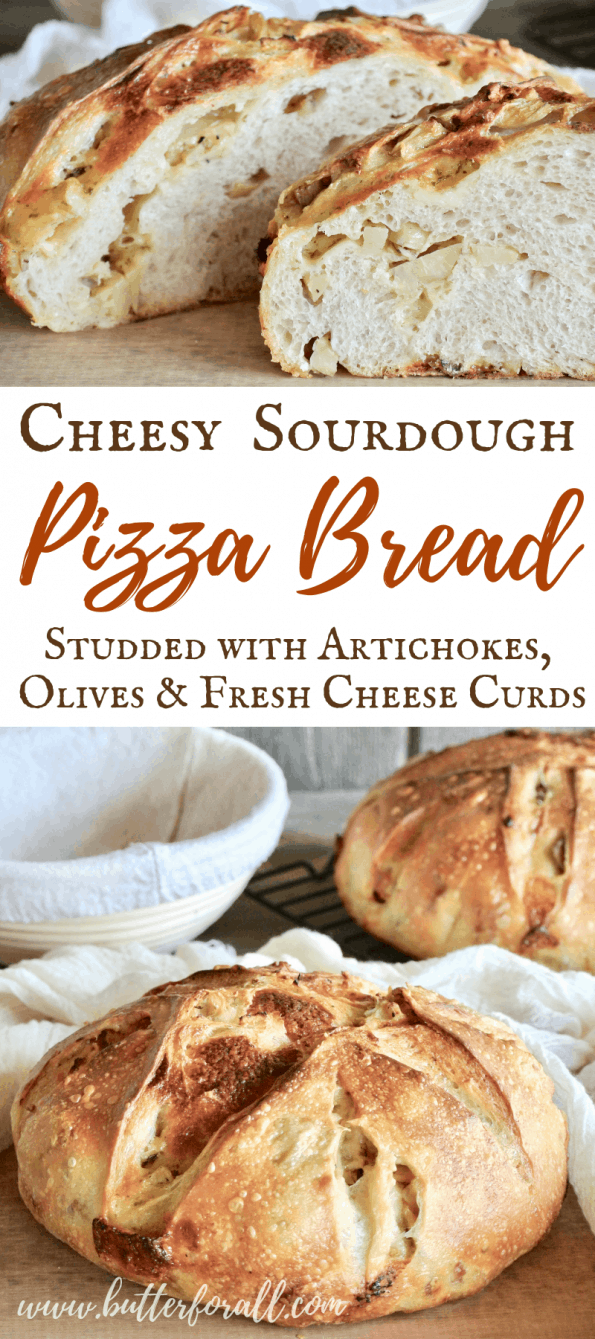
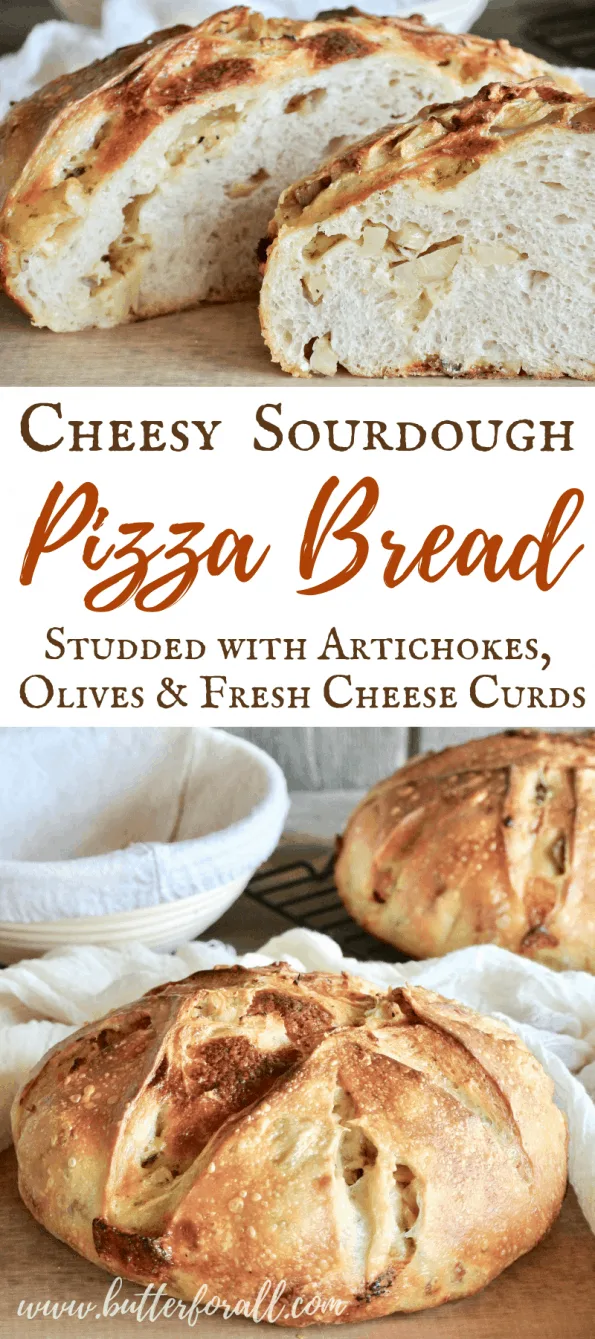
Seriously though, this bread is made with my famous Chewy Sourdough Pizza Crust Recipe and has a classic pizza flavor in a sliceable loaf shape.

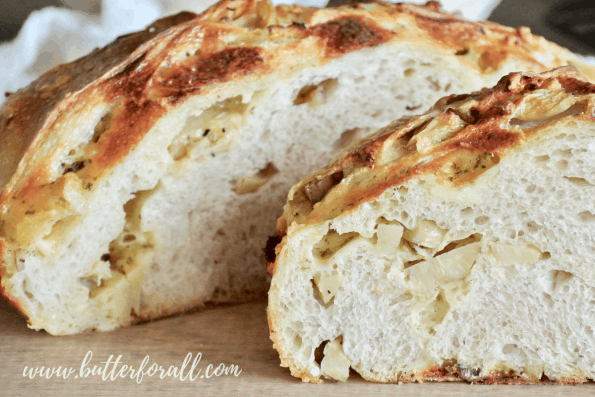
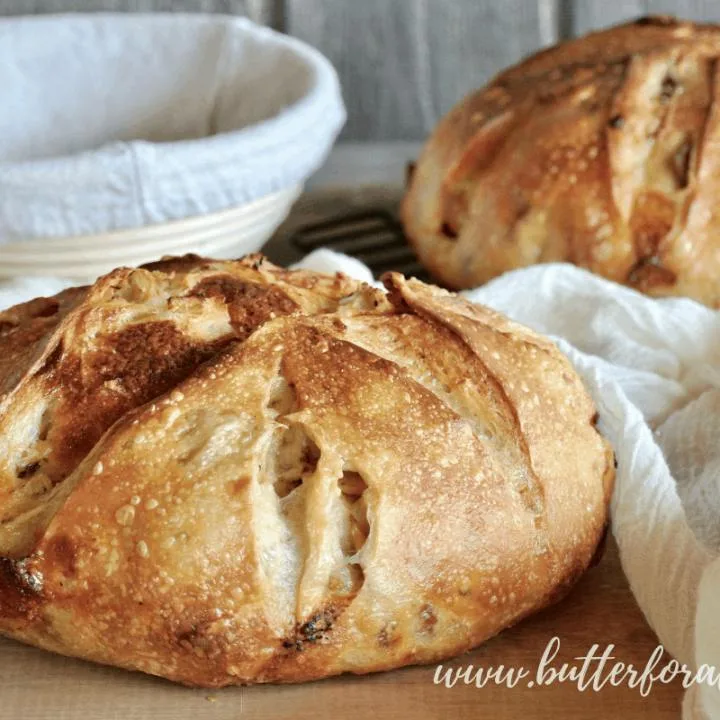
My favorite part of a great homemade sourdough pizza is the caramelized cheese that browns on the crust, so this loaf is like a giant cheesy crust studded with your favorite toppings. In my case that’s roasted artichoke hearts, garlic-stuffed green olives, and fresh herbed cheese curds! You can use whatever toppings you love to make this cheesy sourdough pizza bread your own!

Cheesy Sourdough Pizza Bread Technique
How do I get all the cheesy goodness inside the bread?
This bread does take a little technique so I’ve outlined the step-by-step process below.
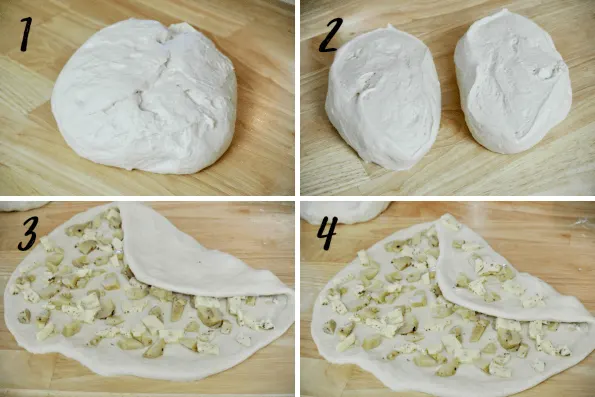
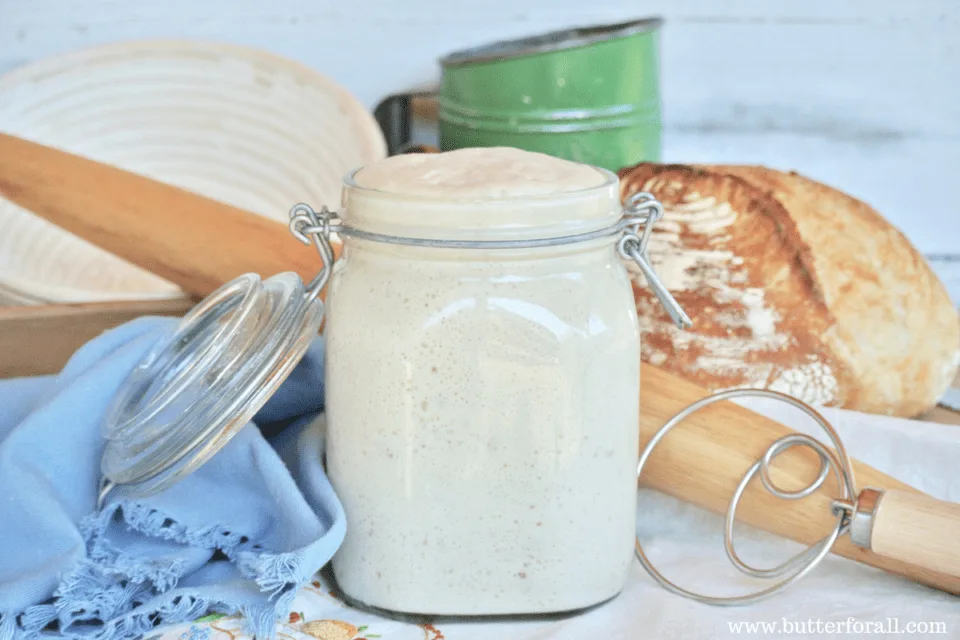
- Start by making a batch of my Chewy Sourdough Pizza Crust. Let it ferment overnight. The next day turn it out onto your work surface.
- Divide the dough in half. This recipe makes two loaves (because trust me)!
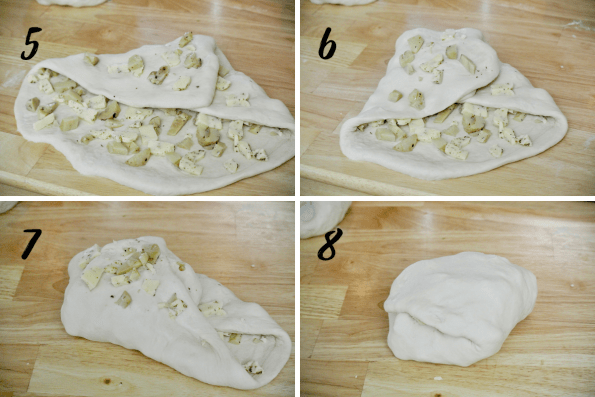
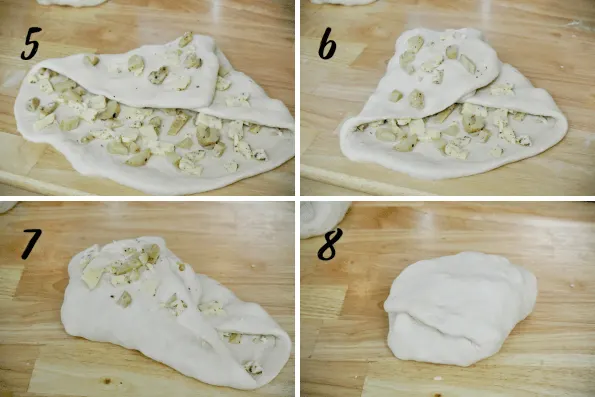
- Lightly flour and roll the first half into a large round. Spread toppings evenly over the round. Make your first fold over.
- Add toppings to the newly exposed dough.

5. Working counterclockwise make the second fold over and add toppings to the newly exposed dough.
6. Working counterclockwise make the third fold over and add toppings to the newly exposed dough.
7. Working counterclockwise make the fourth fold over and add toppings to the newly exposed dough.
8. Make the last and final fold up and over the exposed toppings.
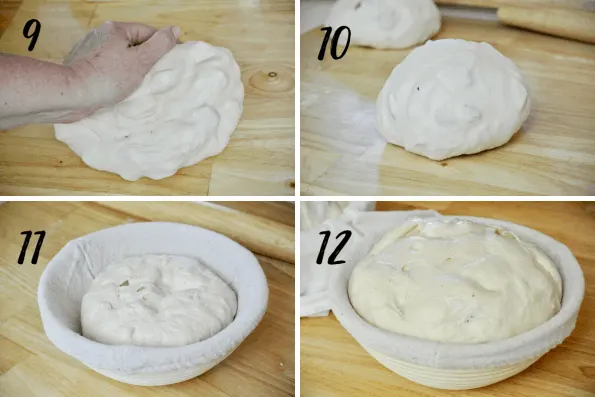
9. With wet hands use a gentle kneading motion to start shaping the dough into a round. Keep the seam side up and stretch the bottom dough tight.
10. Flip the dough seam side down and with wet hands do a little final shaping by gently pulling the dough clockwise and under at the same time. This should help the dough form a tight ball that is sitting on its seam. Let the dough ball rest for 5 minutes on the work surface.
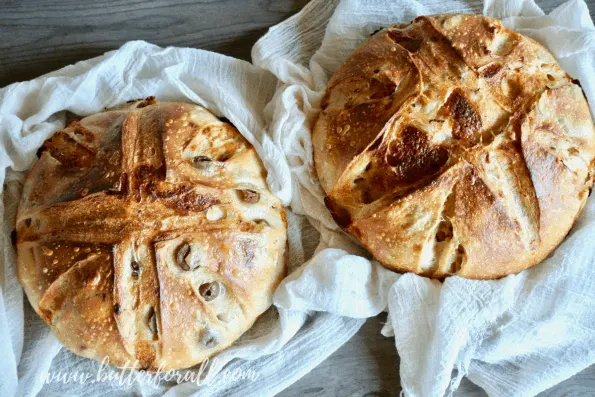
11. Using a banneton with a cotton cover pop the dough in upside down (seam side up) to proof. You shouldn’t need flour if you use the cotton cover. Cover the dough loosely and let it double at room temperature.
12. Once the dough has doubled it will be cresting the banneton and is now ready to bake.

I bake this cheesy pizza bread in my Dutch oven following the same technique that I outline in my post How To Bake the Perfect Sourdough Boule in Your Dutch Oven.
Pro Tip:
Just before scoring, generously wet the dough with filtered water to get a nice blistery crust!
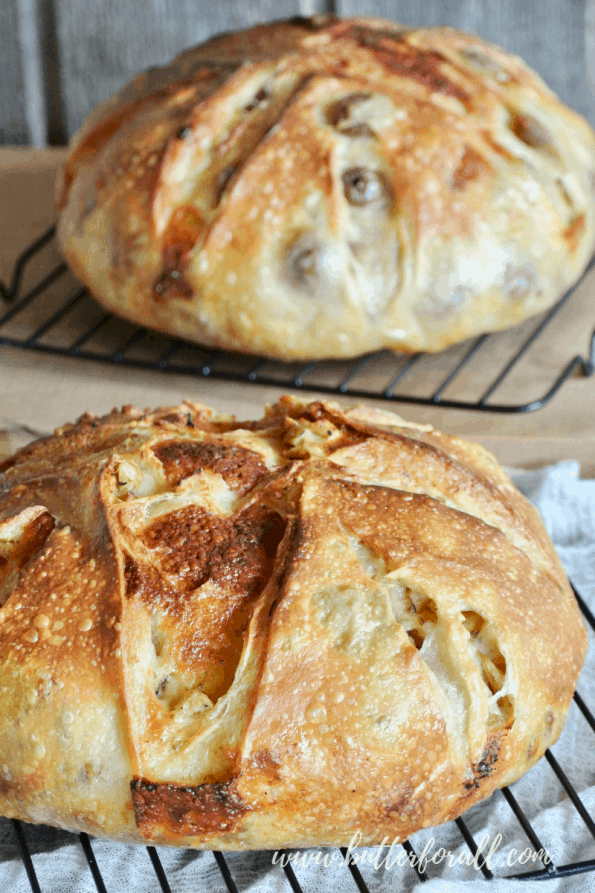

This Cheesy Sourdough Pizza Bread takes pizza bread to a new level. Favorite toppings like artichoke hearts, garlic-stufffed green olives, and fresh cheese curds make every bite a delight. Not to mention the dough undergoes a long fermentation, making it extra easy to digest! 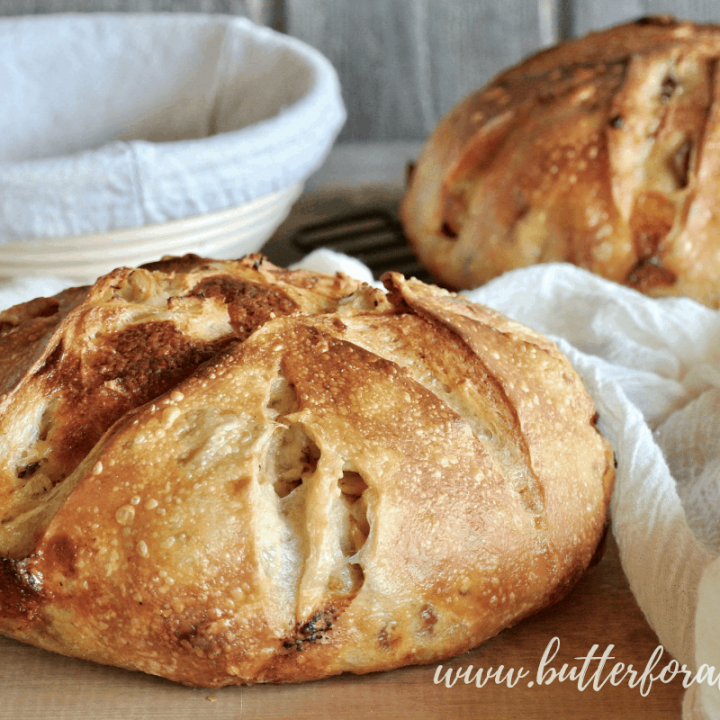
Cheesy Sourdough Pizza Bread
Ingredients
Instructions
The Night Before
The Next Day
Nutrition Information:
Serving Size: 1 grams
Amount Per Serving:
Unsaturated Fat: 0g


Want To Learn Everything About Sourdough?
Start with this free guide:

Denise DelColle
Friday 30th of August 2024
I love the pizza dough. I made two loaves of the pizza dough bread, but it took all day to rise, and then they fell a bit when I took them out of the van to bake them in the Dutch oven. There’s somewhat smaller Then yours. What flour do you recommend. I used organic unbleached AP and mixed about 200 g of bread flour for higher protein content.
Butter For All
Friday 6th of September 2024
Hi Denise,
I think that sounds like a really good ratio for the pizza dough. You could go with 100% bread flour to give you a stronger dough in general. Another nice option would be 100% hard red wheat or sifted hard red if you're looking for more of a whole grain option.
It's possible that you didn't time it quite right, or it may be a sign that you need to work on your sourdough starter so that your bread is proofing faster.
Best of luck next time!
Latia
Sunday 28th of April 2024
Holy smokes, was this ever good!! I can't even tell you how I found your site but I'm so glad I did. This bread was amazing. I made two loaves ("because trust me"). I had my three adult boys and two girlfriends over for dinner (7 of us). When I pulled this bread out and served it with olive oil and balsamic, the first loaf was gone before dinner even started. I sent half of the second loaf home with the boys. I stuffed it with black olives, artichoke hearts, sundried tomatoes, sharp provolone cheese and little mozzarella balls. The loaf was very soft, with a nice, crunch crust. This I will make again very soon and often. Wow!! Thank you so much!! Oh, after I rolled it and filled it and put it in the bannetons, the loaves sat out for a good six hours before I baked them. They had just risen above the banneton edge. I kept waiting for them to rise a little more and it looked like they weren't going to get any bigger, so I baked them. They were perfect.
Butter For All
Monday 29th of April 2024
What a wonderful story! I'm so happy it was such a success. Thank you for taking the time to leave your feedback!
Tara
Thursday 9th of February 2023
Hello! How long once is in the banneton should it take to rise all the way?
Butter For All
Thursday 9th of February 2023
Hi Tara,
It really depends on your starter strength and ambient temperature. But typically, with a healthy starter and a good bulk fermentation, 4-6 hours at room temp. May be faster or slower depending.
Let me know how it turns out!
Courtney
Kate
Wednesday 24th of November 2021
Does this HAVE to be baked in a dutch oven? Could I instead bake it on mu oven stone? Thanks in advance!
Butter For All
Thursday 25th of November 2021
Hi Kate!
Absolutely go for it! You might want to get some steam in the oven either with a pan of water or spray bottle. And follow the directions for the stone on baking temp! Let me know how it turns out!
Best,
Courtney
Mark
Tuesday 11th of August 2020
Instead of fermenting overnight, can I let rise during the day for the 8-12 hours, refrigerate overnight, then bring to room temperature the next day before proceeding?
Thanks
Butter For All
Friday 5th of February 2021
Hey Mark!
I'm not sure why Milan replied here, but the answer is YES! A cold retard will only improve the flavor of this bread!
So definitely go for it!
Courtney
Milan Browne
Tuesday 26th of January 2021
@Mark, No you cannot.