
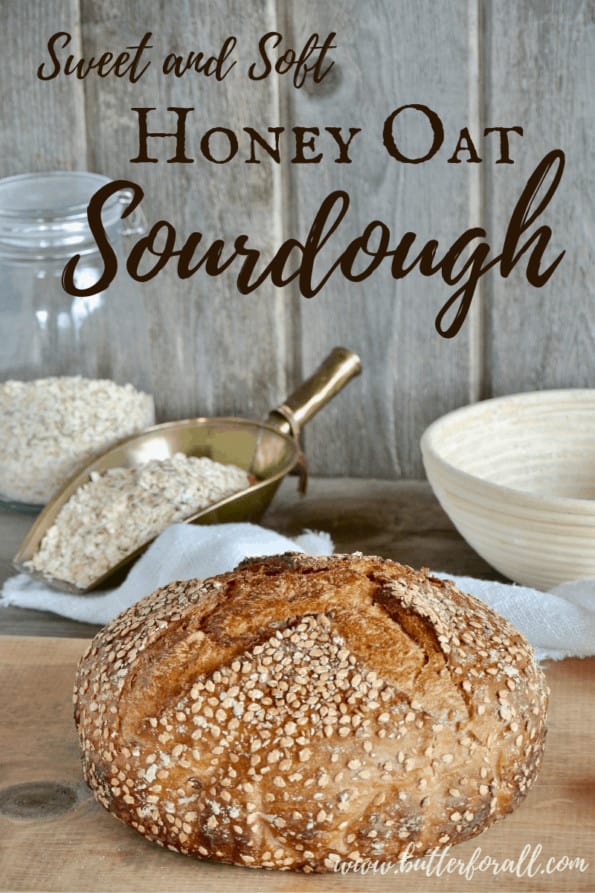
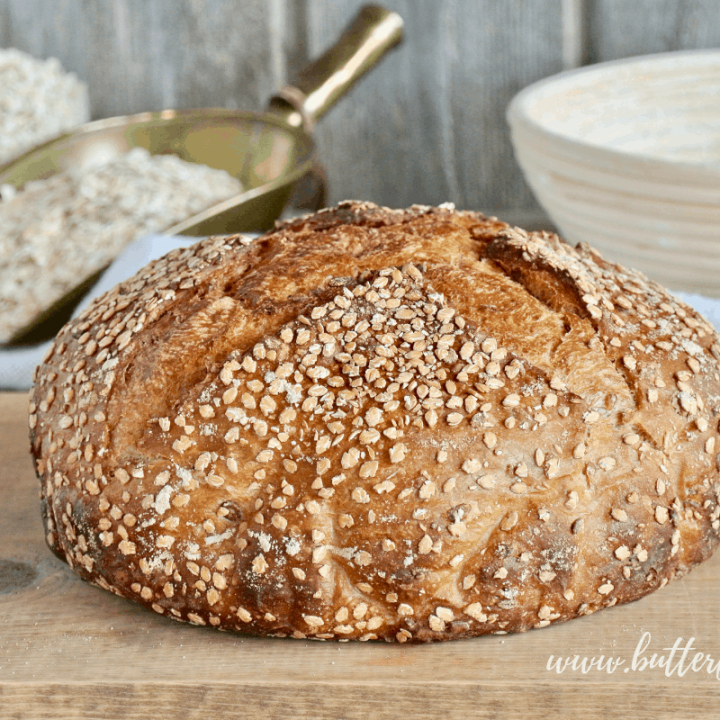
My honey oat sourdough bread has a lot going for it.
If you like crusty, thick, chewy, slightly sweet bread made with whole grains, then this is your recipe!
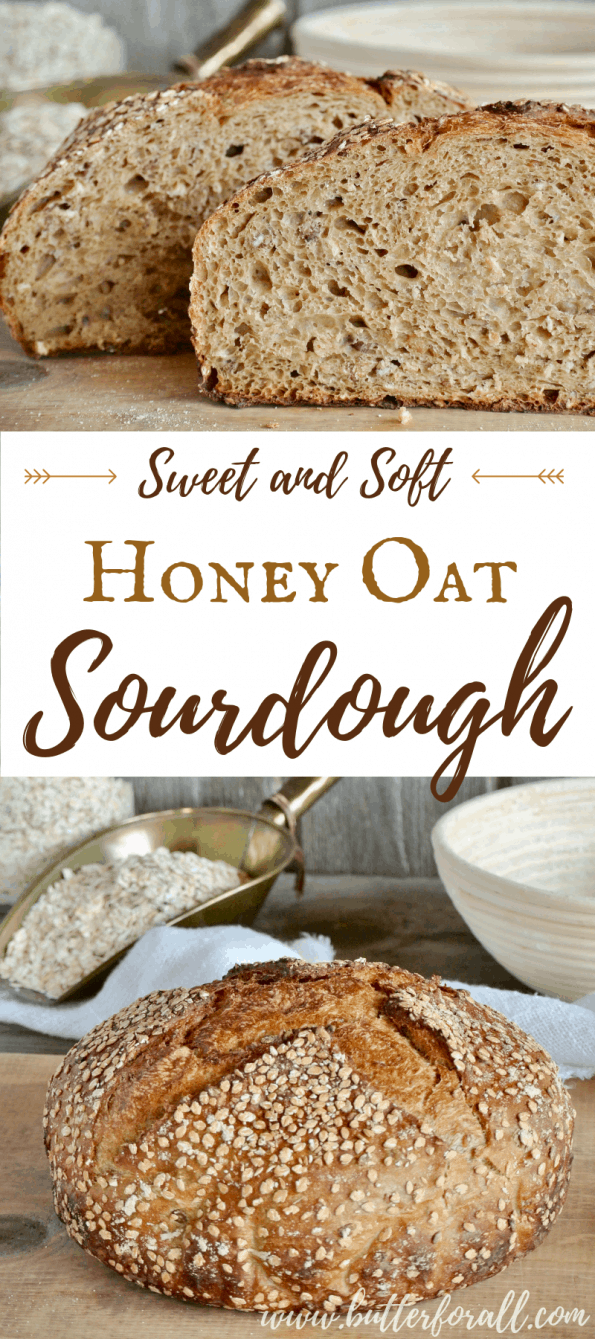
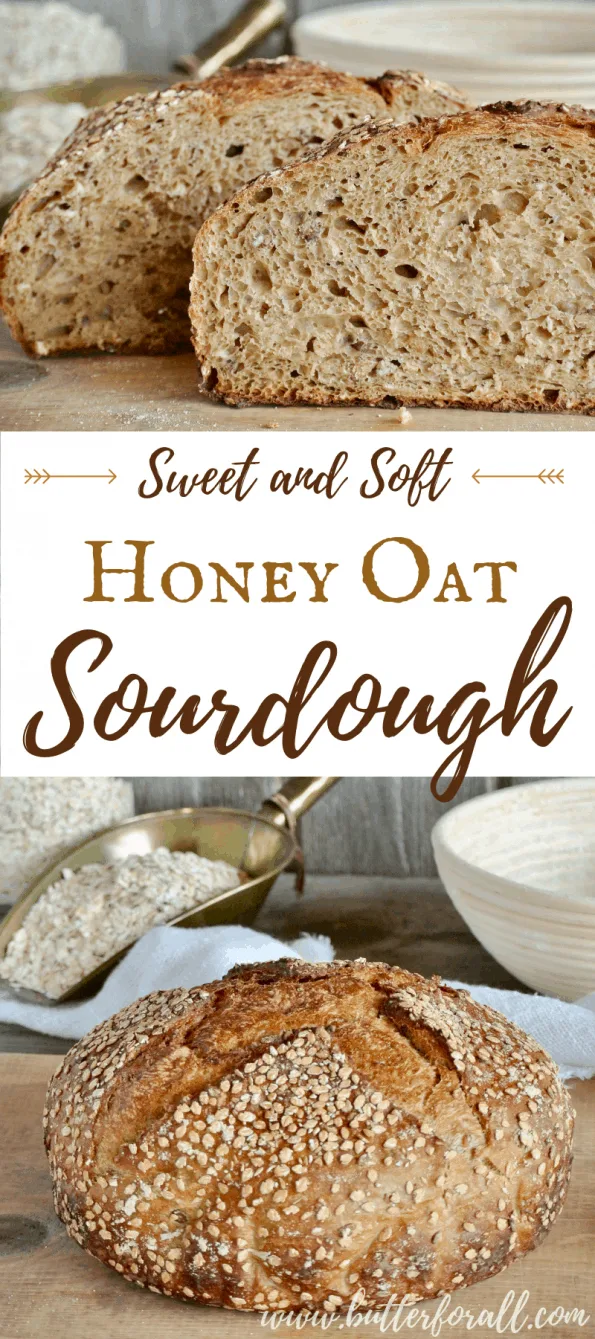
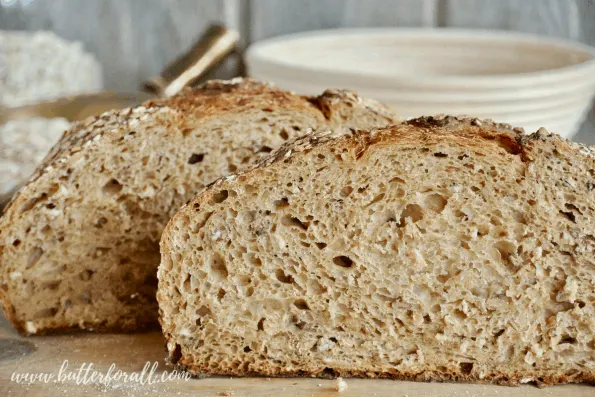
The crumb on this bread is surprisingly airy considering the amount of rolled oats incorporated into it. You don’t have to use only rolled oats, other rolled heirloom grains work really well. I use a combination of rolled oats, rolled barley, rolled rye, and rolled einkorn.
The addition of rolled grains gives this bread a toothy chewiness and a sweet earthy smell. You will not be disappointed!

Finding the Right Grains
I’m extremely partial to my local mill; they grow lots of heirloom organic grains and sell them whole, rolled, or ground into cereals and flours. The good news is, their wonderful selection can be ordered online by visiting Camas Country Mill.
My absolute favorite is the Triple 200 series. I call for this finely sieved whole grain flour in many recipes. It’s similar to whole wheat pastry flour but with a very airy texture and wonderful full-bodied sweet flavor.

Process:
This bread is a high hydration dough. It has extra water and rolled grains added at the time of mixing. It is then left to ferment overnight at room temperature before being shaped and baked in the morning.
I like this long fermentation process because the bread has a chance to fully ferment. This allows the rolled grains to soak up extra water. It gives the lactic acid plenty of time to develop. The high lactic acid development neutralizes phytic acid in the whole grain making nutrients more bioavailable, and it breaks down hard to digest proteins.
Homemade sourdough is the healthiest bread available!


Start Here
If you are a sourdough beginner you might want to start out by reading my free sourdough guide, Demystifying Sourdough – Everything You Ever Wanted To Know About Sourdough Starter – Why It’s Better for You – And How To Start One. This guide will give you so much valuable information on my sourdough process and what I’ve learned by trial and error over the years.
I also have articles about How To Feed Your Starter for Successful Baking and How To Bake the Perfect Sourdough Boule in Your Dutch Oven with videos that will show you how to mix and shape a perfect boule!

Tools of the Trade

This Dutch oven has changed my whole baking game!

A dough whisk keeps hands clean and is great for stretch and fold mixing.

Honey Oat Sourdough
A sweet and soft sourdough bread with rolled grains and honey. This bread makes wonderful toast and incredible French toast!
Ingredients
- 120 grams (3/4 cup) rolled grains
- 200 grams (1 1/2 cup) bread flour
- 200 grams (1 1/2 cup) whole wheat flour - I use a Triple 200
- 90 grams (1/4 cup) raw honey (dark honey works well here)
- 12 grams (2 teaspoons) salt
- 400 grams (1 2/3 cup) water
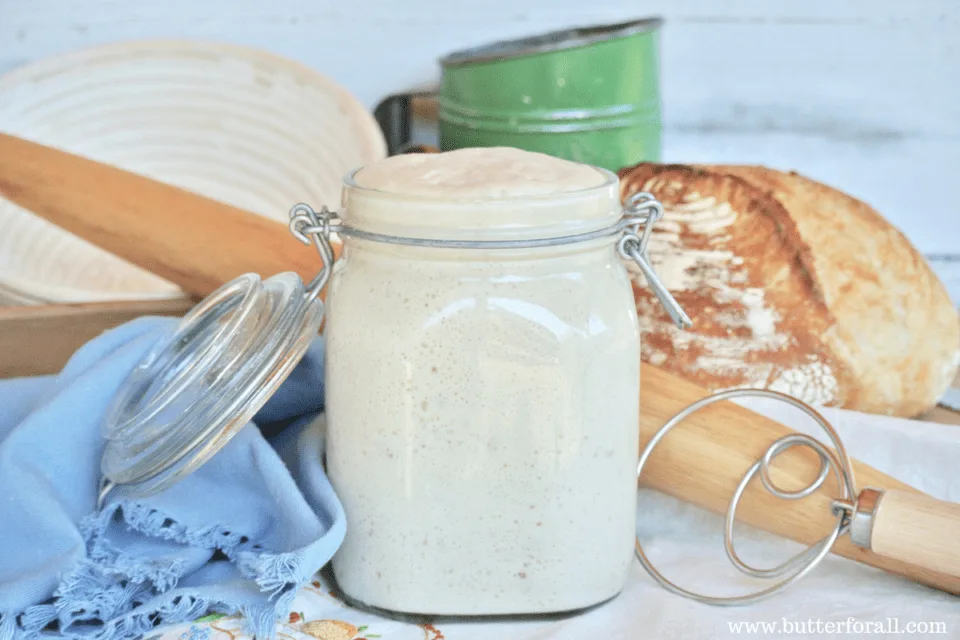
- 250 grams (1 cup) starter at 100% hydration, stirred down
Instructions
The Night Before
- In a large glass bowl mix all ingredients into a wet and sticky dough. I use my dough whisk for this step because the dough will stick to your hands. Let the dough rest for 5 minutes.
- Using the dough whisk do a round of stretch and fold. Let the dough rest for 5 minutes. Repeat this stretch and fold process up to five more times.
- Cover the dough and place it in a warm area of your kitchen. Ferment the dough overnight.
The Next Morning
- Uncover the dough and wet your hands. Do a stretch and fold in the bowl to deflate the dough and start the shaping process. Let the dough rest for 5 minutes.
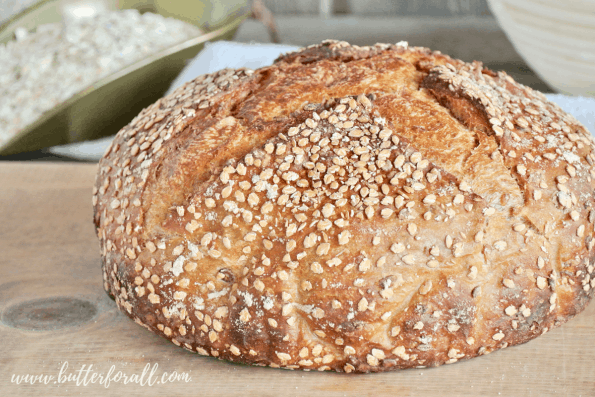
- Spread a handful of oats out on your work surface. Small rolled grains work well – rolled einkorn is pictured. Turn the dough out onto the oats. Make sure the dough lands seam side up on the oats. Quickly shape the dough into a round so that the oats are covering the dough. Place the dough seam side down and shape it further using your hands and the tension of the surface. Leave the dough seam side down on the work surface for a few minutes.
- Prepare your banneton with a light dusting of flour. I use sprouted flour, oat flour, or rice flour as it's less sticky than wheat flour. Place the dough ball seam side up in the banneton and cover it lightly. Let the dough double at room temperature.
- Preheat your oven to 450°F with your Dutch oven inside.
- Cut a square of parchment paper and turn the dough out onto it so the seam side is now down.
- Score the dough with a sharp razor blade. The oats can make it a little tricky to score so I use a nice wide cross pattern instead of something more elaborate.
- Remove the hot Dutch oven from your oven and take the lid off. Carefully pick up the dough using the corners of the parchment paper. Lower the dough into the Dutch oven and replace the lid. Place the Dutch oven back into the oven and bake covered for 25 minutes.
- After 25 minutes remove the lid and continue baking for 15 more minutes. This bread should bake for 40 minutes total.
- Remove the bread from the Dutch oven and parchment paper. Place the boule on a cooling rack and let it cool completely before slicing.
Nutrition Information:
Yield: 12 Serving Size: 1 gramsAmount Per Serving: Unsaturated Fat: 0g
Want To Learn Everything About Sourdough?
Start with this free guide:
Demystifying Sourdough – Everything You’ve Ever Wanted To Know About Sourdough Starter – Why It’s Better For You – And How To Start One

MN
Thursday 30th of October 2025
This is one of my favourite loaves to make and eat! It is a really sticky dough at first like folks have said, but once it ferments overnight, the oats soak up all the liquid and it's easier to work with.
I do find that it needs to bake longer than the recipe says, I do 30 minutes covered and 25-30 uncovered and it comes out perfect. It's also a nice big loaf, it's a good payoff for the effort, although it disappears fast in my house.
Gonna go toast up a slice of it right now- thanks for the recipe!
Butter For All
Wednesday 19th of November 2025
Hello MN, This is such valuable feedback, thank you so much for leaving it for everyone to benefit from! It's always a good reminder, with any recipe, that time and temperature will vary based on your elevation and equipment!
Rachel
Monday 19th of May 2025
Have you left in fridge and then risen? I mixed, performed stretch and folds but, rather leave out overnight and bake in morning, I’d like to stash in fridge and pull out in morning to rise so I can bake for evening meal. Thoughts?
Butter For All
Wednesday 25th of June 2025
Hi Rachel, It is totally acceptable and encouraged to adapt the recipe this way. A good baker understands how to manipulate the fermentation time of a recipe. So mixing your dough and allowing it to do a slowly bulk proof in the refrigerator is perfectly acceptable so that you can bake the next evening. I think it's a great plan! Happy baking :-)
Carol
Thursday 20th of March 2025
I am a little confused on this recipe. In the beginning, you say to mix all ingredients together and then mix up to five times… Five times at what extent of time between. You also mention later in the recipe that we should allow the dough to come up to room temperature but nowhere in the recipe. Does it tell you to refrigerate the dough so I am a little confused about that. Can you please clarify
Marissa Ackerson
Tuesday 29th of July 2025
@Butter For All, approximately how long does it take for the dough to double at room temperature?
Butter For All
Friday 21st of March 2025
Hi Carol,
In step two "Using the dough whisk do a round of stretch and fold. Let the dough rest for 5 minutes. Repeat this stretch and fold process up to five more times". You let the dough rest 5 minutes between each stretch and fold.
There's no Refrigeration called for in the recipe. I just recommend you go back and reread through the recipe again because I'm not seeing anything about letting the dough come up to room temperature. It says "let the dough double at room temperature".
Sorry for the confusion, please let me know if you have any more questions.
Mandy
Tuesday 24th of September 2024
This recipe is a favorite of my whole family! The instructions were succinct, and led to many successful loaves. My husband has been begging me to bake another one soon. Thank you for the delicious recipe!
Mandy
Sunday 29th of December 2024
@Amelia, Yes, I followed the exact recipe. Today I split the dough in half to bake two separate loaves. I wanted to have a smaller one to gift to my parents. We'll see how they turn out.
Amelia
Tuesday 5th of November 2024
@Mandy, do you use the full amount of water? Mine wouldn't keep it's shape.
Butter For All
Sunday 29th of September 2024
Hi Mandy!
I love hearing feedback like this! This is one of my favorite recipes too and so many people struggle with it. It's so wonderful when somebody hits it just right! And I super appreciate you leaving feedback so that others know that it does actually work! Thanks so much :)
Brittney
Saturday 29th of June 2024
Hello!
I am just wondering if you have made this with a stone milled unenriched bread flour and what the results were if so? I am trying to use cleaner flours in my baking and it has been a LEARNING CURVE. Hoping to get advice before trying and failing again!
Butter For All
Monday 1st of July 2024
Hi Brittney,
I'm not sure if you are referring to freshly milled flour or not, but if so, yes, freshly milled flour requires some special treatment. The gluten is not as strong in freshly milled flour so the structure can break down with over handling or over proofing. Adjust hydration as needed, use a light touch and watch your bread closely.
If you are buying stone ground bread flour, it should be pretty strong. You may need to adjust hydration though, as with any recipe. Aim for a dough you can handle easily the first time you make this bread. Once you get the feel for it you can up the hydration as desired.
Good luck! Let me know how thing turn out!