
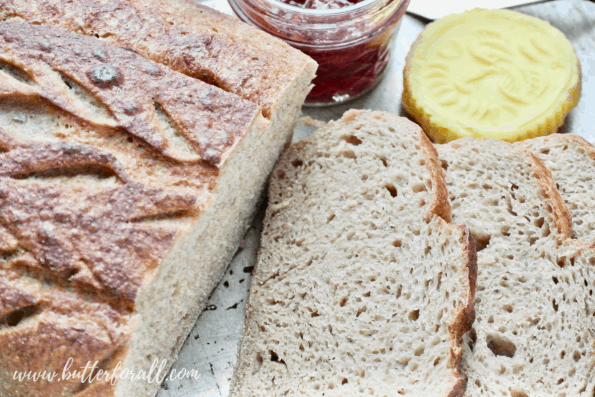
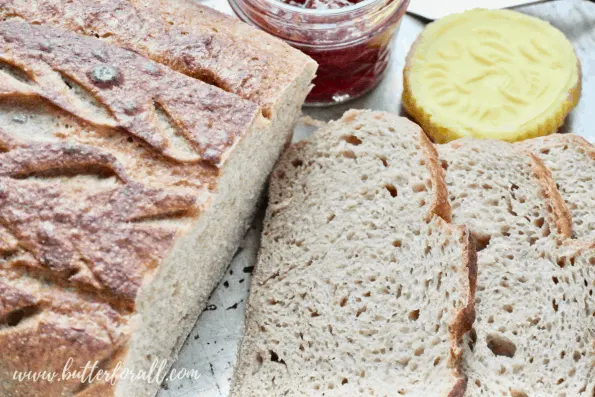
If you are looking for a whole wheat sourdough bread recipe that is super soft and lofty, then this is your ratio.
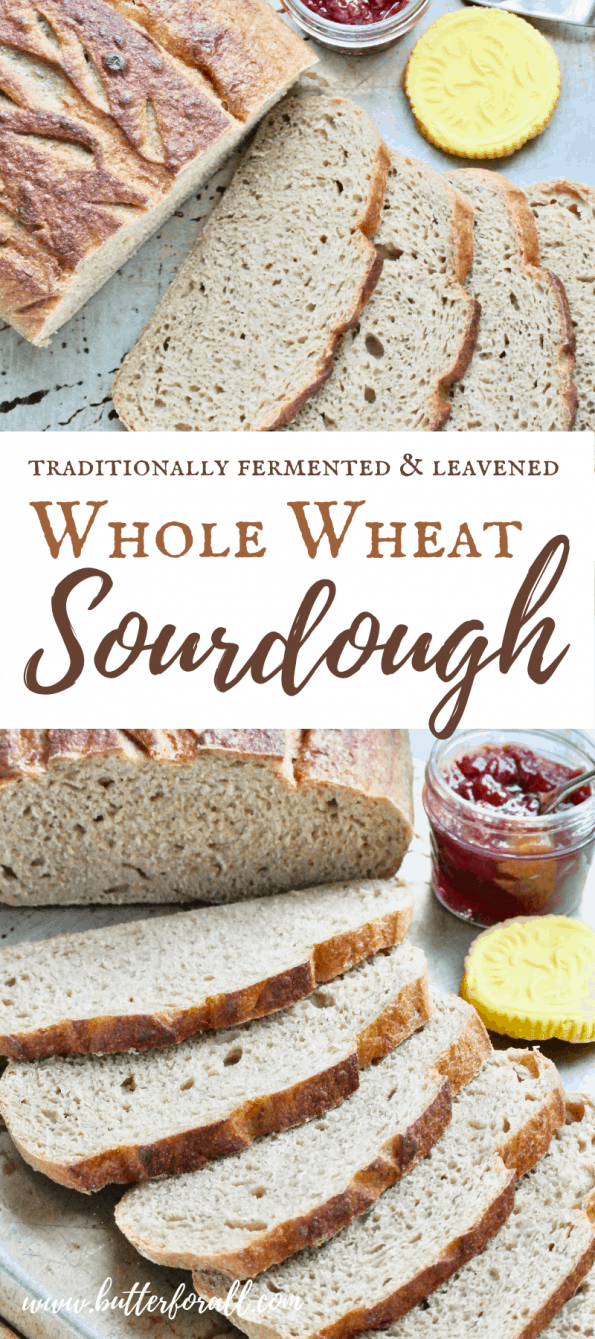
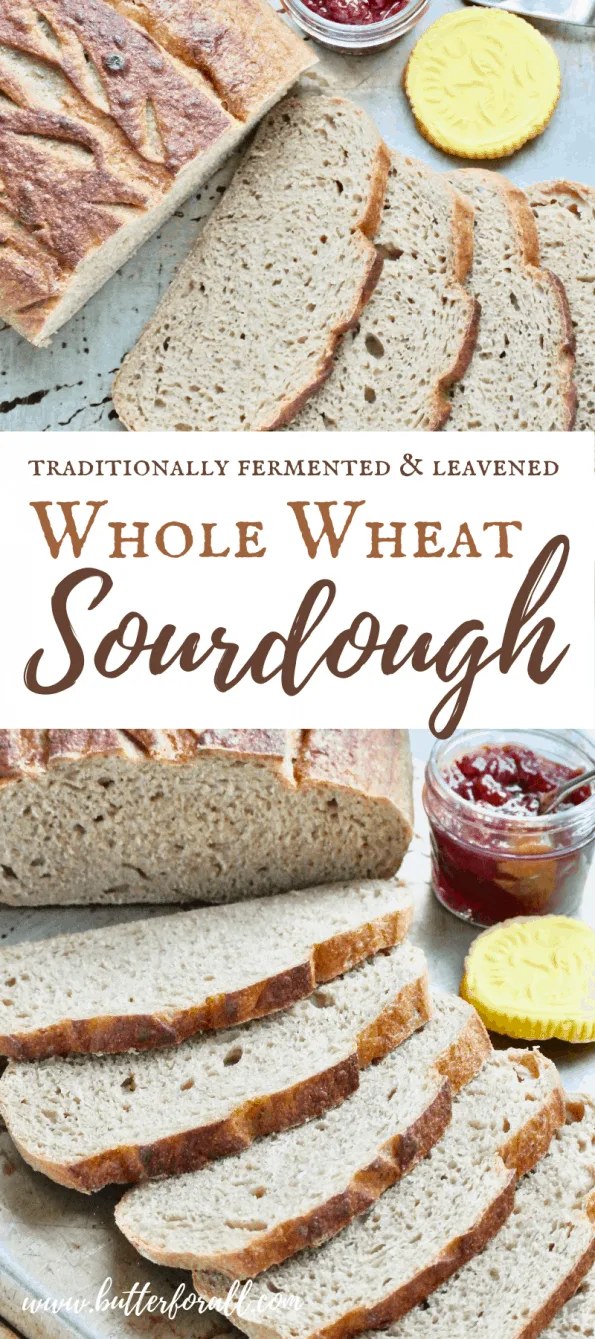
Getting a whole grain loaf to cooperate can be tricky. They are often dense, and sometimes they can even feel undercooked. I have come up with a great formula that produces a very soft and springy loaf with all the great flavor of real whole grain. The secret lies in the flour.
The Right Flour Is Essential
I like to use an ultra-fine sifted whole wheat flour for this recipe. It is similar to a whole wheat pastry flour. The wheat is ground very fine and then passed through a sieve to remove any large pieces of bran.
Straight-grind whole wheat will also work well but it might not have a crumb that is quite as light and airy as the sifted flour does. Stone ground or home ground wheat will have a wonderful flavor and texture in this recipe. Play around with different grinds until you find your own personal favorite!
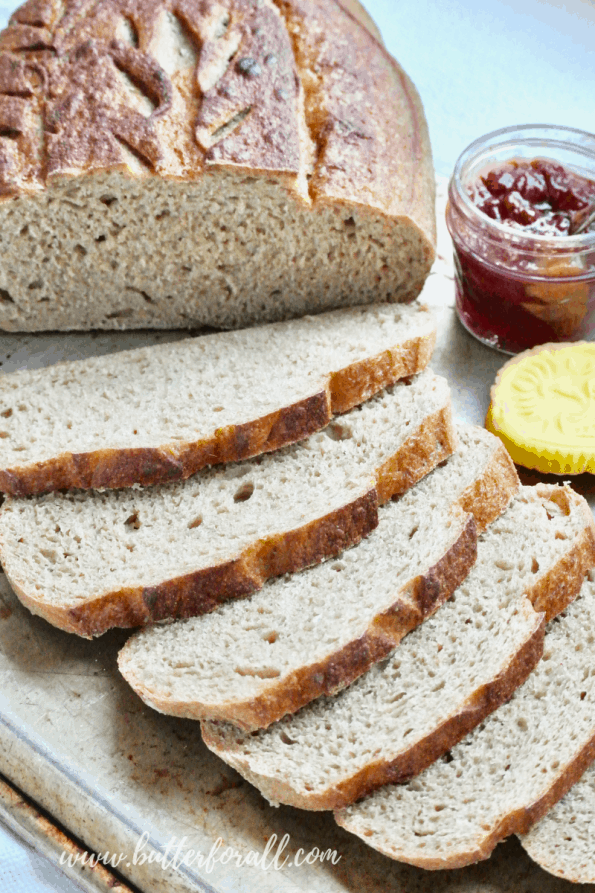


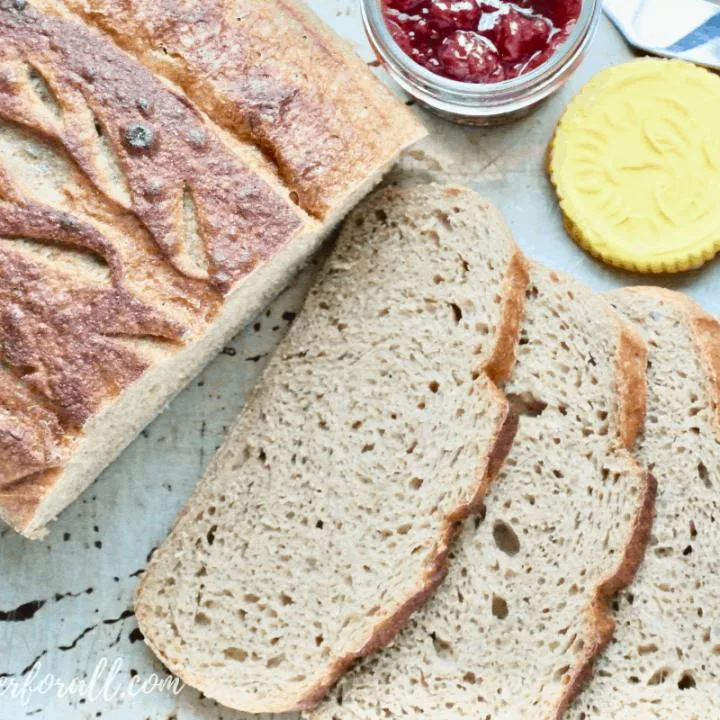
Whole Wheat Sourdough Bread
The perfect formula to make a soft and light loaf of honey-sweetened whole wheat sourdough bread.
Ingredients
- 475 grams (4 cups) whole wheat flour
- 350 grams (1 1/2 cups) water
- 12 grams (2 teaspoons) salt
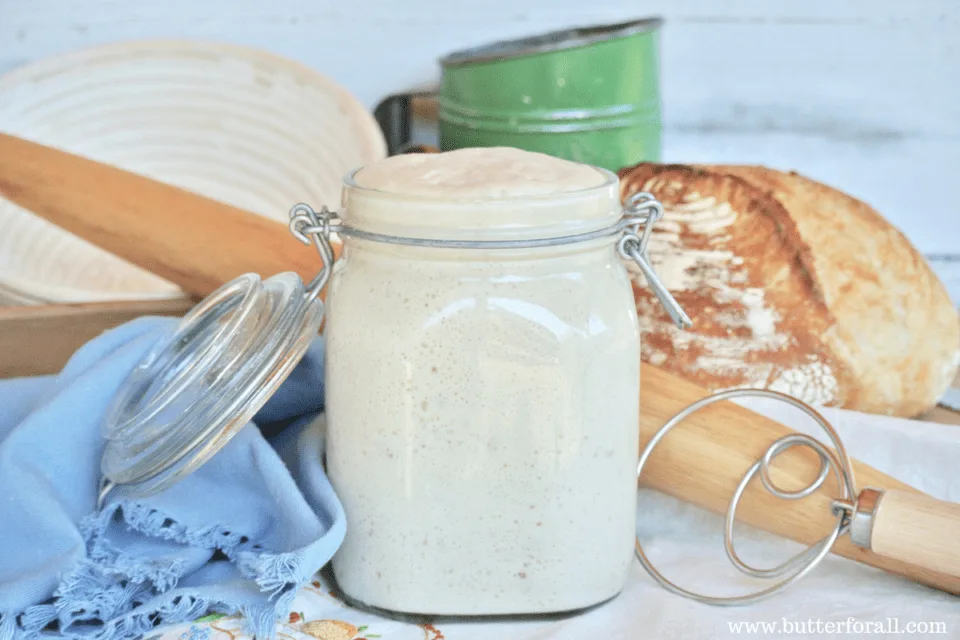
- 250 grams (1 cup) sourdough starter, 100% hydration, stirred down
- 95 grams (1/4 cup) honey, optional
For Dusting
Instructions
The Night Before
- In a large bowl mix all ingredients into a shaggy dough.
- Use wet hands to knead the dough in the bowl just until it comes together.
- Let the dough rest for 5 to 10 minutes.
- Do a series of stretch and folds in the bowl as shown in this video. Repeat the stretch and fold process four to five times, waiting about 5 minutes between each stretch and fold turn.
- Cover the bowl and let the dough ferment overnight at room temperature.
The Next Morning
- Do one stretch and fold in the bowl to deflate the dough.
- Lightly flour your work surface (I like to use sprouted whole wheat flour for this step) and turn the dough out onto the flour.
- Shape the dough into a loaf by patting it into a thick rectangle. Pull the top towards the middle and use your fingertips to seal the seam. Flip the dough around and pull what was the bottom third down over the seam, again sealing it with your fingertips. Crimp the ends of the loaf and pull them toward the center just a little bit. This should give you a thick log shape. Let the loaf rest seam side down on the flour surface for 5 minutes.
- Place the dough seam side up in a generously floured (again sprouted flour works best) brotform banneton. Cover the dough with plastic wrap and place the dough in the refrigerator for 6 to 48 hours or let it rise at room temperature until doubled.
- Preheat your oven to 400°F with a baking stone inside. Alternatively, you can bake the loaf in a clay baker (by following the manufacturer's instructions) or Dutch oven at 450°F.
- Cut a piece of parchment paper to fit the loaf and turn the proofed dough out onto the parchment.
- Score the top of the loaf with a lame, razor blade, or sharp knife.
- Move the loaf to the oven or clay baker using the parchment as a sling.
- The bread will benefit from a heavy spray of water on the raw dough at this step. Alternatively, you can place a pan of steaming water on a lower rack in the oven.
- Bake the bread for 35 to 40 minutes, spraying it with water one or two more times 5 to 10 minutes into baking. If you have added honey to the recipe the bread will darken quickly. If the bread is getting too dark place a sheet of parchment over the top of the loaf. If you are using a covered baker of any kind, bake with the lid on for 25 minutes, and off for 15 minutes.
- Remove the bread from the oven and allow to cool on a wire rack completely before slicing.
Notes
This recipe makes a large batard-style loaf. You can split it between two small loaf pans if you want a smaller sandwich-size loaf! Bake smaller loaves at 400ºF for 30 minutes.
Recommended Products
As an Amazon Associate and member of other affiliate programs, I earn from qualifying purchases.


Nutrition Information:
Yield: 12 Serving Size: 1 gramsAmount Per Serving: Unsaturated Fat: 0g
Want To Learn Everything About Sourdough?
Start with this free guide:

Emily
Monday 2nd of October 2023
Hi,
If I choose to have my bread proof in the fridge for 6-48 hours, when I pull it out of the fridge, do I let it come to room temp or rise more at room temp? Or do I bake it directly from the fridge?
Thanks, Emily
Butter For All
Thursday 12th of October 2023
Hi Emily!
It really depends on what has happened in that time. Sometimes, and with some starters the bread will continue to rise in the fridge and might be completely ready for baking right away. Other starters tend to slow down or stop rising completely in the cold and will need to be brought to room temperature and allowed to complete rising before baking. It really depends on your culture, and your environment. You can send me photos of the bread dough and I can help you decide if needed! courtney@butterforall.com 😊
rodney
Wednesday 14th of September 2022
I just made this recipe for the first time and it came out perfectly. Very tasty and really good with butter 9of course) and home made pepper jelly.
Butter For All
Sunday 18th of September 2022
Yes! I love it when that happens! Your pepper jelly with butter sounds delish :)
Another Liz
Saturday 10th of April 2021
Bread dough made from this recipe is rising in refrigerator as we speak. I have made all my bread for 50 years, but just started being successful with sourdough this year :) I have found that I can only eat fermented bread, but get tired of the taste of sourdough. I have perfected 100% Whole Wheat English Muffins that (usually) don't taste at all sourdough. I make them because we are full-time in a tiny travel trailer and the oven is too small LOL. Bought a new countertop oven, so I will be trying your bread recipe for the first time. I hope it will be successful, sounds good and worked up great. Thank you for the video on folding, it made it much easier AND I just ordered the Danish whisk w/lame that you recommend below this article. I will have it Sunday! Thank you so much for taking the time to write out your recipes and help us newbies with our sourdough journey!
Butter For All
Sunday 11th of April 2021
Hi Liz!
It sounds like you are on a wonderful sourdough journey! It may take a few loaves to perfect the baking time and temp of your new oven, and note that this makes a large loaf, it could potentially be split between two small loaf pans for easier access. I can't wait to hear how it goes. Thanks so much for taking the time to write in ❤️
Courtney
Brenda
Wednesday 17th of February 2021
Some recipes call for a bulk ferment at room temp and then a second fridge ferment and others only do one ferment. What is the reason behind 1 or 2 ferments? I started making sourdough last year and love it but was always confused on the amount of starter to use in feeding so I've been doing 1:1:1. No one said an actual amount until I found yours for 140g starter to 200g flour, 200g water, keeping the starter at under 50%. It finally dawned on me that 1:1:1 means the starter IS 50%: 400g flour/water + 200g starter = 50% starter. So that's what I've been doing although in smaller quantities but I never understood it completely and I always NEED TO KNOW! So I'm at peace now and understand the process better. That was always the missing link for me. Love your rosemary discard crackers!
Butter For All
Wednesday 3rd of March 2021
Hi Brenda!
What you describe here is just personal preference. There are so many ways to be successful with sourdough. Some people have quick starters that work fast and they like the mild flavor that provides. Some people, like me, keep their starters in the fridge and let them work a little slower. Overnight bulk followed by a second rise in the fridge or on the counter provides ample time for the bacteria in the starter to do its job breaking down protein. It all really depends on your starter, your preference, and your schedule! Sourdough is super adaptable, you can "train" your starter for different results fairly quickly. Over time you develop a personal style. That's all it is.
So glad you love the crackers!
Hope all this helps,
Courtney
JULIA
Friday 4th of December 2020
THANK YOU THANK YOU THANK YOU!! YOUR VIDEO IS FANTASTIC! I have been wanting a whole grain SD and you have done it for me! Please tell me how to add inclusions! 1) How much do I add (in weight) and 2) where in the process do I add them and 3) how do I get them evenly distributed in the loaf. MILLION THANKS AGAIN.
Butter For All
Saturday 5th of December 2020
Hi Julia!
I'm so glad you like it! Thanks for the nice feedback! So for inclusions, you can add as much as you want, but I try not to go over 50% of the total bread weight. If you add too much and the bread won't rise correctly. For seeds, nuts, rolled oats, and dried fruits, I add them at the time of mixing because I like them to ferment with the dough. But for cheese, delicate fruits, or olives I add them during shaping. You flatten the dough on your work surface and spread it with the ingredients (kinda like topping a pizza), then you fold the sides in and add more toppings to the exposed dough, you continue doing this until the dough is rolled back top into a ball. See my Pizza Bread recipe for photos outlining the process! - Cheesy Sourdough Pizza Bread When you add your inclusions during mixing they are by default pretty well distributed, the above process should also give you good distribution!
Hope that helps!
Courtney