
Let’s be honest. Pie crust can be a tricky little devil.
So, in this post I’m going to share my tips for making a perfectly flaky, beautiful crust for every pie!
It’s ALL About the Pie Dough.
This is the number one, most important aspect of making a superb pie. The crust needs to be strong enough to hold up while rolling and shaping but flaky enough to melt in your mouth with every bite.
I’ve tried lots of different dough recipes and none can live up to my family’s recipe. It was one of the first recipes I ever published on Butter For All, and for good reason, it’s the best pie dough I’ve ever had! My mom used to make all our holiday pies with this recipe so it has a very nostalgic taste. But it actually came from my Aunt on my Dad’s side who got it from her mom. Before that I’m not sure of the origin. But what I do know is I’ll never mess around with any other crust if I’m making a traditional sweet or savory pie. So now you want to know, what is this magical pie dough and where can I get the recipe? Let me introduce you to The Ultimate Lard Pie Crust. Yep, you read that right…lard! Lard is the best fat for making a pie dough short and flaky. Trust me.

I have used butter in place of the lard in a pinch and the dough was delicious but it didn’t have the same melt-in-your-mouth texture that the lard gives.
So your task is to find a great source for healthy lard, preferably from hogs that have been on pasture without commercial feed or intervention. If you don’t have a farmer in your area who can supply you with healthy lard I would recommend these as a replacement.


Have a Sourdough Starter? You Can Make a Sourdough Pie Crust!
Sweet and Buttery Sourdough Pie Crust!
Prefer Sprouted Wheat? I Have a Recipe for Sprouted Wheat Pie Crust as Well!
Perfect Sprouted Whole Wheat Pastry Crust
Take It SLOW.
Pie crust cannot be rushed. The dough needs time to chill correctly and absorb the liquids in the recipe. It needs to come to just under room temperature before rolling and it needs to be handled delicately. All of these things take time, so plan accordingly and make your pie dough a day before you need it. Give yourself plenty of time to roll and put the pie together before baking. I’ve rushed pies in the past and it has never worked out well.
Get Your TOOLS and INGREDIENTS Right.
Use a really good rolling pin. This actually makes a huge difference. I recommend these.

Have a nice pie plate or two to bake in. Never cook in aluminum! Here are a few that I use and recommend.
Make sure you have fresh, organic flour. All-purpose works best for this recipe. Make sure your lard and eggs are fresh. Make sure your fruit is at its peak of the season and your spices are fresh and tasty.


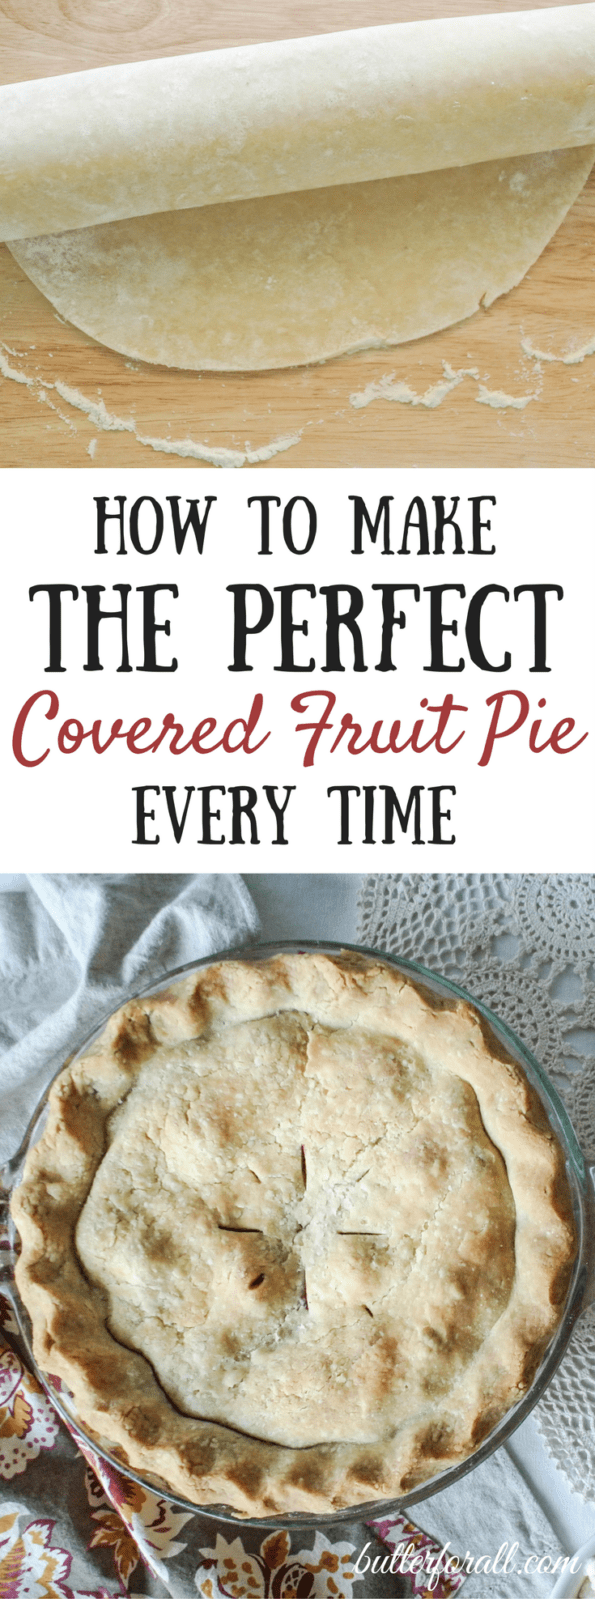
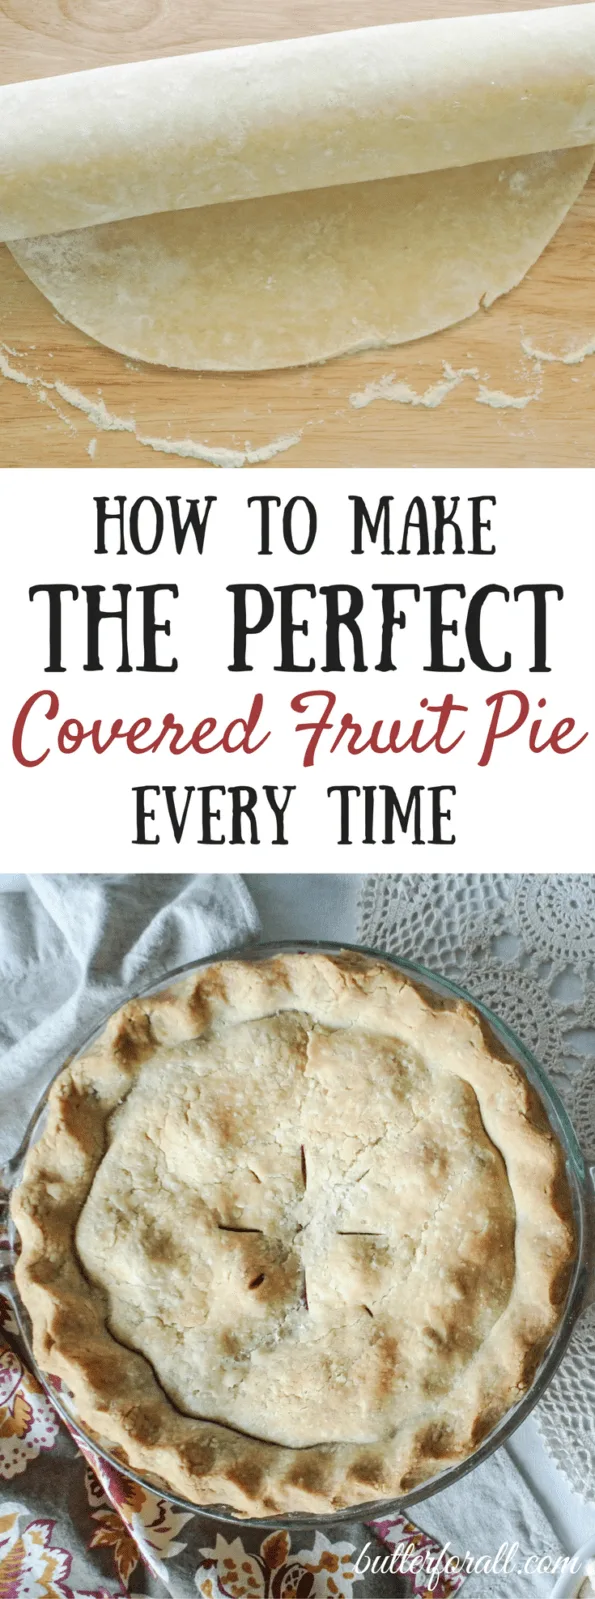
Now Let’s Take a Look at How a Covered Pie Comes Together.
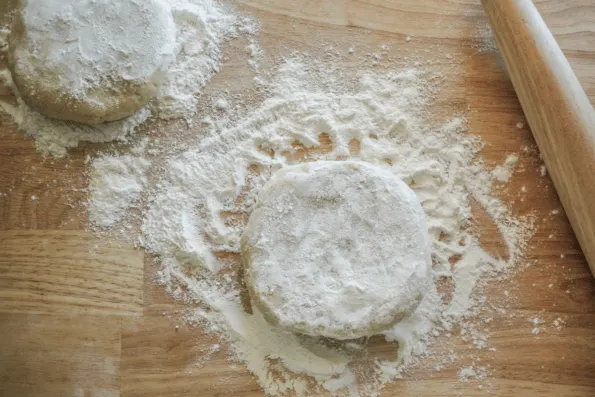
You’ve made your dough and it has rested in the refrigerator for at least an hour. I prefer to rest my dough overnight. Take the dough from the refrigerator and let it set out on the counter until it’s cool but not cold. Some pastry crusts (like my sprouted whole wheat) should be room temperature. Mix your fruit filling and set it aside. Preheat your oven to 375°F.

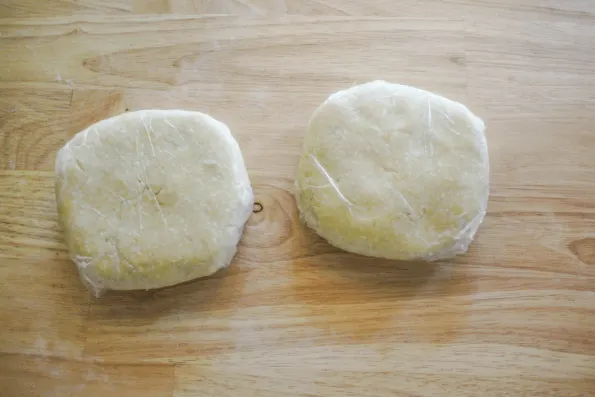
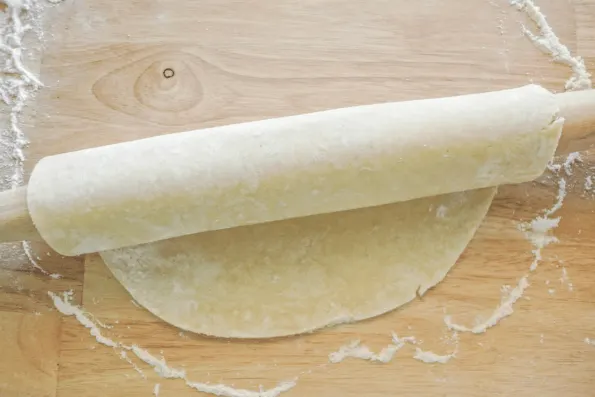
Flour your work surface and unwrap the disks of dough. Flour both sides of the dough before starting to gently roll the dough out from the center. Make sure to turn your dough often to make an even circle.

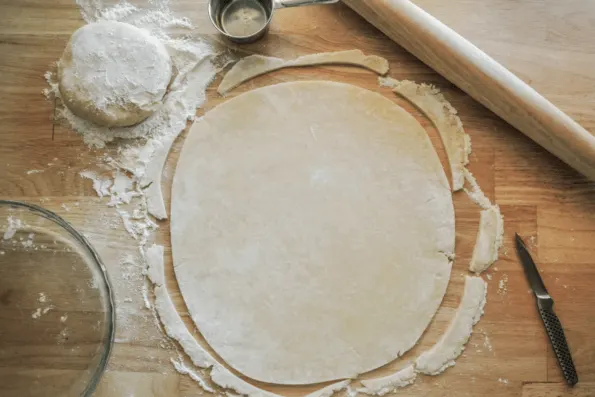
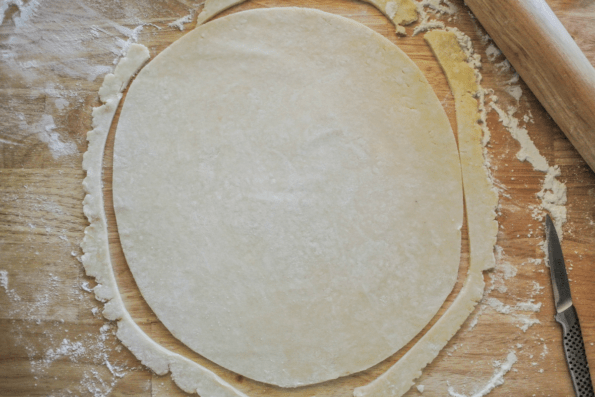
Roll the dough out until it is several inches bigger than your pie plate.
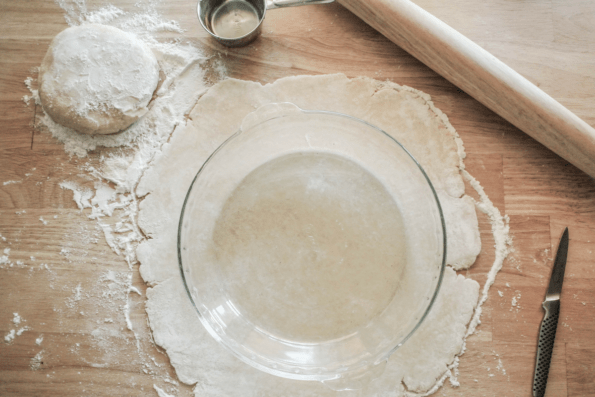

Trim the outer edge off the dough with a sharp paring knife. This will make it much easier to seal and fold later.

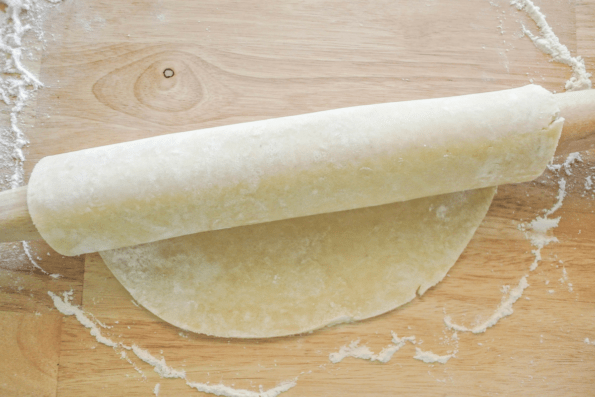
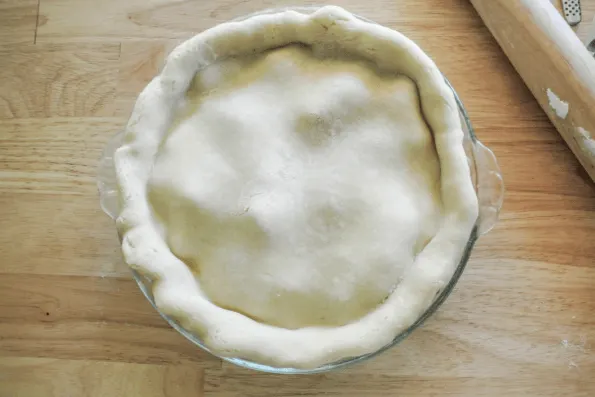
Using your rolling pin start at one edge of the dough and roll it over the pin. This will help support the dough when it’s transferred to the pie plate.
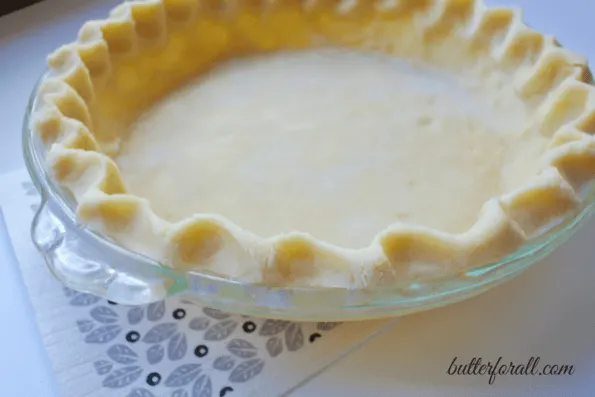
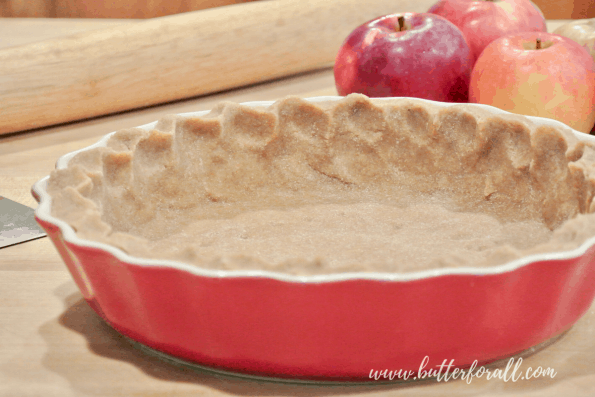
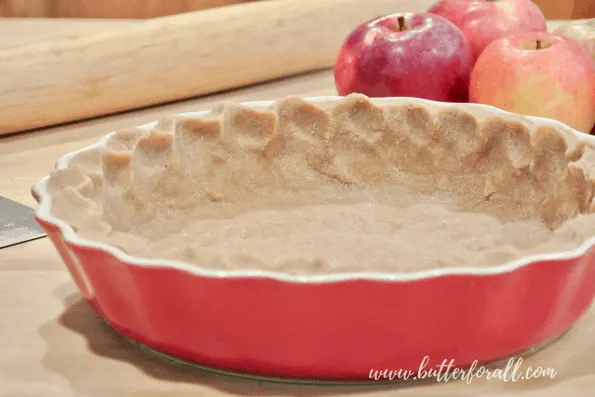
Gently lift the dough and set it into the pie plate. Make sure the edges overhang evenly. If the edge rips you can use a tiny drop of water on the dough to crimp it back together.
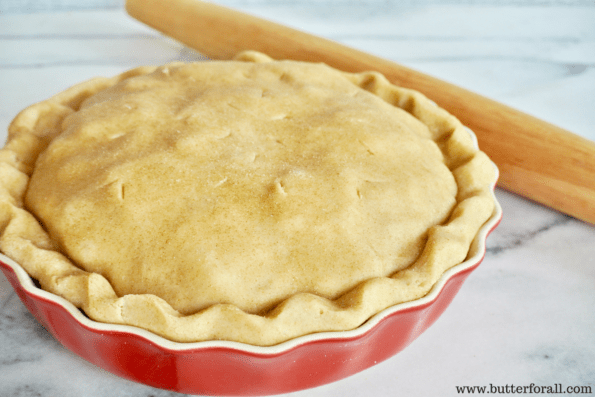
Now set your bottom crust aside and start to roll the top crust in the same fashion. Again roll out the crust a few inches bigger than the pie plate and trim the ragged edge.

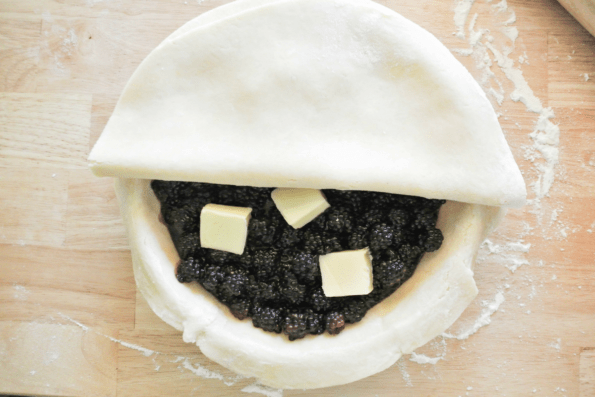
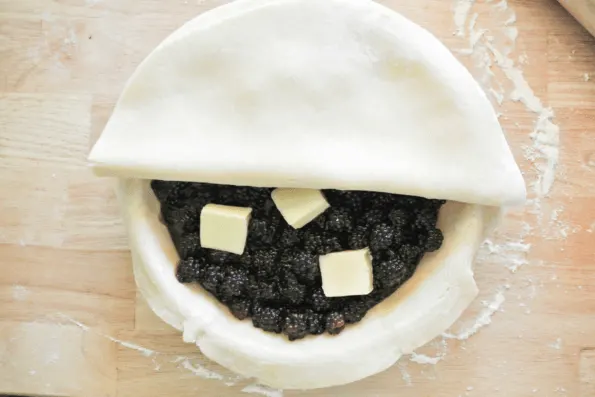
Fill the bottom crust with your fruit mixture and dot it with the butter.
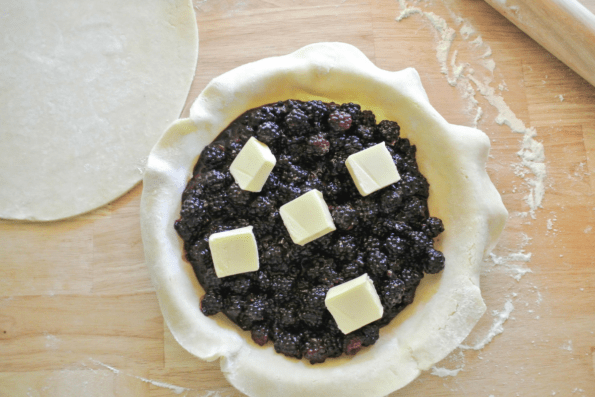
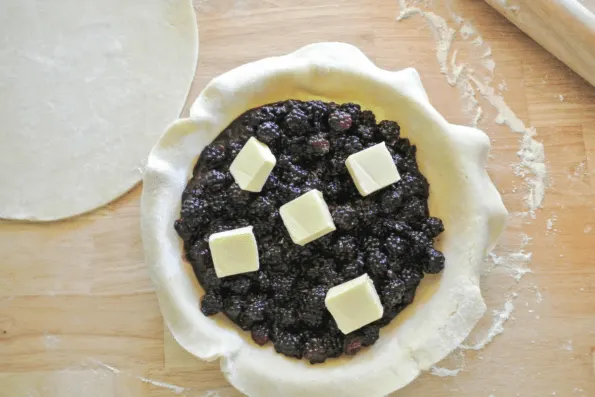
Using a pastry brush or your fingers run some water around the edge of the crust where it overhangs the pie plate. You want it to be slightly sticky but not outright wet. Transfer the top dough using the same rolling pin method as above. Gently line up the dough so it matches the edges of the bottom crust.
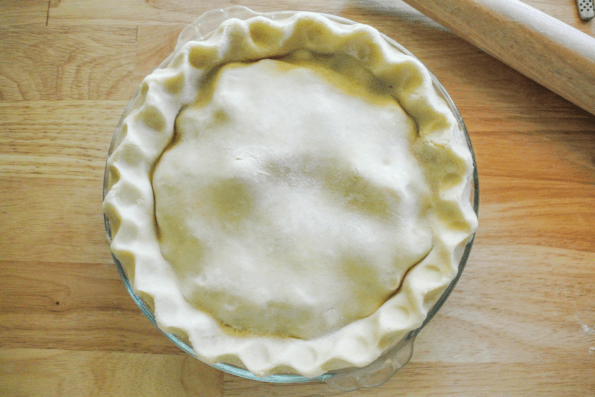
Crimp the dough gently with your fingers to seal the crusts together.
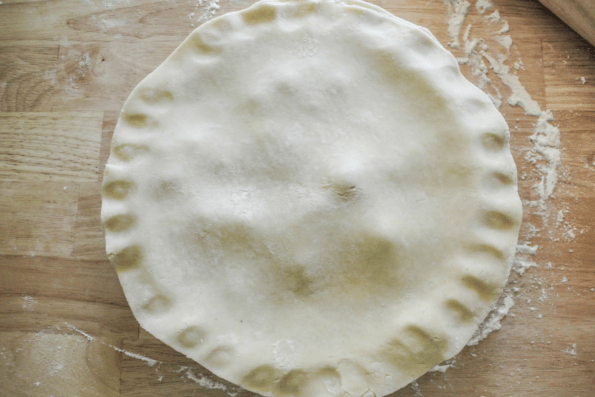

Pick up a small section of the edge of the dough and tuck it under itself. Tuck the entire edge one small section at a time.


This will give you a thick, smooth crust.

Using the pointer knuckle and thumb of your right hand and the thumb on your left hand, make a nice even crimp around the thick part of the crust.

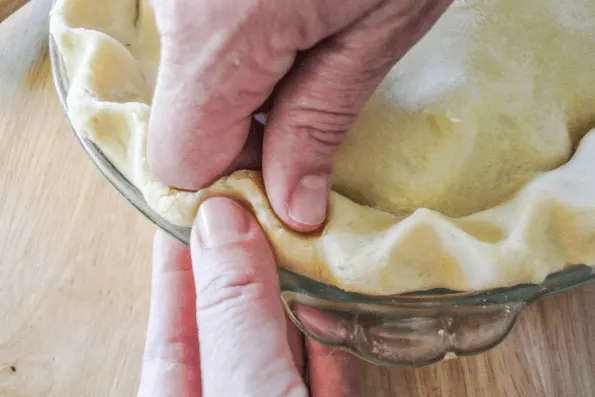
Crimping the edge helps seal the pie and gives it a distinctive country look.

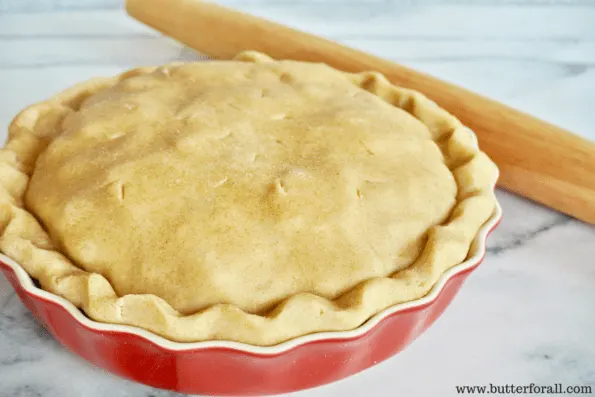
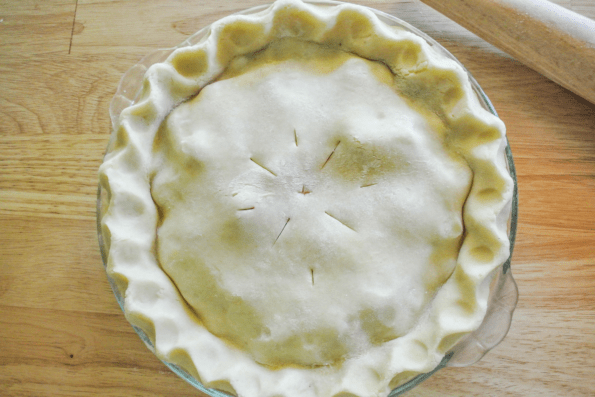
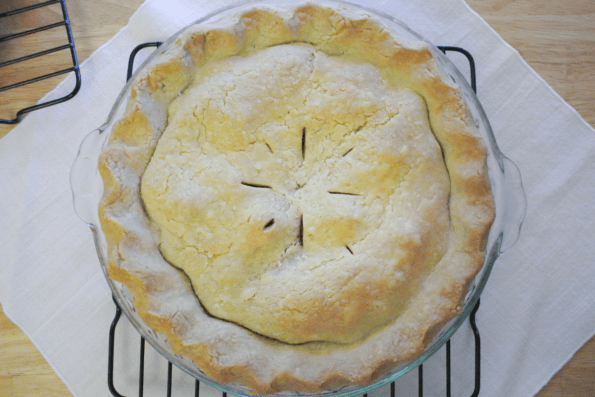
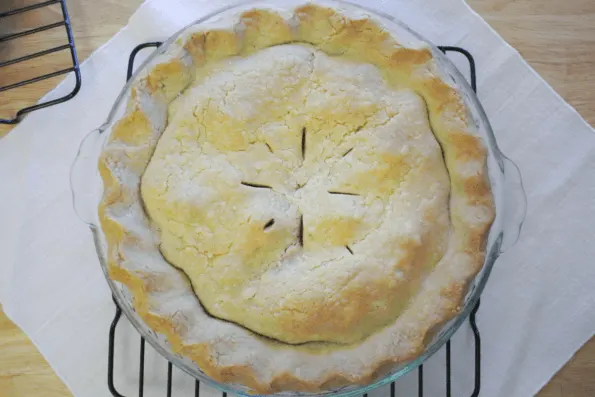
Now take your pairing knife and cut a few steam vents in the top of the pie.
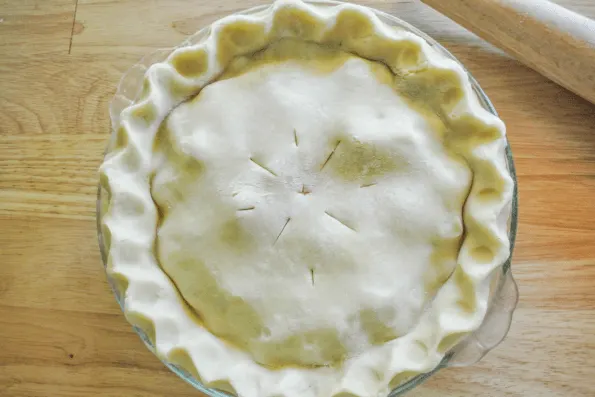
Bake the pie at 375°F in the center of your oven for 15 minutes before turning the temperature down to 350°F and letting the pie bake an additional 45 to 60 minutes.
The crust will be golden brown and the filling will be bubbling when the pie is fully cooked. Remove the pie from the oven and let it cool completely before serving.
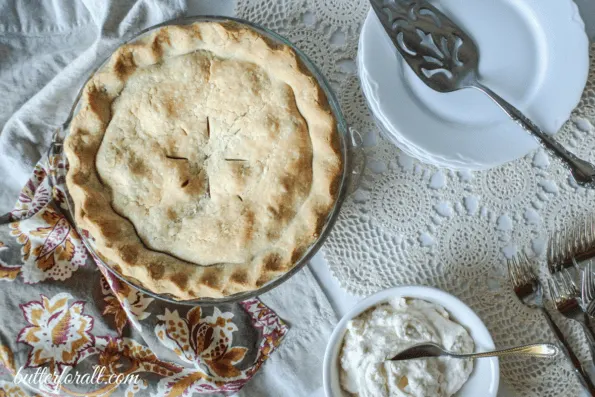
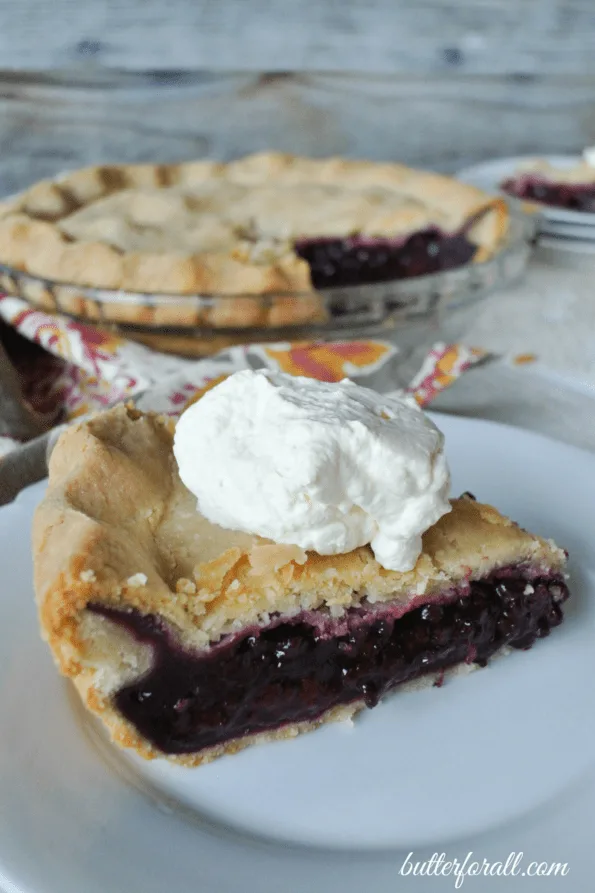
Serve your pie with a dollop of whipped cream!

Or try my Raw Vanilla Bean Ice Cream for the perfect pie à la mode!


My Basic Fruit Pie Recipe
An easily adaptable fruit pie recipe perfect for berries, apples, and stone fruit.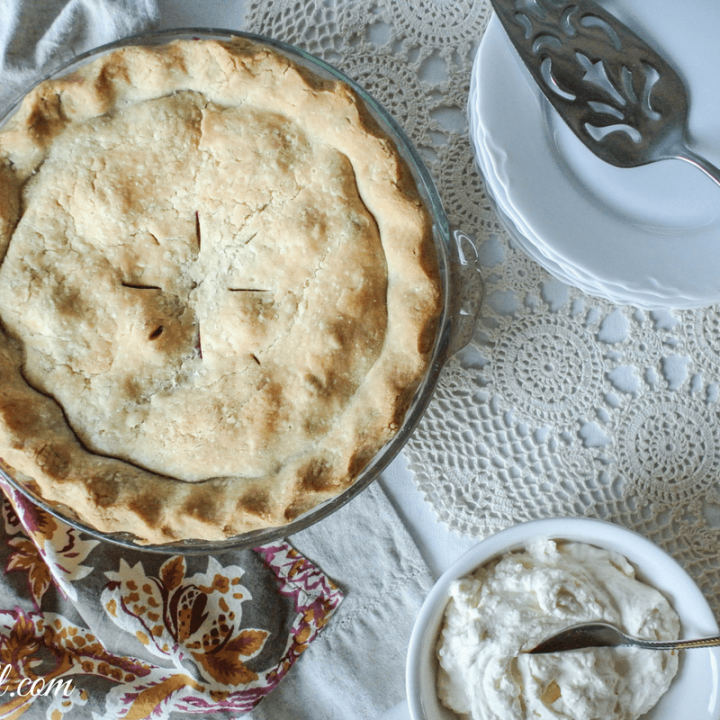

Basic Fruit Pie Recipe
Ingredients
Instructions
Nutrition Information:
Yield: 12
Serving Size: 1 grams
Amount Per Serving:
Unsaturated Fat: 0g

Pocahontas
Tuesday 16th of February 2021
Well described and excellent tips. I'd like to add that over the years I have found that by rolling my dough between the plastic sheets that phyllo dough comes with, I have greater control of the thickness and shape with only a little extra flour on the sheets. I rarely need to trim the edges using this technique. When done, I peel off the top sheet, then lift one edge of the bottom sheet so it is hanging vertically (the dough will stick to it), carefully position it over the pie plate to center the crust. Then peel off the second plastic sheet.
When dividing the dough, I eyeball or weigh out a 60/40 split for the bottom and top - the bottom crust needs to be larger to accommodate the sides.
Because this plastic is a heavier weight than Saran wrap, say, it stands up better to the stresses of rolling and can be washed between uses. Note that it helps to pull off the sheets and reposition them if wrinkles develop or the dough gets off-center from roll out.
Butter For All
Wednesday 17th of February 2021
Hi!
What great tips! Thanks so much for sharing them with us.
Cynthia W.
Sunday 4th of August 2019
I have used this recipe several times now. I've made a strawberry vanilla bean pie, a raspberry pie, and a raspberry & blueberry and they have always turned out delicious. Thank you so much for sharing this recipe. Tonight I'm making another raspberry pie, but will be using some frozen raspberries I picked several weeks ago. I'm hoping the consistency doesn't change too much. Thanks again!!
Butter For All
Tuesday 13th of August 2019
What a nice comment, Cynthia! Thank you for taking the time to let me know the recipe worked well! All your pies sound fabulous, in fact I'm drooling at the thought. It sounds like you are thoroughly enjoying the summer fruit. Please let us know how the frozen berries do.
-Courtney
Mary
Saturday 15th of December 2018
Did I miss link to the recipe for the lard crust?
Butter For All
Saturday 15th of December 2018
Hi Mary!
If you click on the name that is highlighted under the photo of the crust it will take you to the recipe! Or simply type lard in the search field for the whole website and that should pull it up. I apologize that is was hard to see, I’ll make it more clear! And I appreciate your comment.
Have a great day!
Courtney