
Fall is the best time to forage for arts and crafts materials!
This is when you can find a plethora of brightly colored leaves, acorns, dried flowers, mossy twigs, seedpods, feathers, and dry grasses. Collecting them brings you and your children closer to nature and teaches them to look for the subtleties of the natural world. The fun, treasure hunt feeling children get from looking for and collecting natural specimens is contagious and I often find myself also completely enraptured with the hunt.

Where You Should Look For Your Foraged Craft Material.
Finding natural material for craft projects can be as simple as looking in your own backyard, taking a walk around your neighborhood, a walk in the park, or finding a forest, nature park, or other open space. Once you start looking for craft material you will be surprised at how much is just laying on the ground waiting for the right little hand to grab it up and become inspired. When foraging in city limits remember to be respectful of your neighbors and personal property. My own rule with my child is if it is on the street or sidewalk it’s okay to pick it up. We never take even fallen leaves from other’s yards.
If You Can’t Identify It, Don’t Pick It.
It’s important to have some understanding of the flora in your area. You don’t need to memorize all the local plants but being able to identify potentially harmful plants like poison oak and stinging nettles is great knowledge to pass on to your youngsters. Also talking to your children about the process is important, especially with younger tots who may want to put things in their mouths.
Fall Craft #1: Fall Leaf Rubbing
This is one of the easiest fall crafts to collect for and execute. The only foraged natural materials needed are leaves in different shapes and sizes.

Supplies:
- Fall leaves.
- Double-sided tape.
- Medium-weight paper.
- Beeswax crayons.
Instructions:
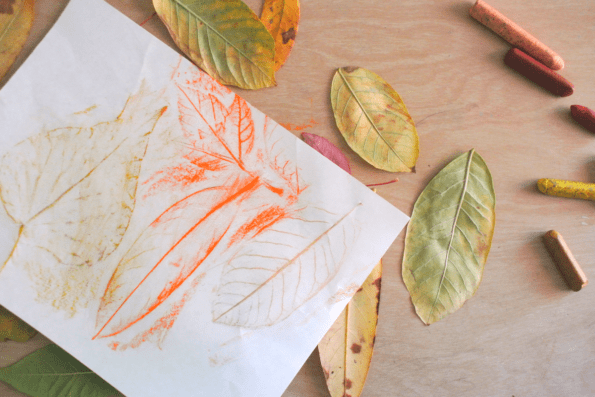
Collect a variety of leaves in different shapes and sizes. Dry and brittle leaves do not work well so make sure you get younger leaves that have just fallen. Leaves with pronounced veins work best!
Using the double-sided tape, tape each leaf to a work surface vein side up.
Cover the leaves with medium-weight paper. You can tape down the corners of the paper if you are working with youngsters who have trouble keeping the paper in place.
Using a wide beeswax crayon held on its side, gently rub over the paper revealing the leaf shape below.
Talking points for this project:
- Colors.
- Shapes.
- The purpose of leaves, how they feed the tree and help us breathe through photosynthesis, converting energy from the sun, water, and carbon dioxide into sugars, starches, and oxygen.
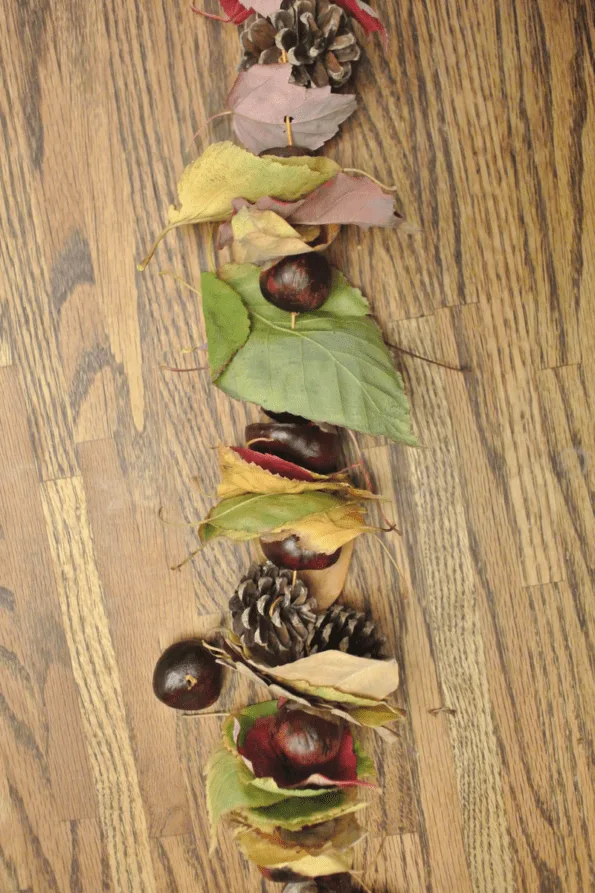
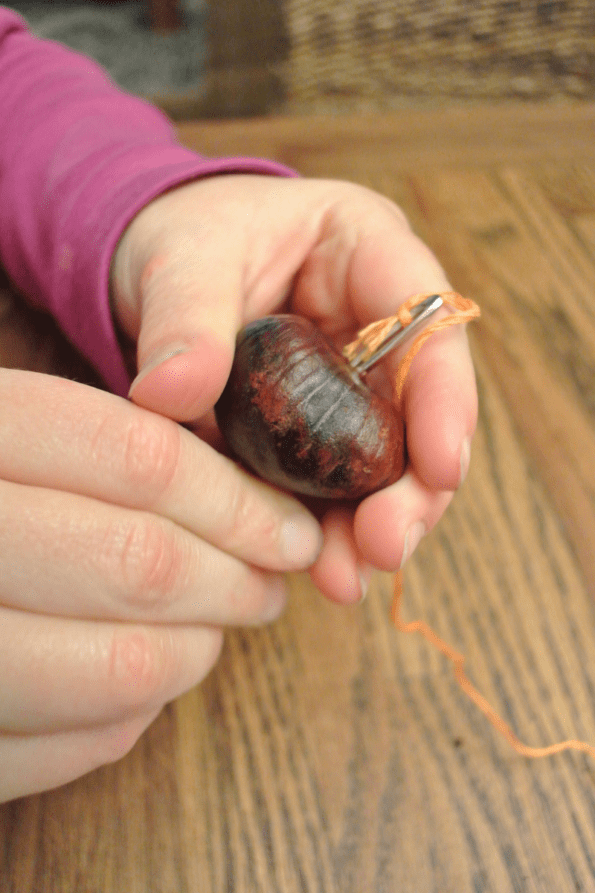
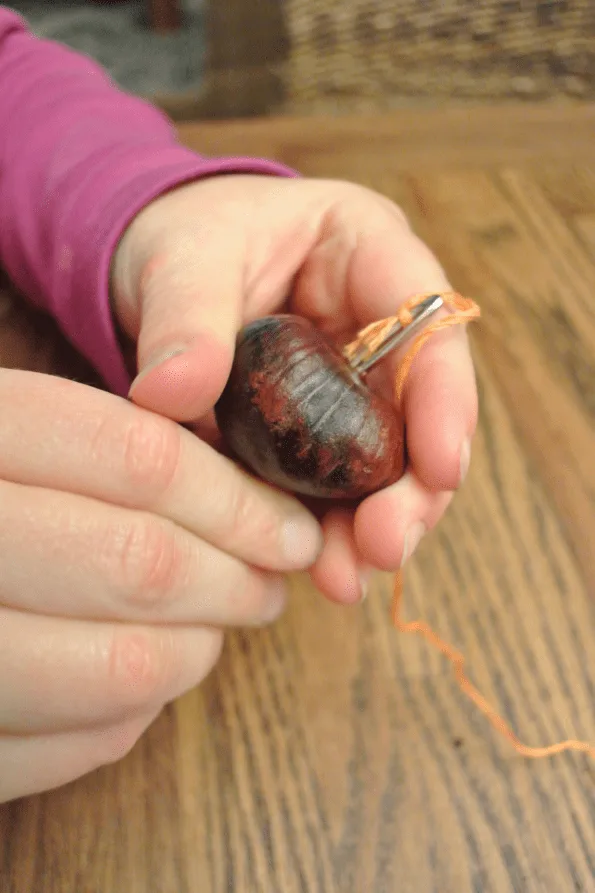
Fall Craft #2: Fall Needle Stringing
This is such a fun craft for little hands. Learning to safely use a needle is empowering and gives children a chance to learn the basics of sewing.

Supplies:
- Foraged leaves, pinecones, and soft seedpods.
- Awl.
- Yarn needle or plastic needle (please only use blunt needles and supervise the use).
- Embroidery floss or yarn.
Instructions:
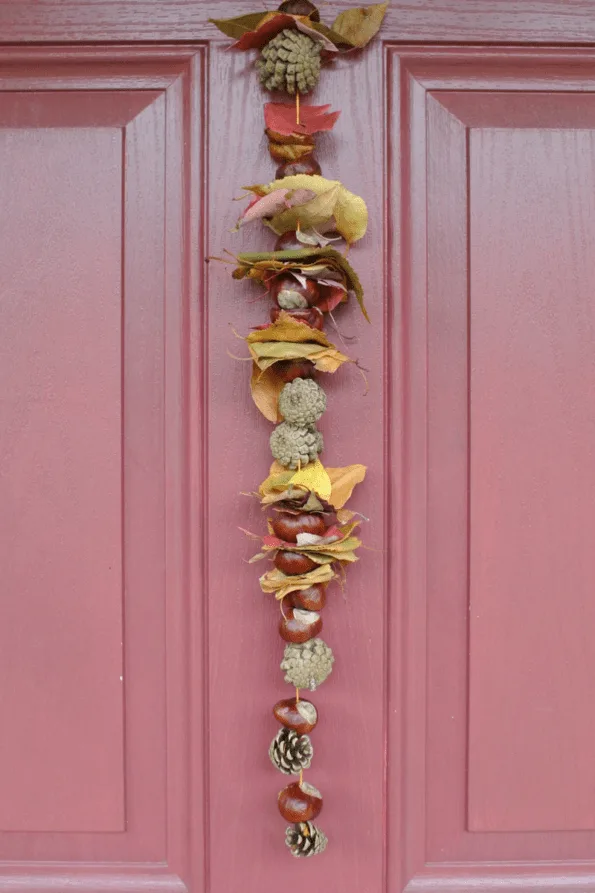
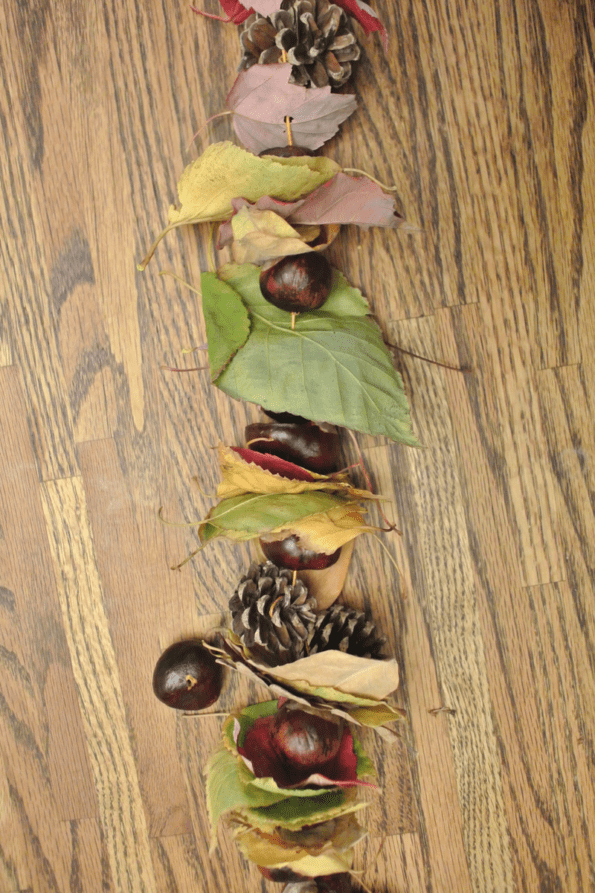
Collect a variety of colored leaves, pinecones, and seedpods (like the inedible horse chestnut or Japanese lantern pictured here).
The adult can use the awl to create holes in tougher pods.
String the needle with about 24 inches of embroidery floss. Tie a small knot at the needle end to keep the floss from slipping through. This may not be needed with heavier yarn. Tie a double or triple knot in the end. Let the child string leaves and seedpods onto the floss. Pinecones can be tied onto the floss by wrapping around the center of the cone one time and using the needle to slip around and under the base thread before continuing with more leaves and seeds. When the floss is full, remove the needle and tie a knot with a loop for hanging.
Talking points for this project:
- Size and shape of different seedpods and pinecones.
- Textures.
- Colors.
- How needles are used for making clothes, blankets, and jewelry.
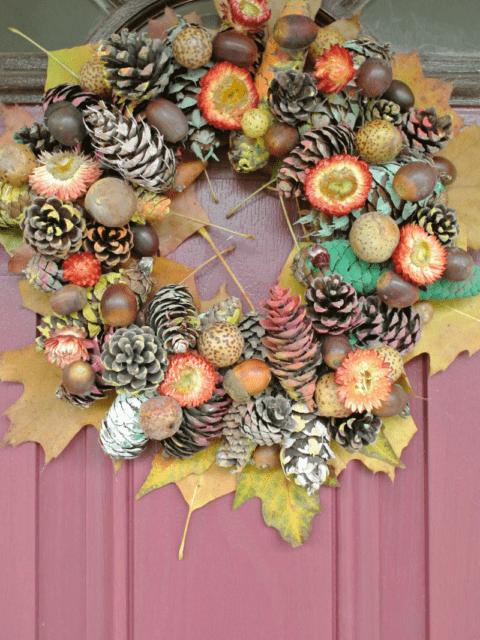
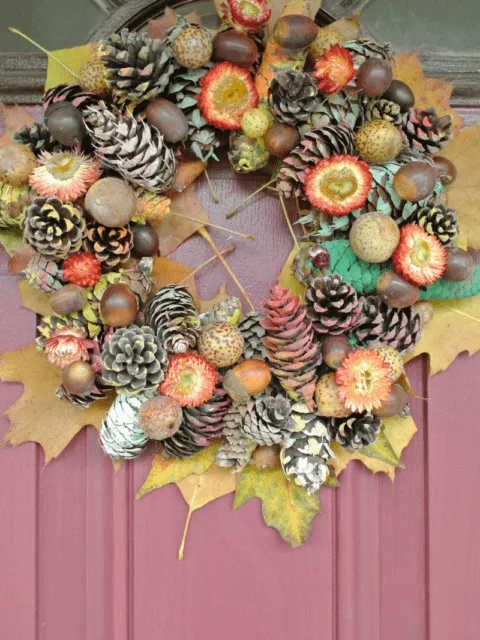
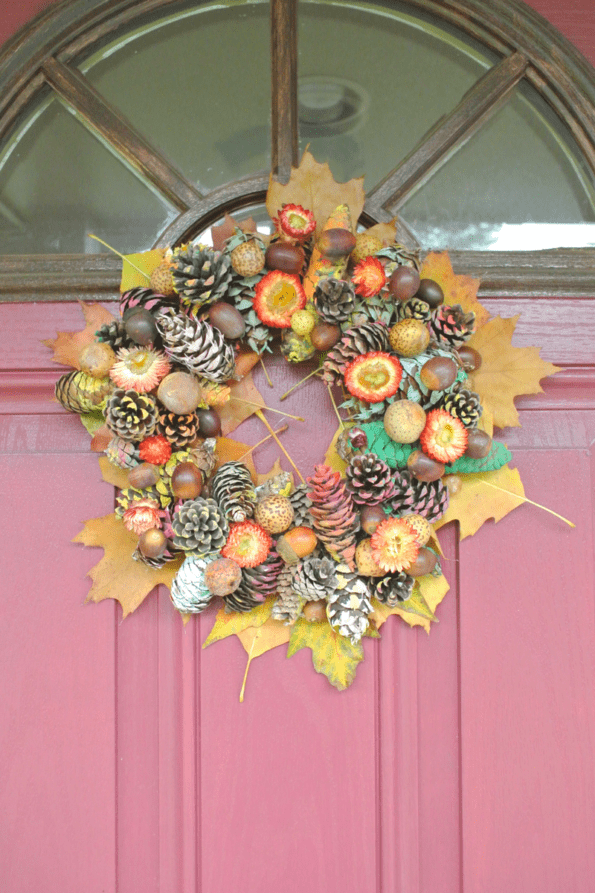
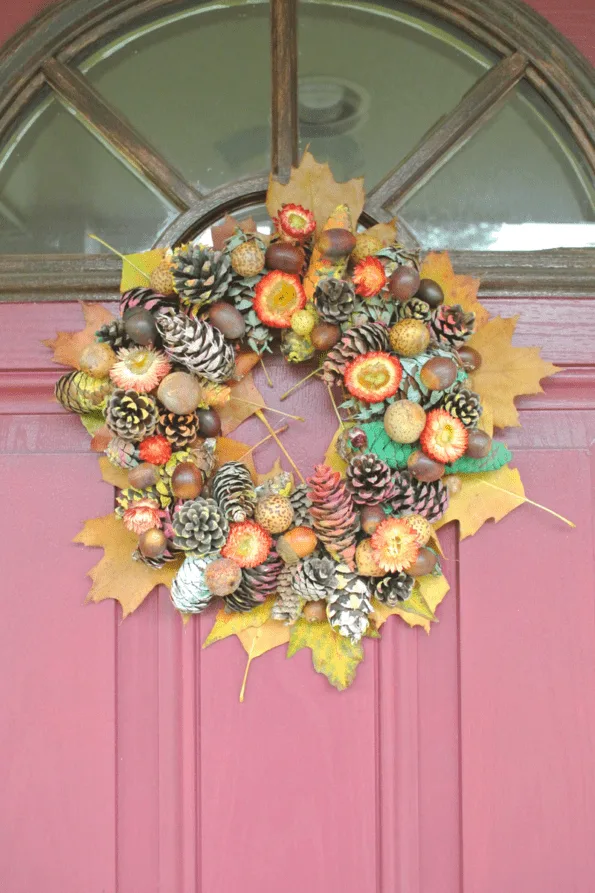
Fall Craft #3: Painted Pinecone Wreath
This foraged fall wreath is the most involved of the four crafts. Follow along with the steps and you will end up with a lovely, festive wreath to hang on your front door.
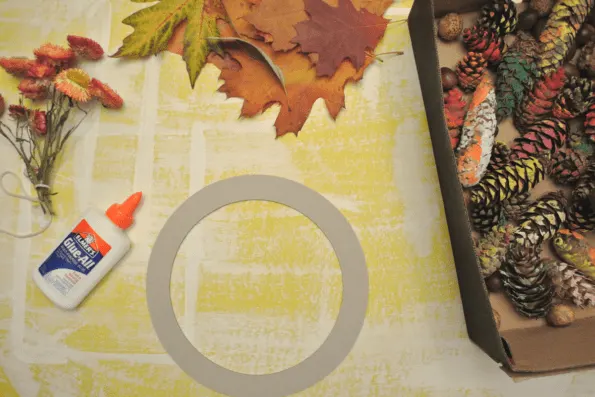
Supplies:
- Wreath frame.
- Tempera paints, paint brush, paint palette.
- Craft glue.
- Hot glue gun and glue sticks.
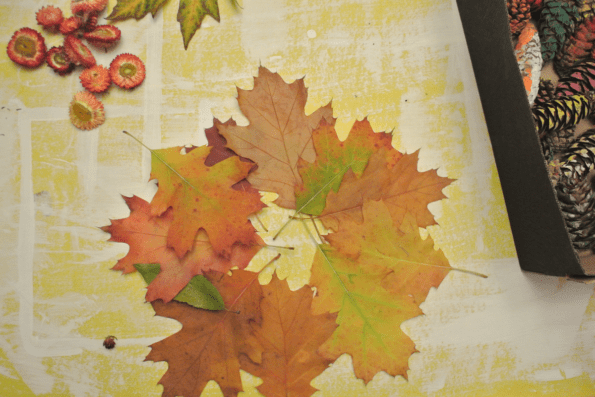
- Foraged leaves, pinecones, dried flowers, acorns, grasses, oak galls, and seedpods.
Instructions:
Collect around 30 to 40 pinecones of different shapes and sizes. Medium and small sizes work best.
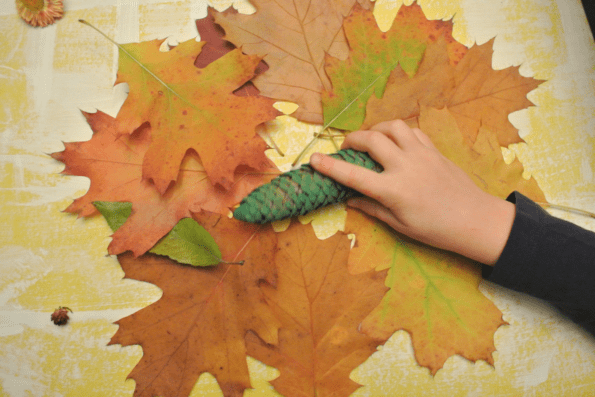
Pick out some seasonal colors of paint to use; we used red, orange, yellow, white, green, and brown. Put the paint in the palette and let your child paint each pinecone with one or more colors.

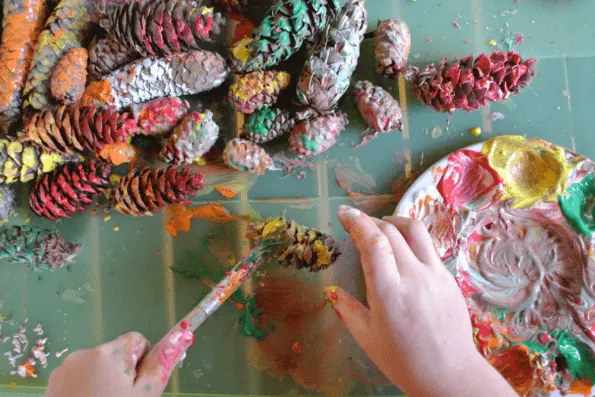
Let the pinecones dry completely.
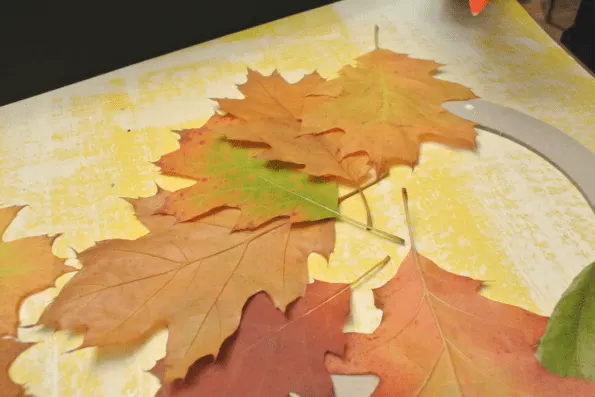
Collect lots of colorful leaves, acorns, seedpods, and dried flowers or grasses.
Bring all your supplies to a work surface where you can use a hot glue gun. Start by using hot glue or craft glue to attach the leaves to the wreath frame.


Next use a hot glue gun to attach the painted pinecones. I helped my daughter with this step by asking her where I could put the hot glue and letting her attach the pinecones. If the child is old enough they can use the glue gun themselves.

Create a single layer of pinecones directly on the wreath frame. Try to balance the weight evenly. You can see we used four large pinecones at 12, 3, 6, and 9 o’clock on the wreath frame.
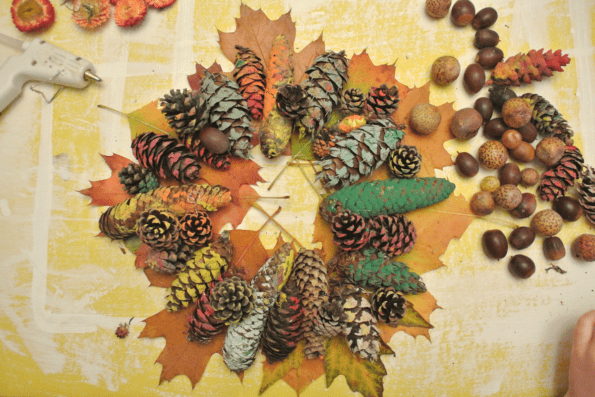
Next start attaching the acorns and or oak galls and seedpods with the hot glue. Work with your child and let them lead this step. Talk about where to put the next element and how it will balance the composition.
Finally attach the flowers or grasses to fill in the empty spaces and complete the wreath.
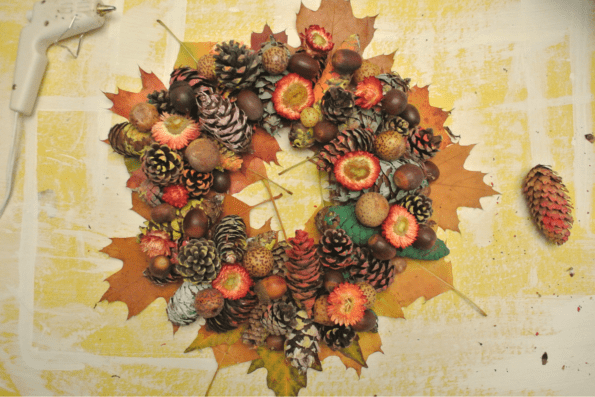

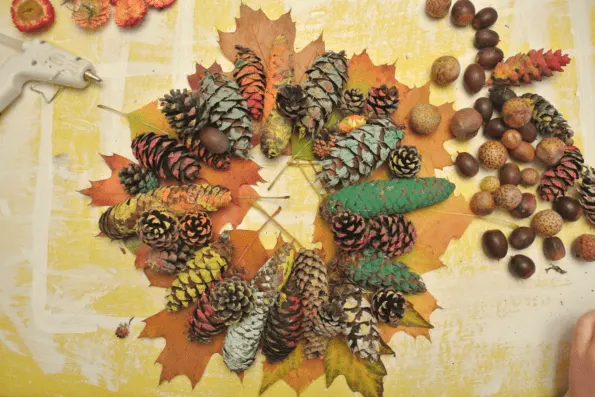
Let the wreath dry before hanging.
Talking points for this project:
- Color.
- Texture.
- Balance.
- Variety.
- Seed kinds and the factors of seed propagation, healthy soil, water, and sunshine.
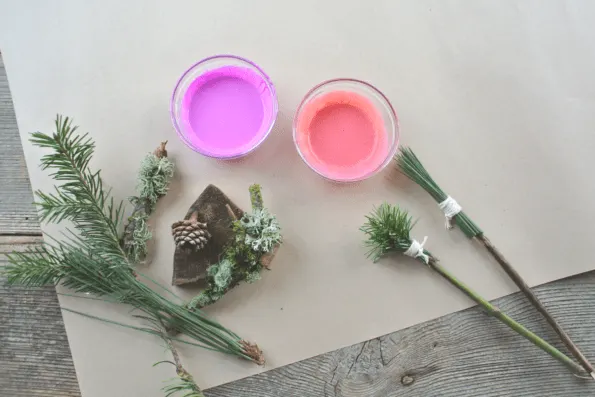
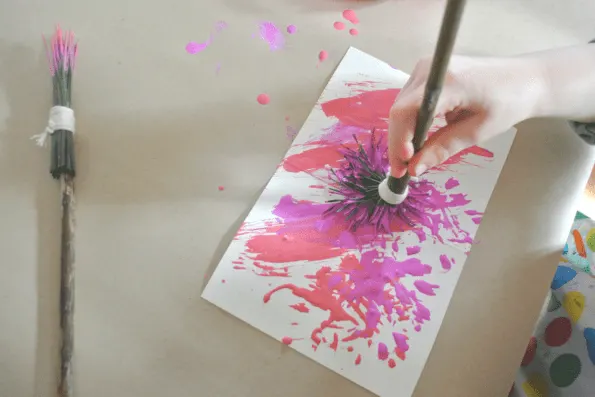
Fall/Winter Craft #4: Evergreen Twig Paintbrushes
This foraged fall and winter craft is so pretty and simple. It is a great way to let your child experiment with different textures. Not only can you make paintbrushes, but you can also use things like rocks, moss, and lichen to stamp out patterns. This project makes lovely greeting cards that your child can send to loved ones.

Supplies:
- Butcher paper.
- Cotton twine.
- Blank notecards.
- Tempera paints.
- Foraged pine needles, twigs, rocks, moss, and lichen.
Instructions:
Collect several varieties of evergreen pine needles and leaves. Collect several straight thin branches to act as your paintbrush handles. Collect other items such as rocks, moss, and lichen that will make interesting patterns when stamped with paint.
Cover your work surface with butcher paper.
Create little bundles of pine needles and secure them to the twigs by wrapping them with cotton twine and tying them tightly. These will be the paintbrushes.
Add paint to a palette or bowls and let your child experiment with the different brushes and stamps. Paint directly on blank notecards if desired.

Talking points for this project:
- The difference between an evergreen tree that keeps its needles and a deciduous tree that sheds its leaves in autumn.
- Textures.
- Smells — see if your child can smell the difference between different varieties of pine needles or between pine needles and fallen leaves from deciduous trees.