
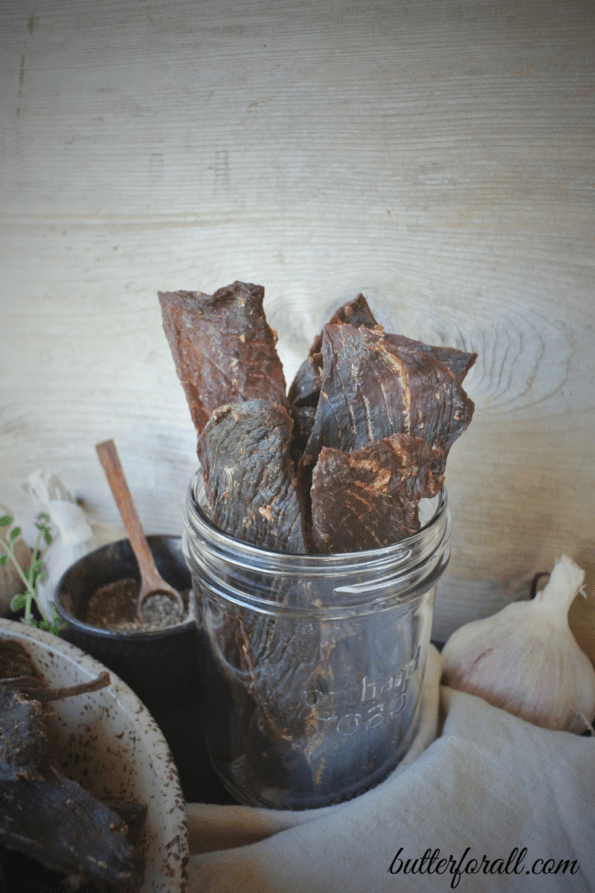
Homemade beef jerky is a perfectly portable, protein-packed snack perfect for fueling your next adventure.
I’m gonna admit it. I love snacking. But even healthy trail mixes and nuts are full of extra carbs that I really don’t need!
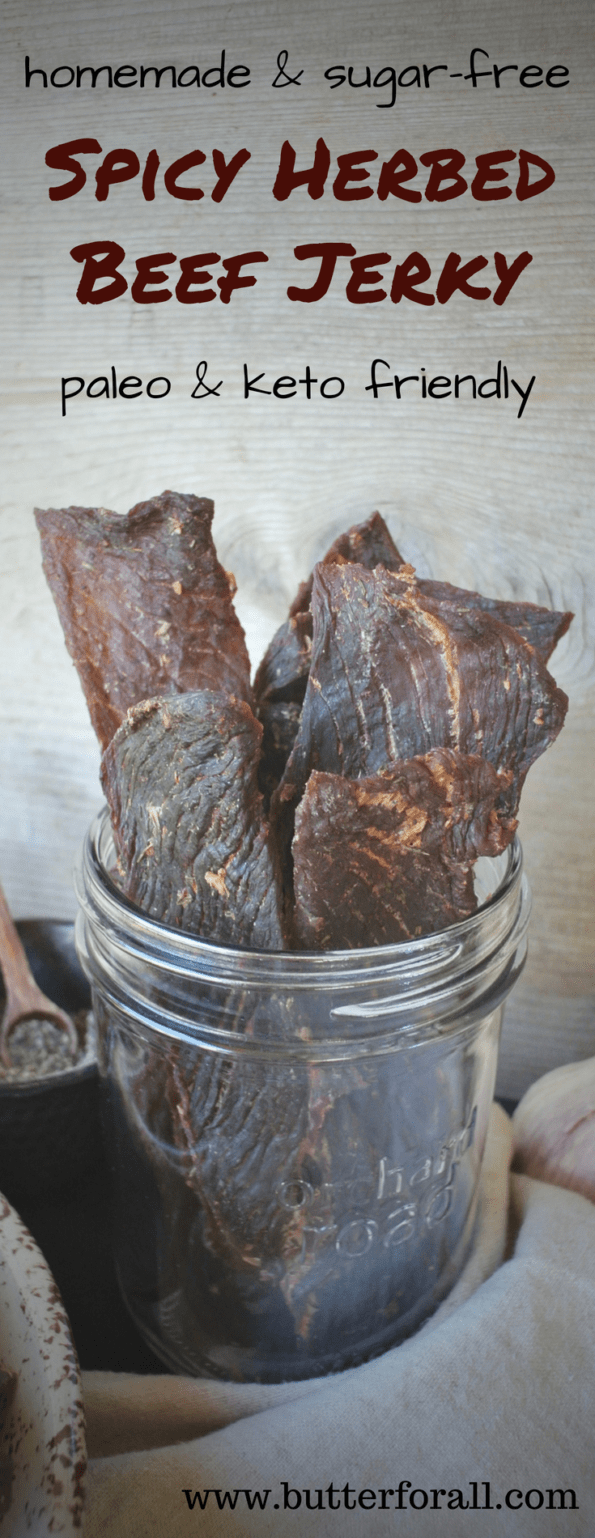

There are a lot of great meat snacks available to purchase pre-made these days, but some of them are full of carbs and sugars too. Problem #2 with pre-made meat snacks is that they are typically not made with 100% organic ingredients, and that is my highest priority. And problem #3, if they are organic they cost an arm and a leg! So, I went ahead a developed a really wonderful, savory, organic, grass-fed jerky recipe that would satisfy all my needs. Make sure to use high-quality grass-fed beef to get the most nutritional benefit for this protein powerhouse.

So How Much Did It Cost To Make One and a Half Pounds of Beef Jerky?
For me it was just the cost associated with the beef. The rest of the ingredients I had on hand! Four pounds of grass-fed beef at $6 per pound. $24! That’s about $1 an ounce!
Not All Dehydrators Are Created Equal!
Let’s talk food dehydrators for a quick sec. There are some great dehydrators out there, but which one do you choose to preserve your hard-earned bounty?
I’m not going to lie. I’ve only ever used two dehydrators. The first was when I was young and it was the tall, round stacking kind. It worked but it wasn’t very revolutionary. Now I use the crème de la crème of dehydrator, the Excalibur! It’s a beast of a dehydrator. Forget doing multiple batches. This thing holds it all. For the 4 pounds of beef jerky I made I only used six of the nine trays! I’ve used it for tomatoes, fruit leather, and so much more. I have one of the basic models now but someday I will invest in the stainless steel model *swoon!*

Here are some of the specs copied from Amazon for the dehydrator I use, the 3926TB model.
“The 3926TB by Excalibur comes with 9 trays, a total of 15 square feet of drying space, 26-hour timer and an adjustable thermostat temperature control that ranges from 105°F to 165°F preserving the nutrients in herbs and produce and making it safe to dehydrate meat for jerky. The fan, heating element and thermostat are in the back of the unit, so cool air is drawn in, heated and then distributed evenly over each tray. The patented Parallex Horizontal Airflow is exclusive to Excalibur and helps the food dehydrate faster, retain more nutrients and look and taste better, without tray rotation. Trays can be removed to raise bread, make yogurts, and use with arts & crafts. Made in USA, Sacramento, California.”
Is a dehydrator necessary for this recipe? No, but it is certainly a lot easier and less messy than using the oven. Not to mention more fun!
Preparing the Jerky
This recipe yields 1 1/2 pounds of fully dried, flavorful beef jerky
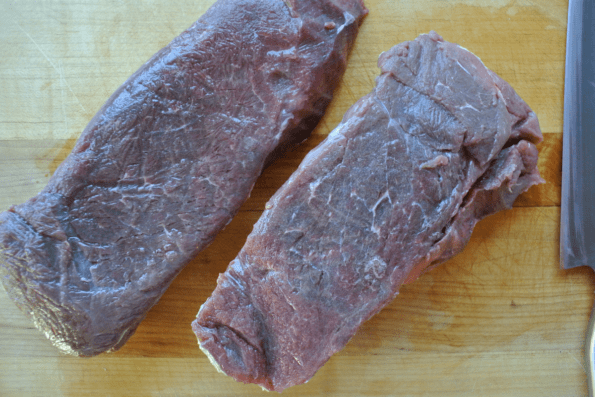
Start with partially frozen beef. You can either partially freeze fresh meat or partially defrost frozen meat. The meat should be firm enough to slice easily.
Trim any excess fat from the meat. Fat (although it tastes great) can spoil faster if left on the jerky. Trim any tough connective tissue away as well.

Cut each broil in half and begin slicing with the grain. For a more tender jerky you can cut the meat against the grain but it may not hold up as well in the marinade, resulting in smaller pieces.

When all the meat is sliced place it in a large bowl in the refrigerator.
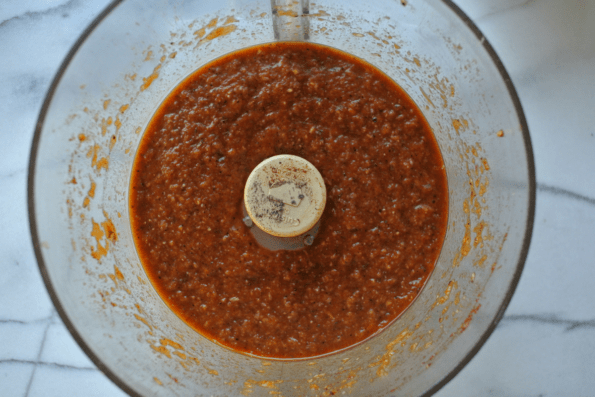
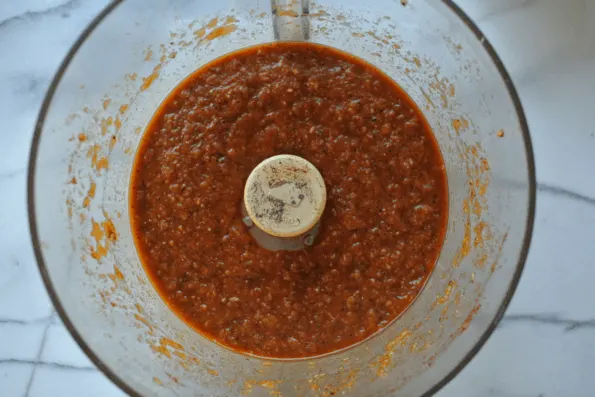
Gather all the other herb and spice ingredients and add them to your food processor or blender. Pulse them several times to start breaking down large chunks. Blend on medium speed until the ingredients form a thick sauce.
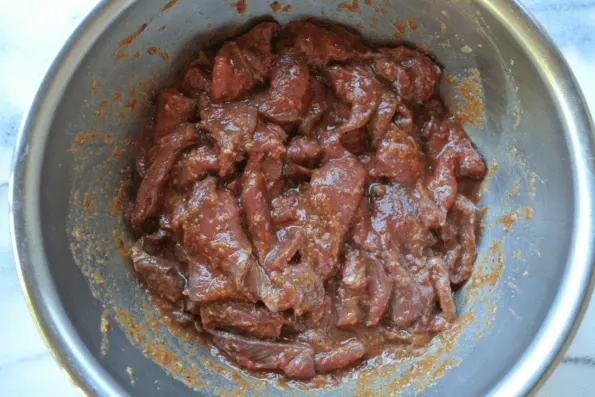
Pour this marinade over the sliced beef and gently stir to distribute it evenly. Make sure all the beef is coated by separating any pieces that are sticking together.

Cover the bowl and refrigerate for 12 to 18 hours, preferably overnight. In the meantime, check out your dehydrator to make sure it is clean and in working order.
After your meat has marinated, place it in a colander and rinse it gently with cold water. You want to remove about half of the excess marinade. I know this seems strange, like you are rinsing the flavor away, but trust me, the wonderful flavors have already penetrated the meat and the jerky would be too salty and sticky without a rinse. Let the meat drain for several minutes.
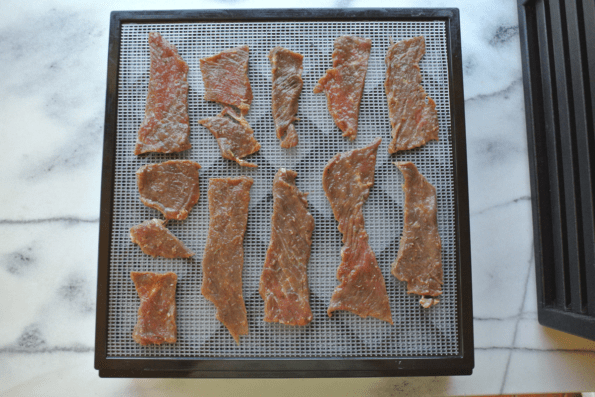
Working one tray at a time lay the jerky meat as flat as possible on the drying racks. Make sure to unfold any pieces that may have doubled over. Leave at least 1/2 inch of space between each piece of meat.
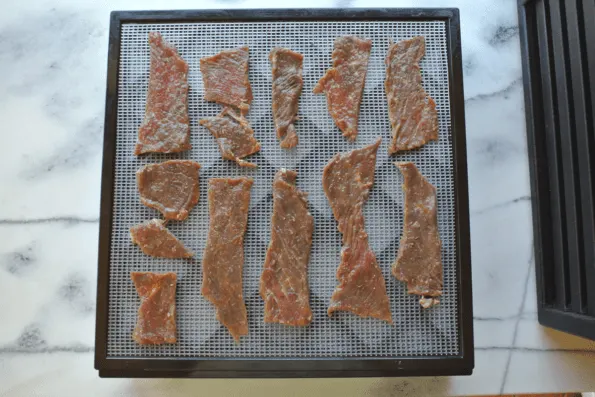
Load the dehydrator and turn it on to 160°F. Let the jerky dry for 3 to 6 hours. When it is thoroughly dry it will have darkened in color and it will snap slightly when it’s bent.


Pro Tip:
As you are loading the trays, reserve all of the slightly thicker meat slices that will dry slower. Make one tray with these pieces at the end and place it at the very top of the dehydrator. When the majority of the jerky is done you can leave this one tray in to dry a little longer. That way you won’t have to go through all the trays picking out the pieces that are thicker.

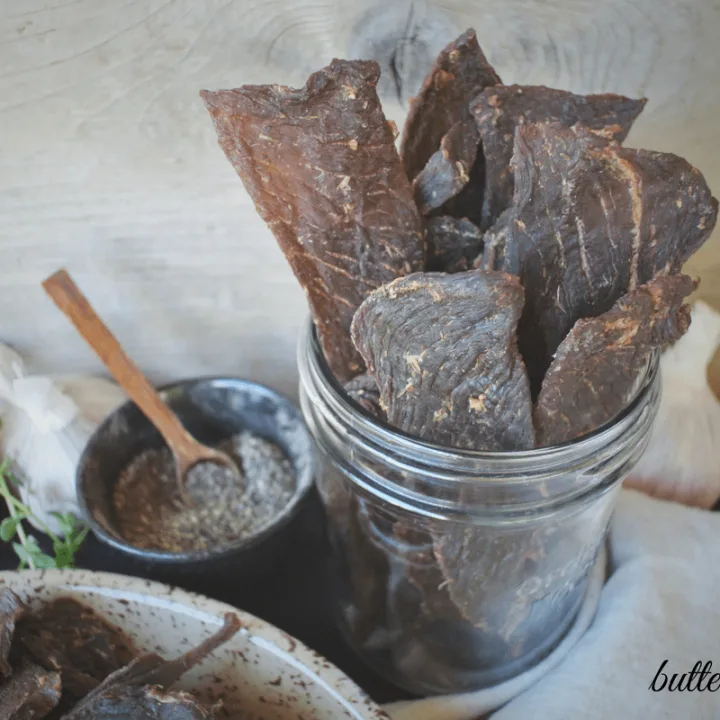
Homemade Spicy Herbed Beef Jerky – Paleo and Keto Friendly
The most flavorful and economical homemade beef jerky.
Ingredients
- 4 pounds grass-fed London broil
- 1 small onion, quartered
- 2 bulbs garlic (about 15 to 20 cloves)
- 1/4 cup lemon juice
- 1/4 cup salt (kosher or Real Salt brand)
- 1 tablespoon ground black pepper
- 1 tablespoon hot sauce, your favorite
- 1 tablespoon horseradish
- 3 tablespoons coconut aminos, optional
- 1 tablespoon paprika
- 1 tablespoon dried thyme, or two tablespoons fresh chopped
Instructions
- Start with partially frozen beef. You can either partially freeze fresh meat or partially defrost frozen meat. The meat should be firm enough to slice easily.
- Trim any excess fat from the meat. Fat (although it tastes great) can spoil faster if left on the jerky. Trim any tough connective tissue away as well.
- Cut each broil in half and begin slicing with the grain. For a more tender jerky you can cut the meat against the grain but it may not hold up as well in the marinade, resulting in smaller pieces.
- When all the meat is sliced place it in a large bowl in the refrigerator.
- Gather all the other herb and spice ingredients and add them to your food processor or blender. Pulse them several times to start breaking down large chunks. Blend on medium speed until the ingredients form a thick sauce.
- Pour this marinade over the sliced beef and gently stir to distribute it evenly. Make sure all the beef is coated by separating any pieces that are sticking together.
- Cover the bowl and refrigerate for 12 to 18 hours, preferably overnight.
- In the meantime check out your dehydrator to make sure it is clean and in working order.
- After your meat has marinated, place it in a colander and rinse it gently with cold water. You want to remove about half of the excess marinade. I know this seems strange, like you are rinsing the flavor away, but trust me, the wonderful flavors have already penetrated the meat and the jerky would be too salty and sticky without a rinse. Let the meat drain for several minutes.
- Working one tray at a time lay the jerky meat as flat as possible on the drying racks. Make sure to unfold any pieces that may have doubled over. Leave at least 1/2 inch of space between each piece of meat.
- Load the dehydrator and turn it on to 160°F. Let the jerky dry for 3 to 6 hours. When it is thoroughly dry it will have darkened in color and it will snap slightly when it’s bent.
Notes
Pro Tip: As you are loading the trays, reserve all of the slightly thicker meat slices that will dry slower. Make one tray with these pieces at the end and place it at the very top of the dehydrator. When the majority of the jerky is done you can leave this one tray in to dry a little longer. That way you won't have to go through all the trays picking out the pieces that are thicker.
Donna Utsch
Wednesday 16th of January 2019
Can this jerky recipe be used for Turkey too?
Butter For All
Thursday 17th of January 2019
Hi Donna!
I think it would be great on Turkey Jerky! Just make sue to follow your dehydrator's instructions for drying turkey!
Let me know how it goes!
Courtney
Felicia
Thursday 26th of April 2018
How long would you cook it if you like more tender, soft jerky?
Butter For All
Sunday 29th of April 2018
Hi Felicia, This style of dehydrated jersey needs to be almost completely dry to prevent spoilage. You can look for a recipe that uses ground beef and a baked method to make a soft jerky (meat bar) that way or talk to your butcher about the different cuts of meat you could use. I'm sure there are cuts that would produce a more tender finished product. Hope this helps a bit, Courtney
Shannon
Wednesday 13th of December 2017
Hi, same temp and time in oven? Thx!
Butter For All
Thursday 14th of December 2017
Hi Shannon! Typically the oven only goes down to 175°. Just watch it closely after 3 or so hours and you should be fine!